Masking Video: How to Mask
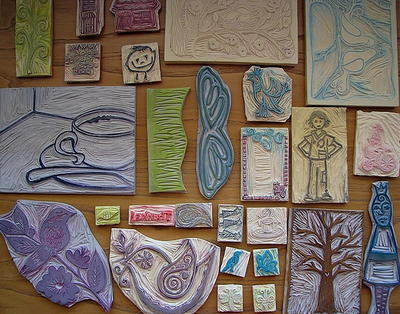
Are you guys into card making or scrapbooking? My hunch is no--we seem to be more of a crochet and knitting group. Paper crafters, feel free to say hi in the comments, though! I wasn't much of a card maker either until I started looking at some of the project ideas on FaveCrafts and seeing how easy they might be to replicate. I mean, anyone can cut out shapes (either with scissors, a paper punch, or a Cricut), and anyone can adhere embellishments to a piece of cardstock, especially with the help of glue dots. I soon learned that you can even make your own embellishments if you want to save money in the scrapbooking aisle at the craft store.

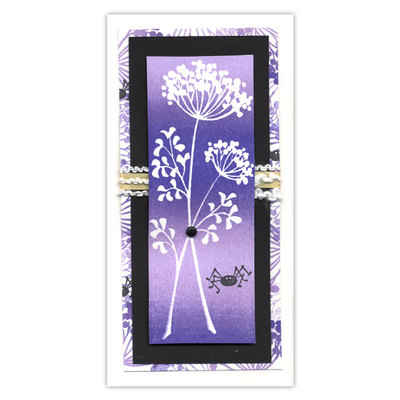
Card making is one of those crafts that everyone has dabbled in at some point--we've all got to give cards to friends and family on their birthday, and a good number of us give cards on Christmas, Halloween, Easter, Mother's Day, and other special occasions. We've got lots of cardmaking technique videos on our YouTube channel that could turn even the most novice paper crafter (i.e. me) into a real card making maven. One of the techniques I learned from our very own YouTube channel is masking. Ever heard of it? Me neither! Masking means blocking off part of an image when using rubber stamps so that the blocked-off (or "masked") portion does not get stamped. Clear as mud, right? This video by Latrice Murphy explains it a lot better! You can watch the whole thing to see how she makes that adorable bunting and cupcake card, or just watch through the first 3 minutes to learn the technique.
And if you don't feel like watching a video, don't have the capabilities of viewing one on your computer, or you're reading FaveCrafts at work and don't want the boss to find out (shhh, I won't tell!), I'll break it down for you: How to Mask
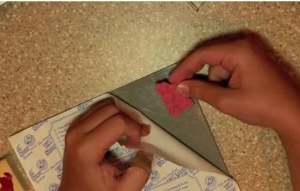
- First stamp the image you want to mask onto a piece of scratch paper and cut it out. In the video, Latrice stamps a bunting stamp and cuts out each individual triangle.
- Then stamp the same image onto your card or scrapbook page. Latrice stamped the same image in the corner of her card using the bunting stamp.

- Take the cut out shapes (the "masks") and adhere them to your card or scrapbook page, right on top of the stamped area. Removable or re-positionable adhesive works best for this step.

- Now that your image is masked, you can feel free to stamp over it. In the video, Latrice stamps her card with a cloud background so that the bunting looks like it's in front of the clouds, like real bunting billowing in the breeze.
- When you're done stamping, remove the masks and you'll see the unstamped section beneath (in this case, the cloudless bunting shapes).

Doesn't that sound easy? For all of you non-paper crafters--doesn't this video make you want to give it a try? What's the most involved card making technique you've ever used?
Read NextWish and Dream Stamped Cards
Your Recently Viewed Projects

Thanks for your comment. Don't forget to share!
Weberme
Aug 01, 2016
There is no need to buy cards anymore when you can make your own with this masking video. What a great idea and you can add anything you want and make it your own. Love the idea you can make a card for Halloween, Birthday, Showers,Secratary Day or even make up a day. No need to try and find a card when you can make up whatever theme you want. Did your child have a bad day at his football game and he is feeling down. Make a card to cheer him up.
roffdgav 7475704
Jul 31, 2012
I make cards for my son & his crew while they are deployed overseas. Thank you for more great ideas!
Report Inappropriate Comment
Are you sure you would like to report this comment? It will be flagged for our moderators to take action.
Thank you for taking the time to improve the content on our site.