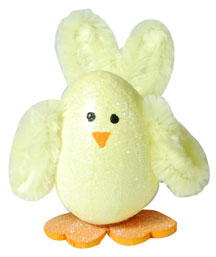
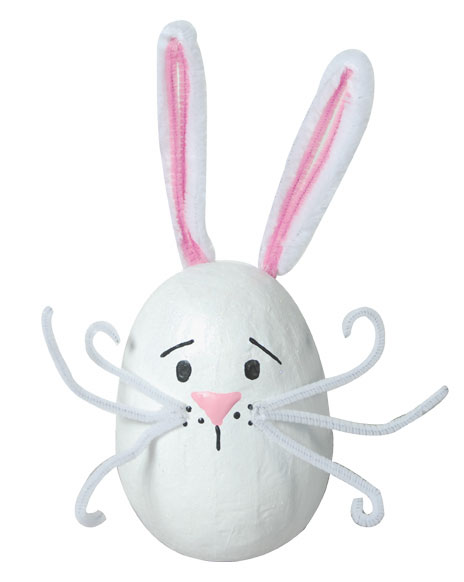
Funny Bunny Painted Egg
This bunny, easily painted with paint writers and shimmering with glamour dust, is egg-actly what your Easter decorating needs.
Materials:
DecoArt Products Required
Americana Acrylics
- DAO1 - Snow (Titanium) White
Americana Writers
- DAW67 - Black
- DAW250 - Bubblegum Pink
Glamour Dust
- DAS37 - Glamour Dust Crystal
Multi-Purpose Sealer
- DS17 - Multi-Purpose Sealer
Supplies
- Two 12" 15-mm white chenille stems
- Two 12" 6-mm pink chenille stems
- Two 12" 6-mm white chenille stems
- 1 1/2" white pompon
- Lo-temp glue gun
- Foam plate
- 1/2" flat brush
- 6" papier mache egg
Instructions:
1. Basecoat egg Snow White, allowing to dry after each coat.
2. Apply coat of Multi-Purpose Sealer over Snow White. While wet, sprinkle egg with Glamour Dust; let dry.
3. Refer to photo for placement and use Bubblegum Pink Americana Writer to paint inverted triangle for nose shape.
4. Use Black Writer to paint mouth, eyes, brows, and dots by whiskers; let dry.
5. Glue pompon to back of egg for tail.
6. Fold each pink chenille stem in half. Bend each 15-mm white chenille stem in half, leaving curve at bend. For each ear, glue fold of pink inside center to curve of white chenille stem. Twist loose ends together and referring to photo for placement, glue ends to back of egg near top.
7. Cut remaining white chenille stems into thirds for six 4" lengths. Refer to photo for placement, and glue ends of three stems at each side of nose for whiskers. Curve ends of whiskers as desired.
Read NextThanksgiving Turkey Pinata
Your Recently Viewed Projects
Thanks for your comment. Don't forget to share!
Report Inappropriate Comment
Are you sure you would like to report this comment? It will be flagged for our moderators to take action.
Thank you for taking the time to improve the content on our site.