This project was submitted by one of our readers, just like you.
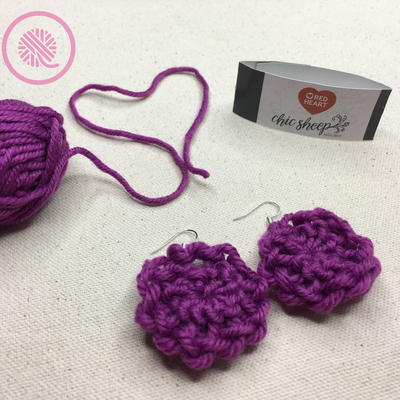
Easy Loom Knit Flower Earrings

Easy Loom Knit Flower Earrings
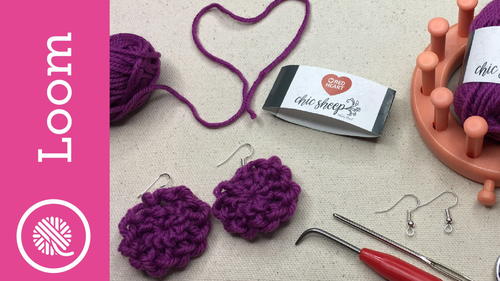
From the Designer: "Cute and easy loom knit earrings made with Marly Bird's new Red Heart Yarn Chic Sheep! They are really easy and don't need many tools. Even if you haven't loom knit before I take you through all the steps. You don't need a bunch of jewelry tools either. This project takes about 20-30 minutes. It uses about 5 yards of yarn, earring blanks, a 12 peg flower loom, loom hook, a yarn/tapestry needle and scissors. These lightweight and fresh earrings will have you ready for Spring in no time! Check out my step-by-step video made for you."
Time to CompleteUnder an hour
MaterialsYarn
Primary TechniqueKnitting

Project TypeMake a Project
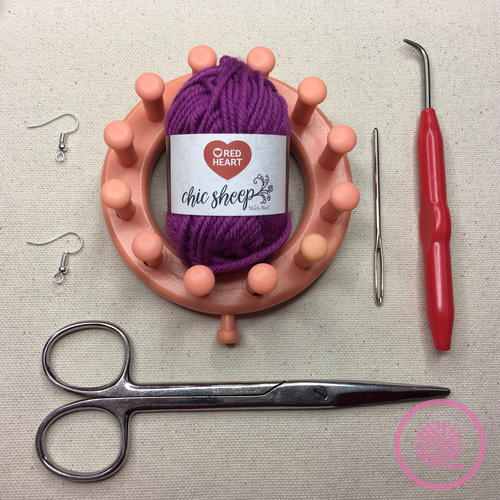
Materials List
- 12 peg flower or bloom loom with loom hook
- Yarn/Tapestry needle
- 5 yards yarn - Used Red Heart Chic Sheep color Vineyard
- 2 earring blanks
- Scissors
This pattern is not written in shorthand as it is made for someone who is new and just learning terms. Be sure to watch the video below if you prefer.
Instructions
Notes:
*Flowers are made in the round.
*Flowers are made separately and attached to earrings
*Working Yarn means the yarn coming from the small ball of yarn in your supplies.
*Work the stitch or “knit over” simply means to lift the bottom loop over the top loop and peg to make the stitch.
-
Gather materials.
-
To begin you need to put yarn loops onto the loom. This is called casting on. The abbreviation is CO. To start, secure the yarn to the anchor peg with a Slipknot. Place the slipknot on the anchor peg and tighten gently. Do not make it too tight because later you will release the slipknot after you have knitted a few rounds.
-
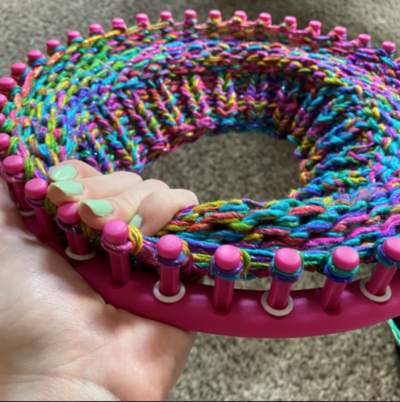
Next you will put a series of loops on the loom to begin knitting. The basic cast on method for loom knitting is called the E-wrap Cast On. Move the working yarn to the inside of the loom between the first and last pegs. Wrap the yarn around the first peg in a clockwise direction. Repeat for the second peg and all the way around the loom. Make sure you don’t wrap the yarn too tight because if you do, it will make it difficult to remove the loops as you work. This technique is called E-wrap cast on because the wrapped pegs resemble a series of cursive lower case “e’s”. NOTE: The pegs being wrapped in a clockwise motion with the loom being worked in a counter-clockwise direction. In most cases it doesn’t matter which direction you work or how you hold the loom. Work however it is most comfortable for you unless a pattern calls for a specific technique.
-
Push the loops near bottom of the pegs. Wrap all pegs a second time starting with the first peg and ending with the last peg. Make sure you wrap in the same direction as you did the first time. You are now ready to begin knitting.
-
Beginning with the last peg wrapped, use your loom tool to lift the bottom loop over the top loop and knit off the loop. (There is a groove in each peg that helps to guide the hook.) Continue around the loom by working peg 1, peg 2, etc. When all the pegs are worked you will again have only one loop on each peg. Each stitch is now "knit over".
-
Row 1: Wrap the working yarn around the loom above the pegs and hold the working yarn with the same hand that is holding the loom (or you can temporarily secure it to the anchor peg); this keeps the yarn in place as you make a tighter knit. This stitch is called a "flat knit"; It is tighter and less stretchy then the e-wrap. For this flower pattern wrap only 1 row and knit over, release the beginning slipknot from the anchor peg.
-
Flat knit only peg 1 once more.
-
Gathered Bind Off: Wrap your working yarn around the loom 1 1/2 times and cut the working yarn. Using your loom hook to guide the yarn through the loops as below. Starting with peg 2, insert the hook below the loop and pull the yarn through; grabbing the working yarn from above the loop. Repeat on the next peg. Repeat and work yarn through the loops on all pegs until all have yarn through them. Insert the hook into the loop on peg 2 again to make sure there is no gap.
-
Remove the loops from the pegs. Being careful not to twist the knitting into the circle, pull the yarn tail until the opening is completely closed. Using a yarn needle tie a knot near the center to keep it closed. Weave the tail to the edge of the flower to the beginning tail. Tie tails in a knot.
-
Earrings: Add 1 earring blank through one tail and tie tails in a secure knot. Weave tails back into flower center and tie in knot. Trim yarn tails, but not too short.
-
Make 2nd earring.
NotesI cannot wait to try this new yarn in the Red Heart Miter Me the Chic Scarf pattern! The pattern & yarn can be found at Love Knitting which is an amazing site for tons of yummy yarn goodies. Be sure to check out Love Knitting. I had a blast looking through all the fun patterns there and saving favorites! Love Knitting has the world's biggest range of everything a knitter needs.
So which color will you try first for your earrings? Check out all the colors! I picked Vineyard; a rich purple.