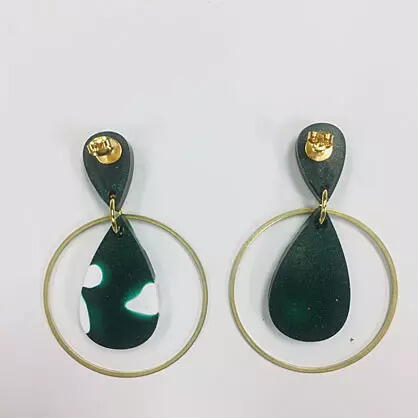
Liquid Faux Malachite Earrings

Turn heads at your next night out with these beautiful Liquid Faux Malachite Earrings from Sculpey®! Made with Liquid Sculpey® Emerald Metallic and classic White Liquid Sculpey, these earring pendants end up with a shiny and unique finish that closely resembles malachite. Plus, these earrings only take 90 minutes to make, bake, and assemble with Sculpey's jewelry making mold and materials! Look and feel your best while sporting earrings that you made yourself, or help a loved one do the same by gifting them this beautiful accessory that looks professionally-made!
Time to CompleteIn an evening
MaterialsClay
Materials List
- Liquid Sculpey® Emerald Metallic 1 oz.
- Liquid Sculpey® White 1 oz
- Sculpey Tools™ Oven-Safe Molds: Geometric Jewelry Mold
- Sculpey Tools™ Clay Tool Starter Set
- Paper towel
- 8 mm Gold tone jump rings (2)
- Gold tone ear posts (2)
- Gold tone ear nuts (2)
- Gold tone large hoop connectors (2)
- Silicone glue or instant drying glue
- Flat nose pliers
- Small sharp scissors
Project Instructions
-
Getting Started with Liquid Sculpey®:
Please make sure your work area is covered and you are not working on an unprotected surface. We recommend working on the Sculpey® Oven Safe Work Mat, wax paper, metal baking sheet, or disposable foil. Uncured Liquid Polymer Clay may damage unprotected furniture or finished surfaces. Be sure to cover your crafting area appropriately. - Stir Liquid Sculpey® completely. Thin with Sculpey® Liquid Clay Softener as needed - Wash hands after use (we have found that baby wipes work best).
Baking:
-It is important to use an oven thermometer when you bake the liquids so that you can ensure your oven is at the correct temperature.
-Do not microwave the liquids. They must be baked in a Preheated oven at 275 ºF (130 ºC) for liquid colors and 300 ºF (149 ºC) for Clear – Do not exceed baking temperatures.
-If your piece is less than 1/4” bake for 15 minutes. For thicker pieces that are 1/4” or above bake for 30 minutes.
-If your liquid project has become yellowed or discolored in the oven when you remake it, tent it by placing either – folding an index card in half and placing your project under it or by using aluminum foil over your project. -
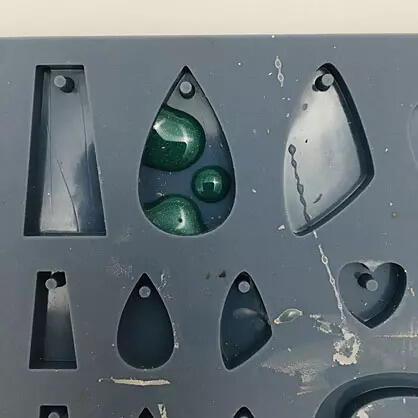
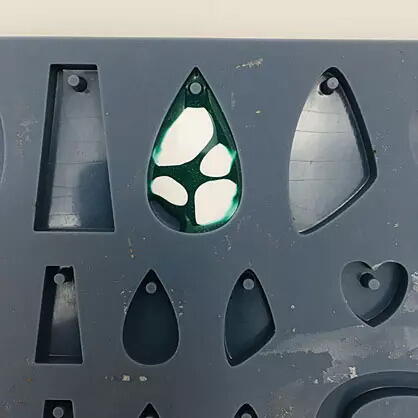
In the bottom of the teardrop shape in the Jewelry Mold, drop three separate drops of Emerald Metallic Liquid Sculpey® (LS).
-
Immediately drop White LS directly on top of the Emerald Metallic areas.
-
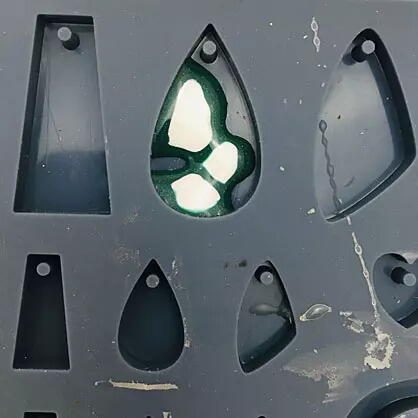
Drip more Emerald Metallic on top of each White area. Each time you add the opposite color, be sure to not cover up the spots of color below the new one. This way you will be creating layers of rings of the colors that will spread randomly to fill up the mold.
-
Drip more White on top of the Emerald spots. You will start to see the two colors interacting with each other in random ways and the colors will partially mix. If you have areas open up where there is not much activity, you can add more spots and then layer those as well.
-
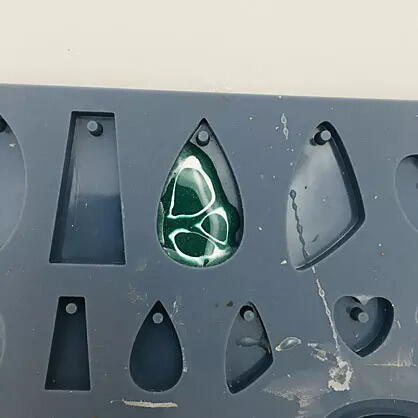
Keep layering the colors until the mold is totally full to level. Tap the mold on the work surface to release trapped air bubbles. This will also help the colors to move around a bit creating really random patterns like you might find in malachite.
-
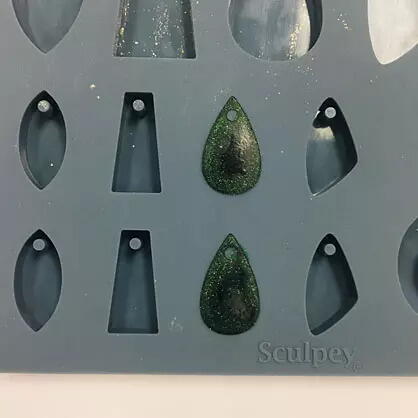
Also fill the two small teardrop cavities with Emerald Metallic LS. These will be used for the top part of the earrings.
-
When you are happy with the look of the liquids, bake the mold following the baking instructions for Liquid Sculpey®.
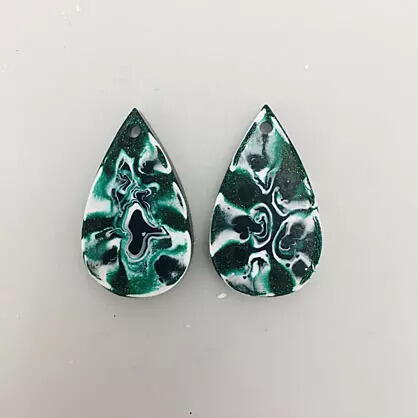
Allow the pieces to completely cool before removing them by gently flexing the mold. Make another of the large teardrop pieces following the above steps to make a second faux malachite piece. -
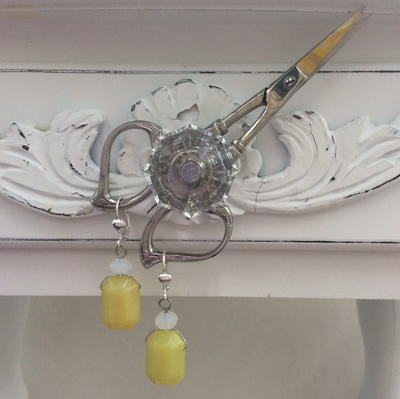
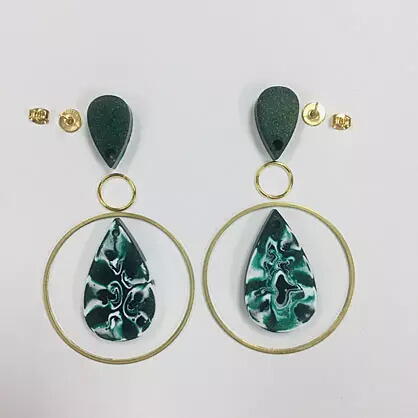
Here’s a look at how the earrings will be assembled.
-
Connect the bottom teardrop to the top teardrop with a jump ring. Lay the circle connector through the jump ring before closing the jump ring using flat nose pliers.
-
Glue ear posts to the back of the little teardrops using silicone glue or fast drying glue.

Do you prefer dangly earrings or studs, and why?
Read NextLiquid Faux Malachite Earrings
Your Recently Viewed Projects
Thanks for your comment. Don't forget to share!
Report Inappropriate Comment
Are you sure you would like to report this comment? It will be flagged for our moderators to take action.
Thank you for taking the time to improve the content on our site.