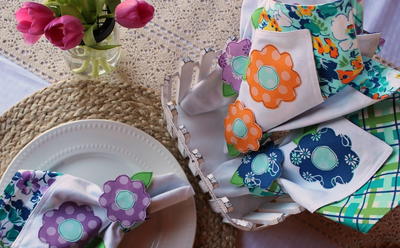
Spring Bloom Napkins and Napkin Rings
Your guests will fawn over your new springtime table settings once you learn how to make your own DIY napkins and DIY napkin rings!

When you host your first potluck of the spring season, why not wow your guests with table settings that will have them seeing beautiful blooms all dinner through? This simple tutorial from Therm O Web will have you sewing cloth napkins that are as breathtaking as a spring garden in no time. With fusible interfacing, these floral DIY reusable napkins will have the sturdiness of storebought cloth napkins at a fraction of the price. Save money by using these charming dining pieces again and again, and your table will never look drab. You’ll even learn how to make your own napkin rings to finish your romantic spring decor with an extra classy flair.
Time to CompleteUnder an hour
Main MaterialFabric
Primary TechniqueSewing

SeasonSpring
Project TypeMake a Project
Materials List
- HeatnBond Fusible Craft Extra Firm Interfacing
- HeatnBond Lite Iron-On Adhesive
- Fabric Fuse Liquid Adhesive
- Cotton fabrics: 1 yd. white (makes 4 napkins); four different coordinating fat quarters for each napkin
- Thread: white, black
- Tools: iron, sewing machine, sharp scissors, permanent marker, basic sewing supplies
Instructions - Cutting
Note: Please read the complete instructions before beginning project. Prewash napkin fabrics without fabric softener.
-
Cut from HeatnBond interfacing:
1 – 3” x 7” strip
1 – 3.5” x 3.5” square
1 – 2.5” x 2.5” square -
Cut from fabrics:
1 – 16.5” x 16.5” white cotton square
1 – 16.5” x 16.5” floral cotton square
1 – 4” x 8” floral cotton strip
3 – 3.5” x 3.5” purple squares (for flowers)
3 – 2.5” x 2.5” green squares (for leaves)
2 – 2” x 2” teal square (for flower center)
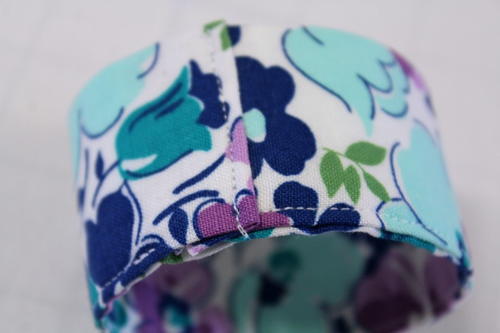
Instructions - Napkin Ring
-
Center the 3” x 7” interfacing strip on the wrong side of the 4” x 8” floral cotton strip. Bond the interfacing following package directions.
-
Place the bonded strip interfacing side up. Press excess fabric over the edges of the interfacing on long sides, then press excess fabric over one short end.
-
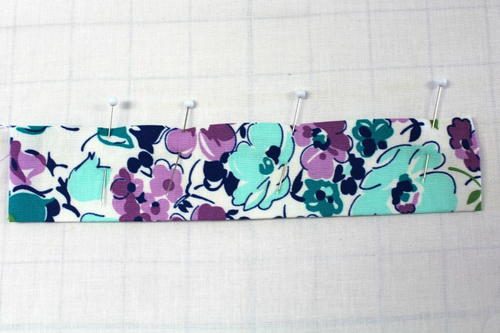
Now, fold the strip in half lengthwise, wrong sides together, sandwiching the long raw edges in the middle, and pin.
-
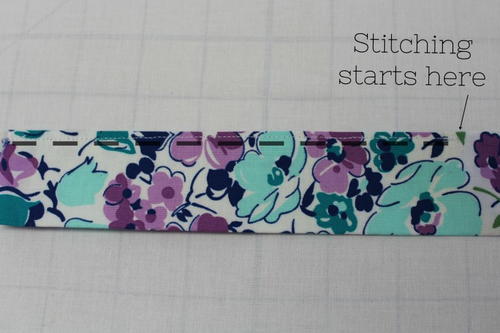
Stitch the long pinned edge using 1/8” seam allowance, beginning 1/2” from short folded end. Continue stitching to the raw edge.
-
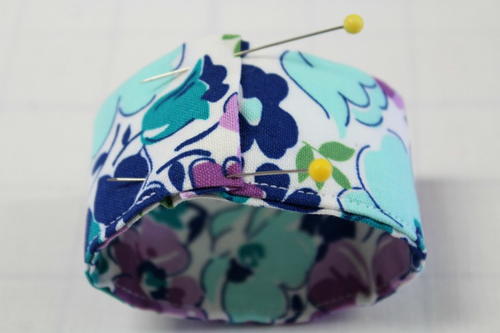
The next step is to form the napkin ring. Bring the raw short edge around and tuck it into the folded short end of the strip; pin it to secure.
-
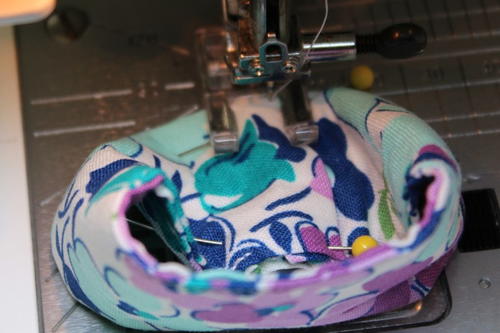
Flatten the ring and stitch together close to the fold to encase the raw edges.
-
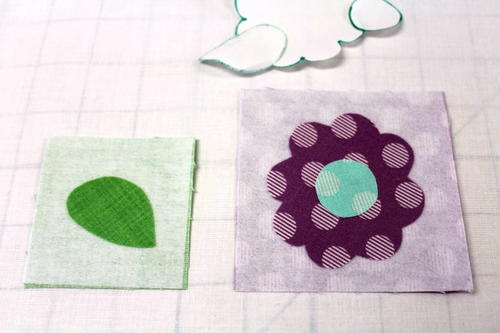
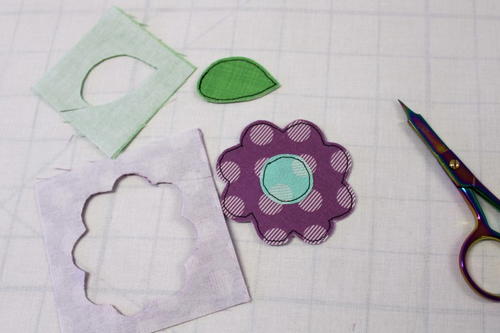
Trace one of each napkin ring flower template from the pattern sheet onto the paper side of HeatnBond Lite; cut out the shapes, leaving a 1/4” border around traced lines. Follow the package directions to fuse pattern pieces to the wrong side of the appropriate fabrics. The flower is fused to the 3.5” square, the flower center to the 2” square, and the leaf to the 2.5” square. Let the pieces cool. Cut out the pieces on the traced lines.
-
Follow the package directions to fuse the 2.5” and 3.5” interfacing squares to the wrong side of two fabric squares. Let them cool. Place the squares on an ironing surface interfacing side up. Peel the liner from the back of the flower center and fuse it to the flower. Fuse the flower to the 3.5” interfacing square. Peel the liner from the back of the leaf; fuse it to the 2.5” interfacing square.
-
Top stitch around the flower, flower center, and leaf with black thread. Cut out shapes, leaving a narrow border beyond stitching.
-
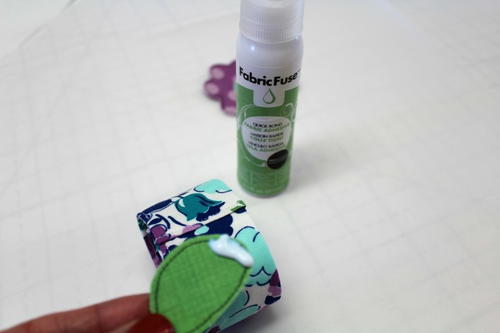
Using quick-bond Fabric Fuse Liquid Adhesive, glue the leaf to top of the napkin ring where the seams meet. Next, glue the flower to the top of the seam and let it dry 4-6 hours, clamping to hold the leaf/flower in place if needed.
Instructions - Napkins
-
Trace one of each napkin flower template from the pattern sheet onto the paper side of HeatnBond Lite; cut out the shapes, leaving a 1/4” border around traced lines. Follow the package directions to fuse the pattern pieces to the wrong side of the appropriate fabrics; the flower is fused to 3.5” square, the flower center to the 2” square, and the leaf to the 2.5” square. Let them cool. Cut out the pieces on the traced lines.
-
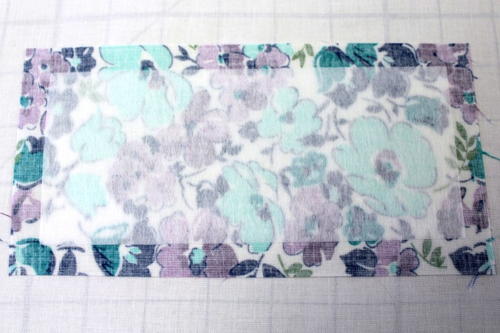
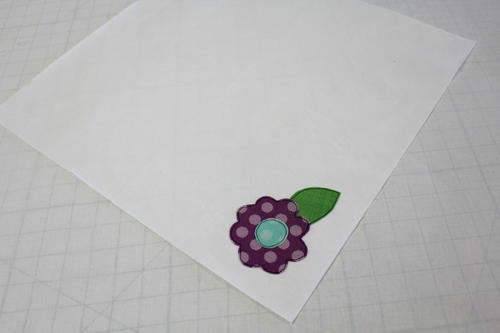
Peel the liner from the back of the leaf and the flower and place them on one corner of a white fabric square as shown, being sure to leave at least 1/4” space from the fabric edges. Peel the liner from the flower center and place it on the flower. Follow the package directions to fuse the entire applique to the white square. Let it cool. Top stitch around the flower, flower center, and leaf with black thread.
-
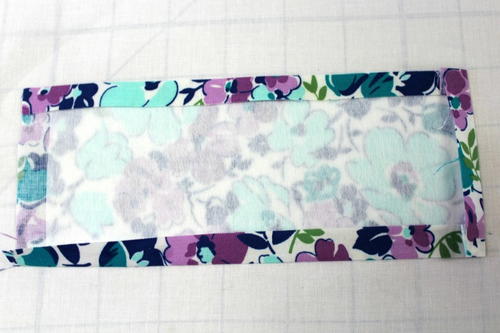
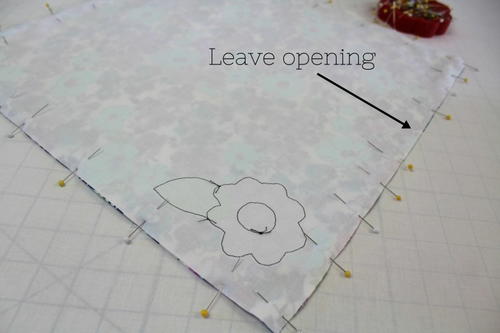
Place the white fabric squares right sides together and pin. Stitch all four sides, leaving a 3-1/2”-wide opening for turning on one edge.
-
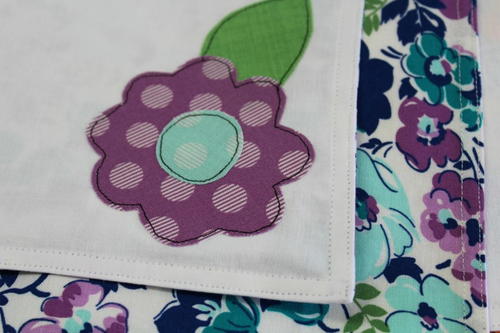
Turn the napkin right side out through the opening. Push the corners out and press the opening closed. Press the napkin well. Finally, edge stitch the entire napkin with white thread and then top stitch 1/4” from the edge.
How do you bring your crafting know-how to your home decor? Let us know below in the comments!