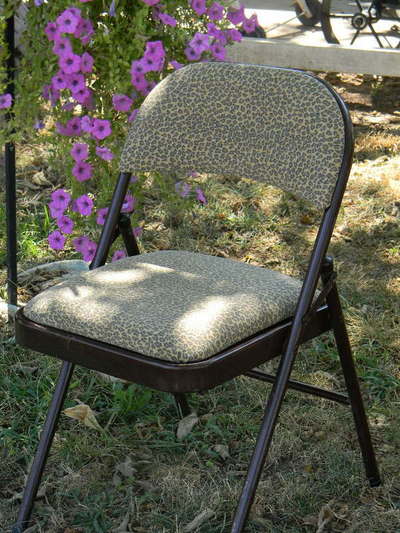
Reupholstered Chair Cushions

If you want a fresh look for some old furniture, you should try this DIY home decor project: Reupholstered Chair Cushions. Folding chairs are convenient to bring almost anywhere and for party set-ups, but don't throw them out if they're looking worn out. With this tutorial, you will learn how to upholster a chair with new fabric to give it a new life. DIY furniture isn't always this simple, so you should really think about trying these instructions on how to reupholster a chair cushion.
Primary TechniqueGeneral Crafts

Materials:
- Folding chair with attached cushions
- Screwdriver
- Soap and water
- Fabric
- Iron
- Scissors
- Hot glue gun
- Craft glue
- Paintbrush
Instructions:
- Remove the screws from the bottom of the chair seat and the back of the chair's seat back. The cushions will easily slide off.

- Clean the chair frames with soap and water. I am embarrassed to admit there was mystery stuff stuck to the chairs that hadn't gotten wiped off after the last dinner. I was also surprised at how much dust and dirt was trapped between the cushions and the chair. I didn't repaint my frames, but if needed, I would have spray painted them while the cushions were off.

- Choose the fabric for recovering the cushions. Sturdy, non-stretchable fabric is best because you don't want the fabric to stretch out of shape after the chairs have been used a couple of times. I used scraps of upholstery fabric I had left over from a previous project. Iron out the wrinkles.
- Place the fabric on your work surface with the wrong side facing up. Center the seat cushion on the fabric with the bottom side facing up. Fold the fabric over the edges of the cushion to determine how much fabric you will need. I tried to match the edges of the existing fabric on the cushions. Cut the fabric.

- Your cushion will have a board on the bottom. The boards on folding chairs are too thin for staples. You don't want staple ends to poke through the top of the cushion. Even though the manufacturer of these chairs used staples, they were very shallow. I'm surprised they secured anything. Since the cushion fits into an indentation on the chairs frame, I decided hot glue would hold just as nicely. The pressure once the cushions are screwed back in place will prevent the fabric edges from working loose. Fold the edges of the fabric to the bottom of the cushion and glue in place. Miter fold and glue the corners. Trim away excess fabric around the holes for the screws. Note: The removed screws are not very long. You will want the glued fabric edges to be as flat as possible, with minimal bulk, especially around the corners.
- Replace the seat cushion in the chair frame and attach the screws.
- Cut the fabric for the seat back using the same technique as the seat cushion.
- The chair back cushions of my chairs had a slight curve which required a little extra preparation for the fabric. Place the cut fabric with the wrong side facing up. To help the fabric mold to the shape of the cushion, paint a layer of craft glue over the front of the cushion using a paintbrush. Center the fabric over the cushion front with the right side facing up. Smooth the fabric over the wet glue on the cushion. Flip the fabric and cushion over and attach with hot glue in the same way as the seat bottom.
- Replace the back cushion in the chair frame and attach the screws.