How to Make a Simple Macrame Plant Hanger
This macrame plant hangers DIY is perfect for beginners and knot experts alike.

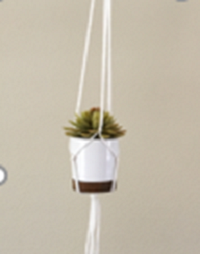
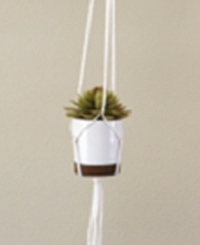
Learn how to make a simple macrame plant hanger following the step-by-step instructions and photos in this tutorial from Red Heart. What's old is new again! If your grandmother had plant hangers in her 1970s Florida condo, step into memories and make an updated version for your own home. This design is simple enough for beginners and intricate enough to add visual interest to your space. Choose white yarn for a neutral hue. These would be beautiful in a three seasons room, outdoors, or to bring the outside in to an office or living area. You'll love the completed look!
From Red Heart: These pot hangers are a super crafty way to add plants to your environs. Plants have health benefits and the ability to clean the air in your room.
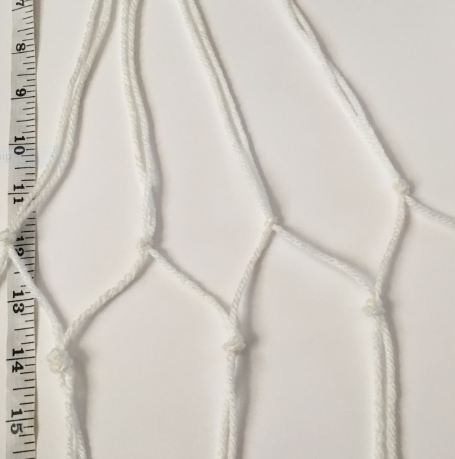
Note: Each hanger measures 30" (76 cm) long.
Time to CompleteIn an evening
Primary TechniqueHome Decor

Project TypeMake a Project
Yarn Weight(4) Medium Weight/Worsted Weight and Aran (16-20 stitches to 4 inches)
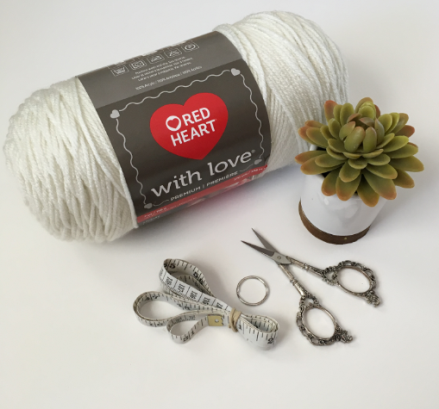
Materials List
- RED HEART® With Love®: 1 skein 1101 Eggshell
- Flower pot with 4½" (11.5 cm) circumference and 1½-2" (4-5 cm) metal ring for each hanger
- Tape measure
- Scissors
How to Make a Simple Macrame Plant Hanger Instructions
Style 1
-
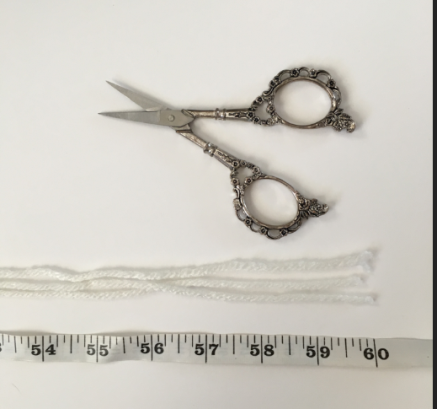
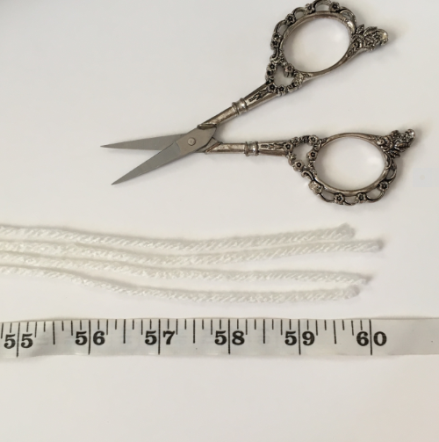
Step 1: Gather all materials on a large, flat surface.
-
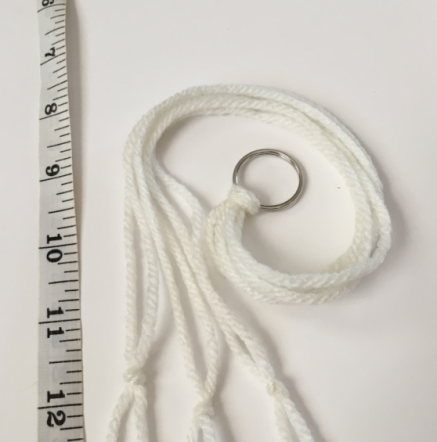
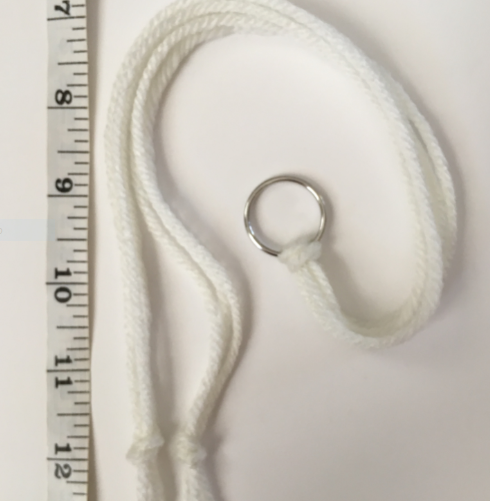
Step 2: Cut 3 strands of yarn, each measuring 60" (152.5 cm) long.
-
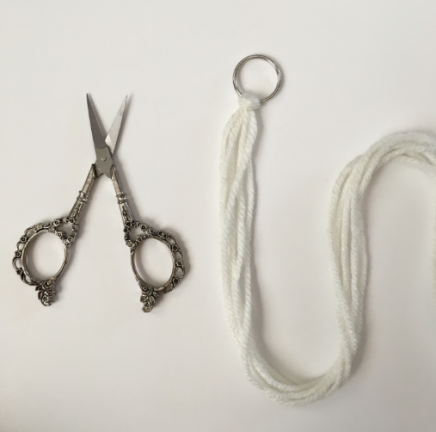
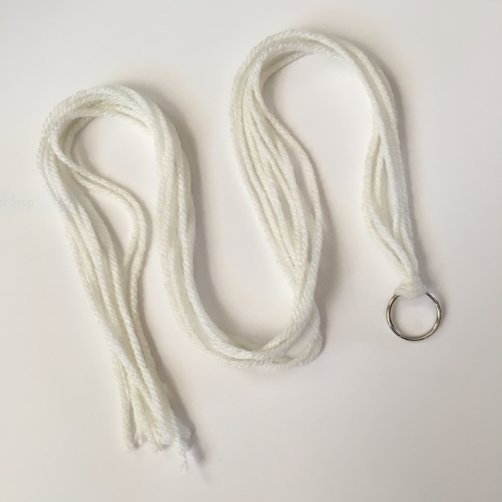
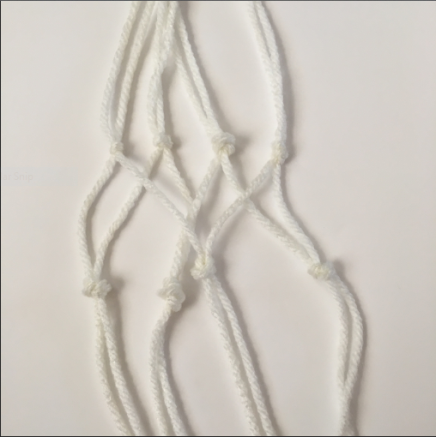
Step 3: Fold each strand in half evenly and knot around ring.
-
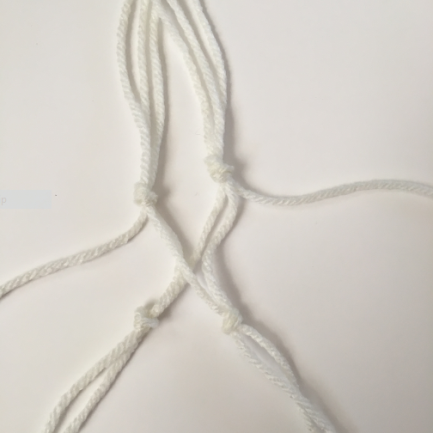
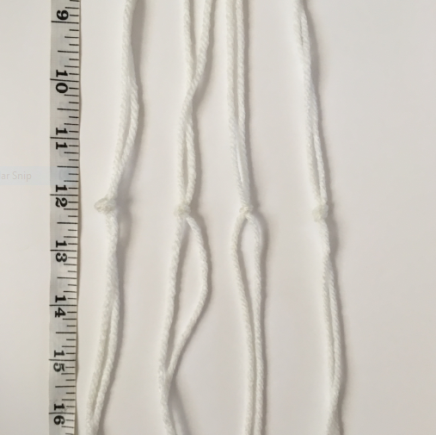
Step 4: 12" (30.5 cm) below ring, separate strands into groups of 2, knot each group together to make 3 knots.
-
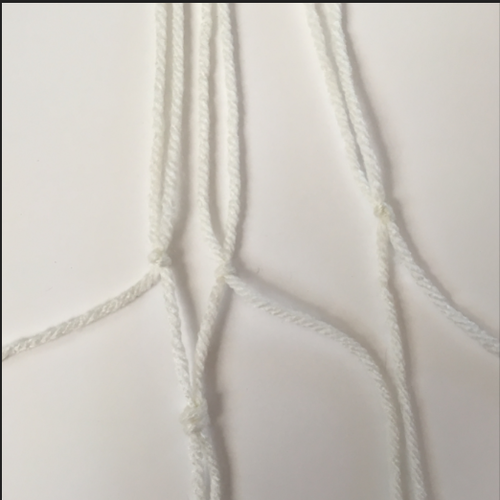
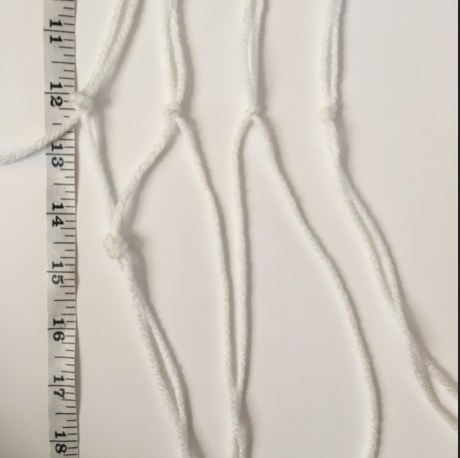
Step 5: Skip first strand, separate strands from first 2 adjacent knots and knot them together 3" (7.5 cm) below knots just made.
-
Step 6: Knot next 2 strands together in line with knot made in Step 5. One single strand remains on right.
-
Step 7: Knot first and last strands together. There should now be 6 knots.
-
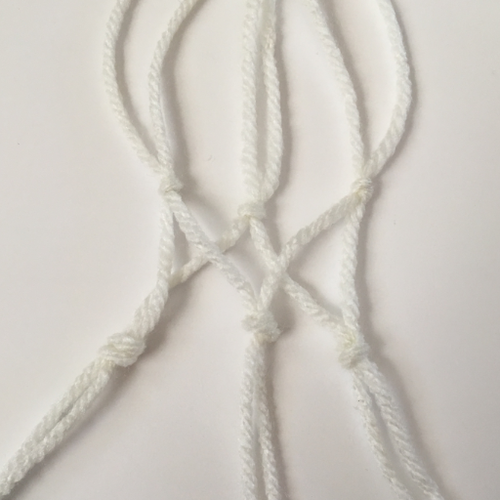
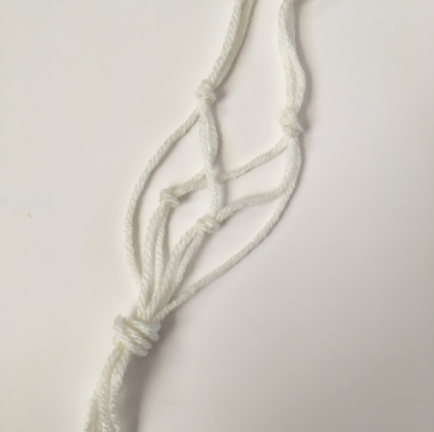
Step 8: Hold all 6 strands together and make 1 large knot3" (7.5 cm) below last 3 knots made.
-
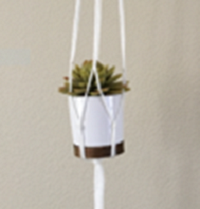
Step 9: Insert flower pot and hang from metal ring.


Style 2
-
Steps 1–3: Work same as Steps 1–3 of Style 1.
-
Step 4: Separate strands into groups of 3, knot each group together 12" (30.5 cm) below ring to make 2 knots.
-
Step 5: Skip first 2 strands at left, knot next 2 (centermost) strands together3" (7.5 cm) below knots just made. Leave last 2 strands at right untied.
-
Step 6: Skip first strand at left, knot next 2 strands together in line with knot made in Step 5. Leave remaining strands untied. There should now be 4 knots.
-
Step 7: Hold all 6 strands together and make 1 large knot 3" (7.5 cm) below knots just made.
-
Step 8: Insert flower pot and hang from metal ring.

Style 3
-
Step 1: Gather all materials on a large, flat surface.
-
Step 2: Cut 4 strands of yarn, each measuring 60" (152.5 cm) long.
-
Step 3: Fold each strand in half evenly and knot around ring.
-
Step 4: Separate strands into groups of 2, knot each group together 12" (30.5 cm) below ring to make 4 knots.
-
Step 5: Skip first strand at left, knot next 2 strands together 3" (7.5 cm) below knots just made. Leave remaining strands untied.
-
Step 6: *Knot next 2 strands together in line with knot made in Step 5, repeat from * once. Leave remaining strand untied.
-
Step 7: Knot remaining strands together in line with knots made in Steps 5 and 6. There should now be 8 knots.
-
Step 8: Hold all strands together and make 1 large knot 3" (7.5 cm) below knots just made.
-
Step 9: Insert flower pot and hang from metal ring.


Why You'll Love This Gardening Craft
As editors of an arts & crafts website, we are excited to present you with the top 3 reasons to make the simple macrame plant hanger craft project:
1. Bring a touch of retro charm to your space: Macrame plant hangers have made a comeback in interior design trends, evoking a sense of nostalgia from the 1970s. By creating your own modern version, you can add a trendy and whimsical touch to your home decor.
2. Add a pop of greenery to any room: Plants not only enhance the aesthetic appeal of a room but also have health benefits such as cleaning the air and reducing stress. By making these macrame plant hangers, you can easily incorporate more greenery into your living space and enjoy the positive effects of having plants indoors.
3. Personalize your decor with a handmade touch: Making your own macrame plant hanger allows you to showcase your creativity and craftmanship. Whether you choose to use white yarn for a minimalist look or experiment with different colors and textures, each plant hanger will be a unique addition to your home. Plus, the satisfaction of completing a DIY project will bring a sense of pride and accomplishment.
In conclusion, creating a simple macrame plant hanger is a fun and rewarding craft project that offers a blend of style, health benefits, and personalization for your living space. Embrace the trend with this versatile and beginner-friendly tutorial from Red Heart!
What is your favorite vintage trend that's making a comeback?