
This project was submitted by one of our readers, just like you.
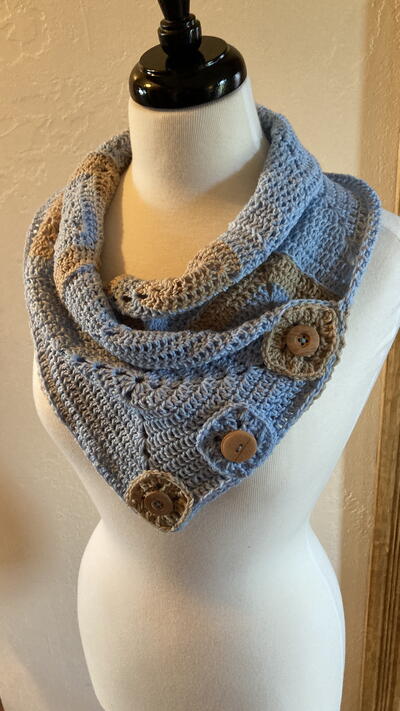
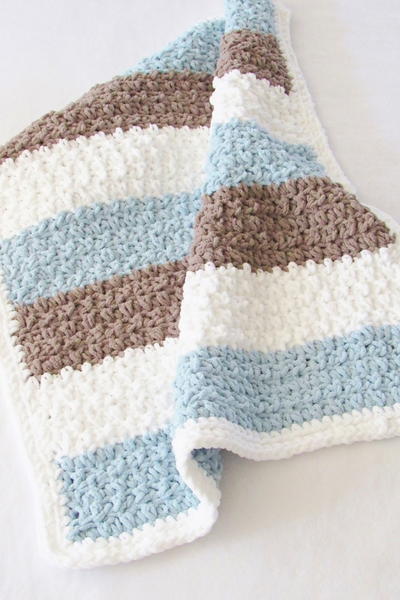
Copper Harbor Neck Warmer

Copper Harbor Neck Warmer
"The Copper Harbor Neck Warmer is perfect for keeping your neck warm on chilly days. Make one for yourself or give it as a gift to someone special. With just a few basic stitches, you can create this stylish and functional accessory. This project is a great way to use up leftover yarn, and it's perfect for winter. In this post, I'll share the pattern with you, along with some tips on how to make it. I hope you enjoy it! "

Primary TechniqueCrochet

Materials List
-
Lighthouse color Curio Universal Yarn 1 skein, 400 yards.
Crouton color Curio Universal Yarn 1 skein, 109 yards.
- Size H Crochet Hook. (The yarn packaging suggests using a C to E crochet hook). However, I wanted a loose looking stitch and used a slightly larger hook. The crochet hook used was an ergonomic hook from Prym
- Three 1-inch Buttons
- Light Blue Thread
- Sewing Needle
- Tapestry Needle
- Scissors
Instructions
-
Abbreviations:
CH = Chain
DC = Double Crochet
SL ST = Slip Stitch
SP = Space
ST = Stitch
STs = Stitches
[ ] = Repeat between -
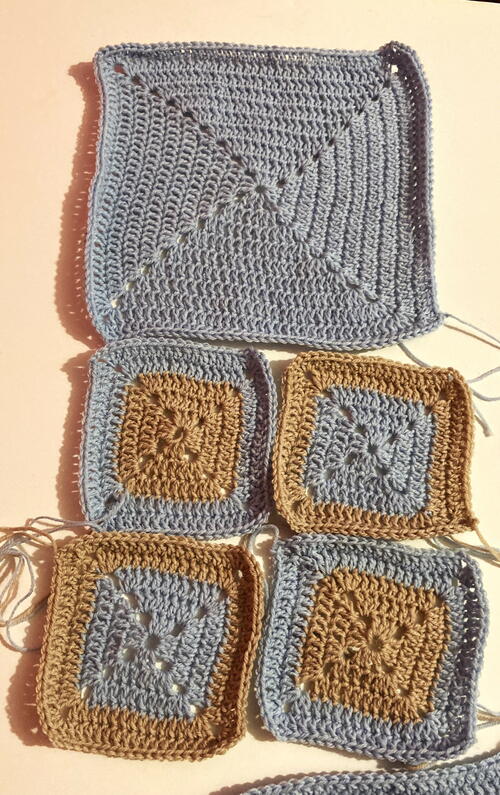
Pattern Notes: Details for each granny square used in this crochet pattern will be provided after the general directions for completing a solid granny square.
-
Round 1 CH 3 (Counts as DC). In the 3rd ST from the hook work (2 DC, CH 2, 3 DC, CH 2, 3 DC, CH 2, 3 DC, CH 2). Join to the top DC ST with a SL ST.
-
Round 2 CH 3 (Counts as DC). DC in the same corner CH 2 SP. DC in each ST across (3 DC). Work in the corner CH 2 SP (2 DC, CH 2, 2 DC). Continue working a DC in each ST across and in each corner CH 2 SP work (2 DC, CH 2, 2 DC) 2 more times. Continue working the DC in each ST across the last side (3DC). When you get to the final corner work (2 DC, CH 2) then a SL ST into the top of the first CH 3 to close the round.
-
Round 3 and Beyond Continue repeating round 2. The only difference is that each round will have more double crochet stitches on each side. Stitches on each side = 7 DC. For round 4 there will be 11 DC STs to work on each side. Round 5 there will be 15 DC STs to work on each side, and so on. Finish by weaving in yarn ends and removing the excess yarn.
-
Details on Squares: 2 Larger lighthouse color squares. Using the Lighthouse yarn crochet two squares that are 10 rounds. Finished size 9 X 9-inches. 8 two-toned color squares. 4 with three rounds of crouton in the middle and two rounds of lighthouse color (5 rounds total). 4 with three rounds of lighthouse in the center and two rounds of crouton (5 rounds total). Finished size of each square 4.5 X 4.5-inches. 2 smaller crouton color squares. 2 rounds. Finished size 2 X 2-inches. 1 smaller lighthouse color square. 2 rounds. Finished size 2 X 2-inches. Finishing. Weave in all the yarn ends for each square and cut off the excess yarn.
-
Joining the Solid Granny Squares Use the joining method of your choice. However, I used the invisible joining method and the leftover lighthouse color yarn. If this method is new to you, here is my video tutorial on the invisible join. https://youtu.be/qlcCIwguVnA
-
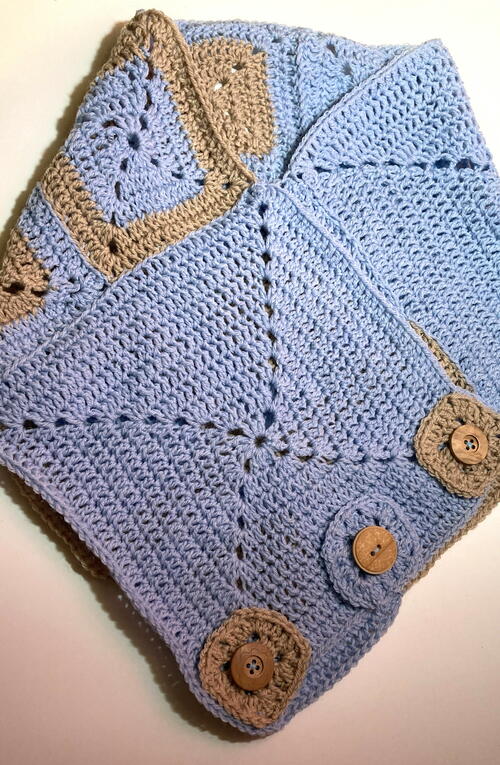
Begin by joining 4 of the two-toned 4.5 X 4.5-inch squares together. I chose to alternate the squares. Repeat joining the remaining 4.5 X 4.5-inch squares.
-
Now there should be 4 squares 9 X 9-inches. Two solid and two of them made with the two-toned smaller squares sewn together. Next join the 4 larger squares together using the same joining method. I chose to begin with the two-tone square, then add the solid lighthouse color square, then the two-tone square, and finally the solid lighthouse color square. There should be 2 crouton color and 1 lighthouse color 2 X 2-inch squares left.
-
Using the Lighthouse color yarn, sew those onto the end of the end lighthouse color square. (Don’t worry about the yarn showing through on the bottom as this will be covered up when the ends of the scarf are sewn together.
-
I arranged a crouton color on each end and the lighthouse color in the middle. Once the yarn squares are securely attached, it is time to sew on the buttons. I used light blue thread with three wooden buttons. (If you look closely, two of the buttons are the same, one is not. I used what I had on hand).
-
It is time for the final step. Arrange the end of the scarf that you just sewed the buttons on over the top of the other end of the scarf; making sure not to twist the scarf. The right sides should be facing up on both ends of the scarf. Using the lighthouse color yarn, sew the top square onto the bottom square on the bottom two sides.
-
Solid Granny Square Scarf This neck warmer is made using various sizes of the solid granny square. The pattern I have for the solid granny square is unique in that it has no seams! Normally, when you see a solid granny square, you can see the seam on one side. That is not the case with these little beauties. See my free solid granny square tutorial. https://patternprincess.com/solid-granny-square-crochet-pattern-for-beginners/ There are also video tutorials for both a left hand and right hand crocheter on working the solid granny square.
Right hand https://youtu.be/pUXTI1vp6yM
Left hand https://youtu.be/29qP7Givt-g -
This neck warmer is ready to wear! Just slip over your head and style. That’s it!