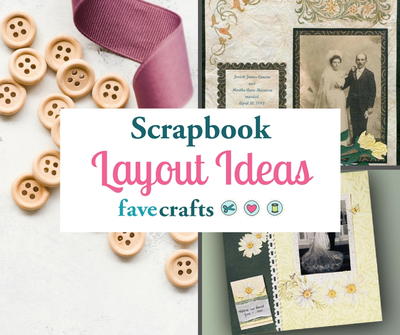
Beginner Scrapbooking Ideas, Free Scrapbooking Layouts, Tutorials and More
Scrapbooking is a great way to preserve photos and memories of the people you love. The wonderful thing about creating a scrapbook is that there are no correct methods, the creative opportunities are endless. Use this FaveCrafts guide to get ideas for how to organize your photos, memorabilia, family history and more. This comprehensive guide includes scrapbooking ideas, videos, free scrapbooking layouts and tutorials.
Table of Contents
Our Favorite Free Scrapbooking Layout: Loose Tooth Scrapbook Layout
Other Free Scrapbooking Tutorials
Beginner Scrapbooking Video
Scrapbooking Ideas and Tips
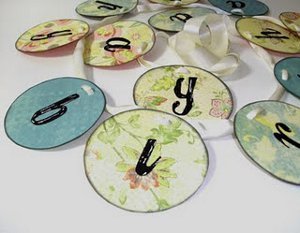
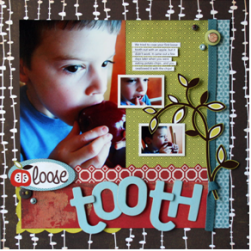
Our Favorite Free Scrapbooking Layout: Loose Tooth Scrapbook Layout
Courtesy of BasicGrey
Remember how exciting it was to feel that first loose tooth? Keep that memory safe and looking great with this quirky and kitschy scrapbook layout!
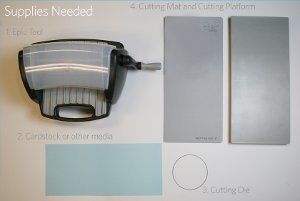
Materials:
- BasicGrey Off beat: Novel paper
- BasicGrey Offbeat: Light Hearted paper
- BasicGrey Offbeat: Casual Paper
- BasicGrey Offbeat: Peculiar paper
- BasicGrey Ambrosia: Zest paper
- BasicGrey Urban Prairie: Hayloft paper
- BasicGrey Offbeat: Element Stickers
- BasicGrey Mellow: Alpha stickers
- BasicGrey Offbeat: Buttons & brads
- BasicGrey Elbow Chip Monogram stickers
- BasicGrey Recess Ribbon
- Craft Knife
- Photos
- Adhesive
- Scallop Scissors
- Glue Dots
Steps:
- Cut the trim off of the bottom of the Novel paper.
- Trim Casual paper to 10” x 10” size.
- Trim Light Hearted paper to 10” x 1” size.
- Trim the Zest & Peculiar paper 10” x 2 1/2” size.
- Place the 10” x 10” sheet of paper in the center of the sheet about 1” in on all sides.
- Using a sharp craft knife cut along the pattern as shown in the example using Peculiar paper.
- Adhere the 5" x 7" photo to the top left hand corner of the Casual paper.
- Adhere the Peculiar paper to the bottom of the photo just barely over lapping.
- Glue the red Zest paper just over lapping the Peculiar paper.
- Add to the outer bottom left had corner the Hayloft paper cut with large scallop scissors.
- Glue light hearted paper to the right edge of the Casual paper.
- Using glue dots adhere the ribbon tying one small knot on the bottom portion of the ribbon.
- Using the dimensional dots add from the element sheet journal sticker with the apple on it.
- Add the Mellow alpha stickers to that sticker as well.
- Paint the Chosen chip alpha letters using a blue acrylic paint.
- Using dimensional dots apply to both “T”s and one of the “O”s.
- Using the element stickers apply the vine sticker apply over the ribbon and part of the paper.
- Apply the button, brad combos to the indicated areas.
Other Free Scrapbooking Tutorials and Free Scrapbooking Layouts
- “It Feels Sticky” Scrapbook Layout
- Back to School Scrapbook Page
- Our Visit with Santa Scrapbook Page
- Two Feet at a Time Baby Scrapbook Page
- How to Make Your Own Rubber Stamps for Scrapbooking
- Creating Punched Embellishments
- Save and Organize your Paper Scraps
Beginner Scrapbooking Video: Design Principles for Scrapbooking
If you’re new to scrapbooking, check out this useful video on how to design your first scrapbook.
Scrapbooking Tips and Ideas
-
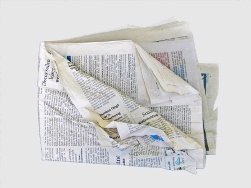
Preserving old newspaper clippings:To preserve newspaper clippings for your scrapbook, mix one quart of club soda with one tablet milk of magnesia. Let the table dissolve completely and stir well. Pour the mixture into a small, shallow pan. Lay the newspaper clipping flat in the pan and soak for one to two hours. Remove clipping carefully and let dry on a soft towel until there is no moisture left. The clipping will now be preserved in your scrapbook pages for years to come.
-
Spreading Glue without getting messy: Recycle old credit cards or save those pre-approved credit cards send in junk mail and use them to evenly spread liquid glue over a large surface. Pour small amounts of the glue on the intended surface and use the edge of the card to swipe and spread the glue as desired. When finished, wipe the remaining glue from the card’s edge and reuse over and over again. This will keep your hands clean and your scrapbook pages free from dried glue spots.
- Scrapbooking Stamp Art Tip: A great tip for beginning scrapbookers! Check if a stamp will work on your scrapbook project without permanently placing it. Using a piece of scrap plastic (clear packing plastic and inserts are perfect for this), stamp with a solvent ink. Lay the plastic over top of your scrapbook page for a general idea of how the stamp will look on your page.