How to Make Your Own Rubber Stamps
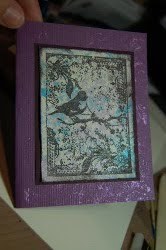
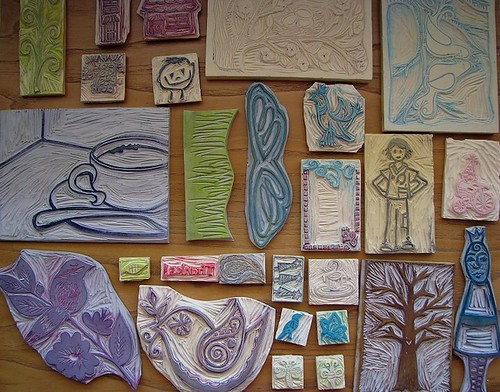
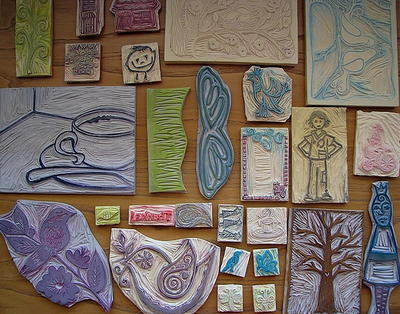
If you like to embellish your scrapbook pages with stamps, try making your own stamps for a completely personal design. Though many methods exist for transferring an image onto a carving block, tracing is probably the easiest. Creative Kismet shows you just how beautiful homemade stamps can be, with some tips on how to care for them.
You Will Need
Tracing Paper
Clip Art of your preferred image
Rubber Carving Block- Speedball sells large carving blocks, affectionately called “the pink stuff” by crafters, including a SpeedyStamp Kit with carving tools. Mastercarve is another maker.
Carving tool- Craft or X-acto knifes will work for the initial cuts, but you may have trouble scrapping out the relief parts of your design. Detailed carving requires special tool(s) with a sharp, V-shaped end.
Sharpened No. 2 Pencil
Stamp Pad
- Print out an image from the web or find an image you would like to make into a stamp. For beginners, use a less-detailed image with thick, heavy lines. This will be easier to carve.
- Place the tracing paper over your image and trace over the solid parts of the image with your sharp pencil. Don’t just outline; fill in the entire image.
- Flip your tracing paper over and place your image face-down on the carving block (the pink stuff). For words, you want the mirror image of the word on the stamp so that the actual print comes out correctly. You can check this by holding your stamp up to a mirror. If you’ve traced a word or words, you should already accomplish this by flipping over the image onto the carving block.
- Hold the image steady on the block with one hand as you rub the back of the tracing paper with a blunt object, such as a spoon. This will transfer the graphite onto the carving block.
- Once transferred, you are ready to carve! For a better-looking “positive image,” you want to carve away the light areas from around your pencil image.
- Cut off the block with your image from the rest of the carving block. Start with the most intricate areas of the design first. For carving between lines (the middle or insides of circles for example), carve around the lines of the image first, and then carve out the area between.
- Carve away from the lines of the image using shallow, horizontal cuts. When working around curves, keep the carving tool in your one hand steady and guide the block with your other hand.
- The cut out parts of the stamp should slope away from the raised surface, rather than straight down or undercutting the raised surface. This will make the stamp surface steadier.
- Once your image has been carved out, remove all the excess rubber material from around the image. You want to remove everything that you do not want stamped. You can use a larger tool from the Speedy Stamp kits or X-acto knife to carve away larger areas.
- When you think you’re done, test out your stamp with a stamp pad or even a highlighter. With stamping, you will likely find additional areas that require carving. Don’t worry; homemade stamps are charming in their slight imperfections.
- You can mount your stamp onto a piece of wood at this point, with or without a piece of foam separating the stamp from the mount, but it’s not a necessity. If you do mount the stamp to a slightly-larger piece of wood, remember to stamp the top of the wood with your stamp before gluing it on for easy reference.
Enjoy!
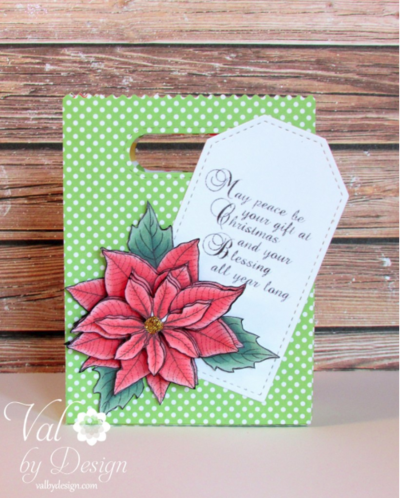
Read NextWish and Dream Stamped Cards
Your Recently Viewed Projects
Thanks for your comment. Don't forget to share!
MissMaggie
Apr 21, 2011
@CRAFTDESIGNERS Great! Thanks so much! I hope you had fun making some. -Editors of FaveCrafts
CRAFTDESIGNS
Apr 20, 2011
Wanted you to know I posted a link to this tutorial today on my blog. Nancy Ward PaperFriendly http://www.nancywardcrafts.com
rosemaryjordan 484 1479
Apr 07, 2011
Great little creative idea and saves on purchasing from store the expenses ones
Diane K
Feb 26, 2011
I love printing sentiments with my computer and printer on beautiful card stock and cutting that sentiment out with a die that fits my sentiment. I have fun running it through a Cuttlebug machine, but I'm hoping to try the Grand Calibur by Spellbinder's. I love new products, though I had really good luck using the Cuttlebug for several years. In that time i made at the paper needs for two weddings. Time for a new and bigger machine
Artsy Grandma
Jan 27, 2011
For temporary stamps use foam meat trays. The little guys can draw a design using a pencil. The negative space is the part that will actually make the print, and the lines they drew will be left the color of the paper you use to print on. Then just ink it (or you can use acrylic paint) and press onto the paper to make great greeting cards, or better yet, let them frame one.
Crafter 16055
Jan 06, 2011
What a great thing to know. My girls love stamping and I never really thought about us making our own. THanks!
susiew51 5350605
Dec 17, 2010
It's also easy to use acrylic mounts for hand-carved stamps. Just put a piece of two of double-stick tape on the back of the stamp and stick it to the mount. It can be reused if you put it on a page protector to store.
Rachels Paper Craf ts
Dec 10, 2010
I like the Idea of makeing my own stamps and often use images that my 9 year old son draws to make them. Rachel Miller
brendabarber46 436 4606
Nov 25, 2010
My friend and I never buy each other gifts we always make them. She collects rubber stamps and I have been looking for instructions. These instructions are detailed and not confusing. I can't wait to try making them.
pwhite98270
Nov 16, 2010
I had wanted to make rubber stamps for my Geocaching expedition and this information was the trick to getting me prepared.
Lettetia
Aug 26, 2010
I am relatively new to stamping and have not been able to find a wide variety of stamps that fit my needs, so this how-to article is a real treasure. I am already planning on ordering supplies to get started. Thank you for posting this.
Crafter 5280340
Aug 19, 2010
Hi! I was so excited to read this How To project. I have always wanted to get started with rubber stamps but the cost of them stopped me. I dreaded being stuck with just one stamp! Thanks to your tutorial, if I get sick of one stamp I can just carve another!
RenSingsToo
Apr 19, 2010
Your instructions were wonderfully detailed. It is these kind of instructions that make us feel we have the "experience" to do a good job already. Do you have any hints for using linoleum blocks, or is that what the "pink stuff" is?
stufffromthebunker
Apr 15, 2010
Wow, excellent instructions. I have been wanting to do this for some time, thanks so much for sharing, can't wait to get started.
HappyMaker
Mar 23, 2010
I could follow these directions and actually MAKE a stamp. There are a few other things on my list, but I will be sure to let you know how it comes out. Thanks HappyMaker
newroze13
Jan 17, 2010
Thank you very much for your article. You did a wonderful job explaining the process. I do have the carving tools and some 'pink stuff'. Time to make some stamps.......with your help.
Report Inappropriate Comment
Are you sure you would like to report this comment? It will be flagged for our moderators to take action.
Thank you for taking the time to improve the content on our site.