Back to School Scrapbook Layout
How to create a Back to School scrapbook page from AMACO with metal embossing. The bright colors and creative techniques will have you wanting to bring this school memory scrapbook page idea in for show and tell!
Materials:
- AMACO® ArtEmboss® — Light Aluminum
- AMACO® ArtEmboss® — Bright Red
- AMACO® ArtEmboss® — Mint Green
- AMACO® Metal Stamp Art
- Black Ink Pad
- Sizzix Dies — Sizzlits Alphabet Dies
- Computer Transparency Sheets
- Therm O Web Zots Adhesive Dots
- JewelCraft Nailheads
- DMD Paper Reflections Cardstock
Instructions:
-
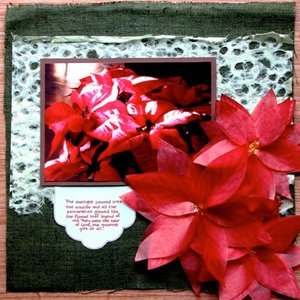
Cut large pieces of all three colors of AMACO ArtEmboss and crinkle. Spread almost flat, and adhere to background cardstock, as shown.
-
Using ink pad, lightly rub over crinkled ArtEmboss. Heat set with heat gun.
-
Using Sizzix die cut machine; cut A-B-C’s and 1-2-3’s from Aluminum, Bright Red and Mint Green from AMACO ArtEmboss, as shown.
-
Adhere A-B-C’s and 1-2-3’s to black strip of cardstock and adhere to layout.
-
Create the title and journaling on a computer and print onto transparency. Cut out transparency print.
-
Cut Aluminum ArtEmboss to go behind title and journaling. Adhere to layout.
-
Adhere transparency journaling and title with nailheads.
-
Matt photos with black cardstock and adhere to layout.
Read NextFunny Faces Scrapbook Layout