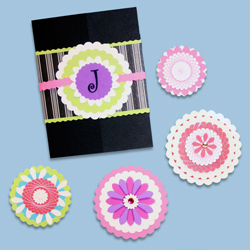
Punched Embellishments
Use a variety of different colors, scraps of papers and nested shapes to create an endless supply of embellishments with these ideas from Uchida of America. Use to embellish boxes, gift bags, tags and more! Glue two identical embellishments together back to back with a loop of thread between for a unique ornament for the holidays! You can also add a punched photo perfectly sized to fit in the center. Punched shapes are also the perfect embellishment for all your hybrid projects.

Materials:
- Marvy® Uchida Clever Lever Craft Punch®:
- Scalloped Circle in three sizes (I used 3”, 2 ½” and 1 ½”)
- Daisy (I used 2”)
- Marvy® Uchida Paper Trimming Buddy™ with Straight Edge, Scoring and Wave cutting blades
- Mini Glue Tape™
- Squishy Scissors
- 8 ½” x 11” Cardstock – Black
- Scraps of cardstock in White, Lime Green and Hot Pink
- 2 ½” x 8 ½” strip of patterned (black & white) paper
- Clear Sticker Paper
- Old, clear, colored plastic folder
Note: Punches are available in 6 sizes ranging from ½” – 3” in diameter. Choose sizes, small, medium and large that are best for your project.
Note: When choosing papers for your layout/project, look for colors and styles that complement your style.
Steps:
1. Cut black, letter sized cardstock in half, so that you have two 8 ½” x 5 ½” pieces. This size is a “Quarter Card”.
2. Score down the center to create a regular, 5 ½” x 4 ¼” card, or to create a gatefold card score, 2 ¼” in from each end. Fold along the scored lines. The front pieces will overlap a little.
3. Use the scalloped blade to cut a strip of lime green paper, 8 ½” x 3”. Adhere the printed paper to this strip. Score along the center, or 2¼” from each end for a gatefold card. Align the edges and adhere to the center of the card.
4. Cut a strip of hot pink cardstock with the scalloped blade 8 ½” x ½”. Set aside.
5. Now for the creative part. Cut the largest scalloped circle from White cardstock, the medium scalloped circle from Lime Green cardstock and 2, daisies from white cardstock. Glue together, overlapping the two daisies in the center.
6. To make the monogram letter, print a reverse image of the letter onto clear sticker paper. Cut about a 2” square around the letter then adhere to the back (dullest side) of the scrap of shiny plastic. Punch around the letter using the smallest size of the scalloped circle punch. Use the punch upside-down so you can easily see to center the letter. Adhere to the punched embellishments.
7. Adhere the embellishment to the front of the card.
8. Gatefold cards don’t usually lay flat, so (referring to project photo) adhere one end of the scalloped pink strip under the daisy layer of the embellishment. Fold around the back of the card then tuck the opposite end under the same layer of the embellishment at the front. Do not glue this end! The band will prevent the card from popping open.
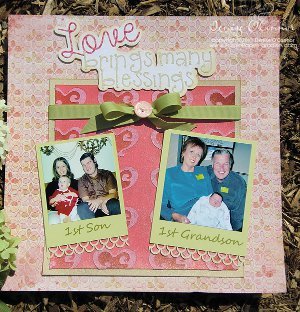
Read NextLove You Forever Layout