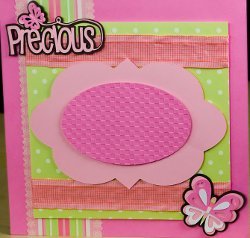
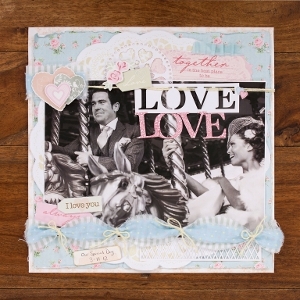
Precious Scrapbook Layout
Use this scrapbook layout to create a fun page in your scrapbook album. The precious embellishment is nice for some family moments or a new family member. In seven steps you can have this layout completed.

Materials:
- Cricut Expression® Personal Electronic Cutter with Plantin SchoolBook and Accent Essentials® cartridges [290300]
- Cricut® Once Upon a Princess cartridge [2000096]
- Cuttlebug® Die Cutter and Embosser [371051]
- Cuttlebug® A2 Embossing Folder [of choice]
- Cardstock: light pink, dark pink, white, brown, green polka dot, striped
- Ribbon: pink
- Embellishments
- Paper trimmer
- Scalloped scissors
- Foam dots
- Adhesive
Steps:
- Use one 12" x 12" sheet of dark pink cardstock as layout base.
- Cut one 4" x 12" block of striped cardstock using scalloped scissors. Adhere to layout as shown.
- Cut one 10" x 10" block of green polka dot cardstock. Wrap ribbon around top and bottom of block as shown and adhere. Adhere block to layout as shown using foam dots.
- Cut tag. Using Once Upon a Princess cartridge and light pink cardstock, select Tag feature and cut one 6 ½" <Doll1>. Using dark pink cardstock, select Tag feature, press Shift and cut one 6 ½" <Doll1-s>. Emboss oval using Cuttlebug machine and embossing folder of choice. Layer and adhere to layout as shown using foam dots.
- Cut Precious. Using light pink cardstock, select Phrase feature and cut one 2 ½" <Buttrfly>. Using dark pink cardstock, select Phrase feature, press Shift, and cut one 2 ½" <Btrfly-s>. Repeat cut using brown cardstock and Base Shadow/Phrase Shadow feature. Layer and adhere to layout as shown using foam dots.
- Cut butterfly. Using light pink cardstock, cut one 2 ½" <Buttrfly>. Repeat cut using white cardstock and Layer feature. Repeat cut using brown cardstock and Base Shadow/Phrase Shadow feature. Using dark pink cardstock, press Shift and cut one 2 ½" &tl;Btrfly-s>. Repeat cut using striped cardstock and Layer feature. Layer and adhere to butterfly as shown using foam dots.
- Add embellishments as desired.
Read NextBeach Day Scrapbook Layout