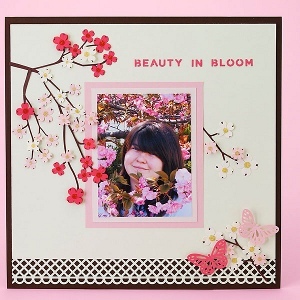
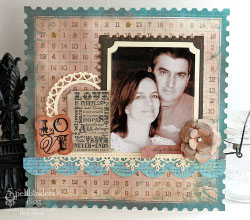
Lovely Scrapbook Layout
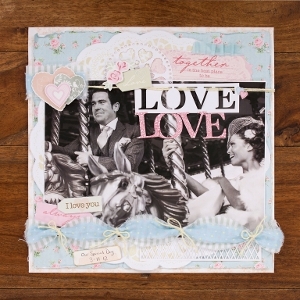
Are your a scrapbook-aholic? Create this lovely scrapbook layout from Spellbinders for your next project! You won't believe how easy it is to complete this paper craft.
Materials:
- LF-168 Grand Large Labels
- S4-114 Standard Circles Lg
- S4-316 Heart Circles
- LF-001 Creative Book Pages
- LF-168 Grand Large Labels
- S7-018 Big Scalloped Border Grand
- S4-311 Label Nineteen
- S5-042 Fleur de Lis Doily Accents
- S5-050 Rose Creations
- S4-324 Ribbon Banners
- My Mind’s Eye patterned Paper
- Tattered Angels Vanilla Breeze Glimmer Mist
- Layers of Color Art Stamps The Love Chapter Illustrated by Nina Brackett
- Zip Dry by Beacon Adhesives
- Cream colored and craft colored cardstock by Worldwin Papers Black 3D Foam Squares by SCRAPBOOK ADHESIVES By 3L
- Fluid Chalk Ink in Burnt Sienna and French Blue by Clearsnap
- Black ink
- Acrylic stamp block
- Embellishments
- Sepia-toned photograph
Directions:
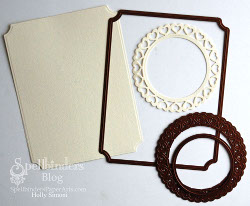
- Cut/emboss LF-168 Grand Large Labels #3 (#1 being the smallest) out of cream colored cardstock. Nest S4-114 Standard Circles Lg #4 inside S4-316 Heart Circles #4 and cut/emboss out of cream colored cardstock.
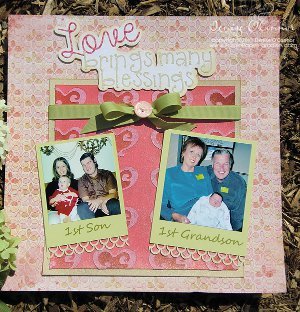
- Cut/emboss LF-001 Creative Book Pages #5 out of brown patterned paper. Stamp Love sentiment onto craft colored cardstock. Align LF-168 Grand Large Labels #2 around stamped sentiment, cut/emboss.
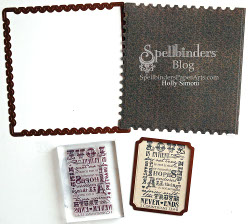
- Cut/emboss S7-018 Big Scalloped Border Grand out of blue patterned paper. Stamp script sentiment onto Big Scalloped Border Grand die cut as shown above.
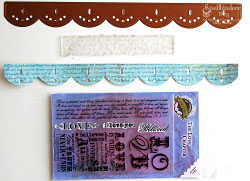
- Cut/emboss S4-311 Label Nineteen #2 out of cream colored cardstock. Spray with Vanilla Breeze Glimmer Mist and allow to dry. Stamp LOVE sentiment onto the die cut.
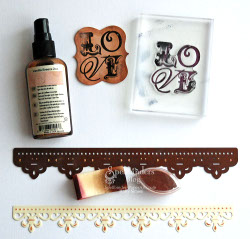
- Cut/emboss S5-042 Fleur de Lis Doily Accents border out of cream colored cardstock. Using the die template as a stencil, apply fluid chalk ink to the die cut as shown above.
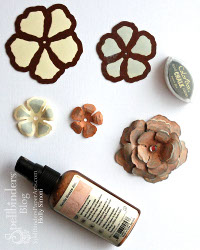
- The photo above shows each step I used to create the dimensional rose.
- To start, cut/emboss S5-050 Rose Creations #3, #4, #5, #6 out of cream colored cardstock. Using each die template as a stencil, apply fluid chalk ink directly to die cut. Remove from the die template. Bend and curl each petal of each Rose Creation die cut. Spray all die cuts with Vanilla Breeze Glimmer Mist and allow to dry.
- Stack each Rose Creation die cut beginning with the largest on the bottom and layer up to the smallest. Adhere each Rose Creation die cut by applying Zip Dry to the center of each. Add a bit of bling to the center.
- Spray Glimmer Mist onto 12 x 12″ patterned paper. Cut/emboss LF-168 Grand Large Labels #2 out of sepia toned photograph. Cut/emboss S4-324 Ribbon Banners, spray with Glimmer Mist, hand write journaling onto Banner die cut. Adhere all elements as shown above.
Read NextLove You Forever Layout