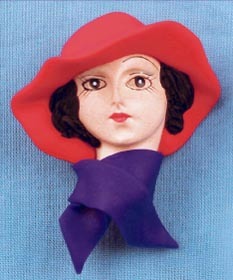
Uptown Ladies Porcelain Like Face
Create an uptown lady with a porcelain-like face and polymer clay.
By Lisa Galvin, CCD, CPD for AMACO
Materials:
- AMACO® Porcelain-Like Face — Item No. 14143F
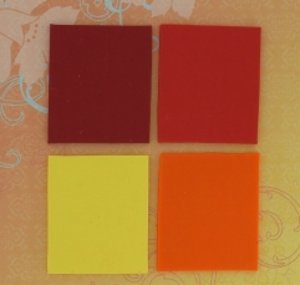
- FIMO® Soft Polymer Clay — 2 oz blocks: Indian Red (#24), Plum (#63), and Black (#09)
- AMACO® PolyRoller, Acrylic Roller for Clay (or AMACO® Pasta Machine)
- AMACO® Flexible PolyBlade
- FIMO® Gloss Lacquer
- 1" Pin Back
- E6000 Glue
- Freezer Paper
- Masking Tape
- Toothpick
- Baking Sheet Dedicated to Polymer Clay Use
- Home Oven or Dedicated Toaster Oven
- Index Card
Steps:
- Preheat oven to 265°F (130°C). Cover work area with freezer paper. Tape corners down. Knead a 1 oz block of both Red and Plum clay to condition. Roll each color to create thin clay sheets, approximately 1/16"-1/8" thick.
- HAT: Use blade to cut a 1/2" x 1" strip of Indian Red FIMO® Soft. Lightly press clay onto top of head to create a scull or “swim” cap that will become top of hat. Wrap ends to backside.
- BRIM: Knead remaining Red clay and then roll onto a solid surface with palms; creating a rope slightly smaller than a pencil in thickness. Cut a 11/2" length, center, and then drape the rope across bottom of the clay scull cap, allowing excess to extend at side edges. Lightly press to join. Use fingers and thumbs to pinch rope; shaping to create hat brim. Cut excess if needed.
- SCARF: From rolled sheet, cut an approximate 1/2" x 3" strip of Plum FIMO® Soft. Trim ends to create angled tips of scarf. Position on back side of neck then wrap to front; crossing to resemble a scarf. Press lightly to ensure good contact between clay and the porcelain-like face. Shape as you like.
- HAIR: Knead a dime size ball of Black FIMO® Soft. Roll with palms to create a thin rope. Working with a little at a time; press small pieces of the rope onto the porcelain-like face; creating hair. Use a toothpick to press the clay firmly in place and to form “hair” lines; shaping and styling as you like.
- Trim excess clay from back of head (if needed); smoothing with fingers to taper side edges. Place onto an index card. Bake on a baking sheet for approximately 40 minutes. Let cool.
- Brush with FIMO® Gloss Lacquer. Let dry. Glue on pin back. For best results allow glue to set overnight before use.
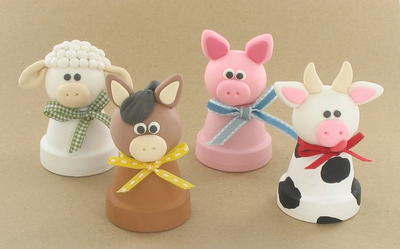
Read Next4 Barnyard Polymer Clay Ideas
Your Recently Viewed Projects
Thanks for your comment. Don't forget to share!
GrandmaJoyce
Jun 13, 2010
Adorable.! I just went to a wedding with and Oriental Theme. They had made faces of sort and put them on a chain draped around a small glass vase with a ribbon under it with the name of the bride and groom. Then the glass was filled with small candies put in a lacy tie up that fit inside the glass with a small rose on the top. SO CUTE!! I thought this would be cute for the Group my sister belongs to. Red Hat ladies that have lunch once a month. They all wear Red and Purple. Thanks so much for showing how these can be made. GrandmaJoyce Shasta Lake, CA
Report Inappropriate Comment
Are you sure you would like to report this comment? It will be flagged for our moderators to take action.
Thank you for taking the time to improve the content on our site.