Pretty Summer Windchimes
Use metal blanks, alcohol inks and even leftover beads to create your own Pretty Summer Windchimes. Mixed media project ideas don't have to be difficult or time-consuming. Use what you have to add a pretty touch to your porch, deck or indoor space.

Materials:
- Spellbinders Media Mixáge metal blanks with matching dies
- Artisan Explorer die-cutting and embossing machine
- Spellbinders Media Mixáge texture plates
- Alcohol inks and applicator
- Craft paint
- Decorative papers
- Craft glue
- Clear gel glue
- Chipboard (or metal) gear
- Acetate (plain and printed)
- Glitter glue
- Adhesive rhinestones
- Paintbrush
- Parchment paper
- Thin clear elastic beading cord
- Regular and heavy-duty hole punches
- Assortment of beads
- Crimping beads and pliers
- Round-nose pliers
- Jump rings and eye pins
- Decorative ornament hook
Instructions:
-
There are many shapes of metal blanks in the Media Mixáge line from Spellbinders to choose from, with matching dies to cut and emboss papers and foils to decorate the blanks. Decorate your blanks in any of the following ways:
- Paint the blanks with alcohol ink or glitter glue
- Die-cut papers or printed acetate to glue on one or both sides of the blanks (use the clear gel glue for adhering acetate)
- Embellish with adhesive rhinestones
-
Emboss with a texture plate
-
Punch a small hole at the top of each blank, if needed, and thread some clear thin beading cord through each one and close it with a crimping bead (make the cords the same length so the blanks will clink on each other in the breeze). Add a couple larger beads to cover the little tail. You can also place a crimping bead up further on the cord to float some smaller beads. Instead of crimping beads, you can opt to tie the cord around a jump ring that you’ve attached to the blank, then tuck the knot inside a larger bead on top.
-
For the hanger, paint a chipboard shape of a gear with craft paint. To give it more rigidity so it holds the weight of the metal blanks and beads, glue it to a circle of acetate. After that’s dry, punch tiny holes at the end of each spoke and another set of holes about halfway up each spoke.
- Thread each cord through a hole, add a flat bead and tie it off in a double knot. Add a couple drops of clear gel glue inside the bead to secure the knot. Put an eye pin through each of the inside holes in the gear, then use round-nose pliers to make a loop on the end of each pin and attach all 5 pins to a jump ring. This will keep everything hanging straight on an ornament hanger.
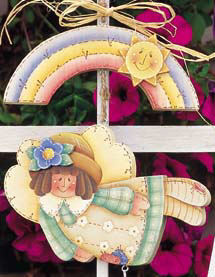
Read NextAngel Wind Chime