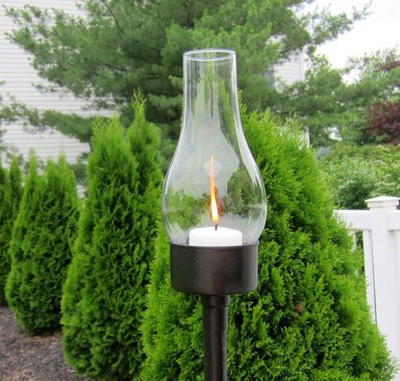
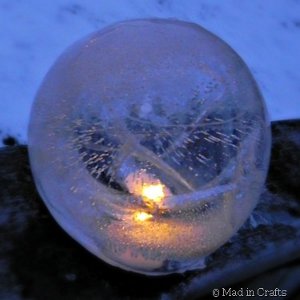
Fire and Ice Luminaries
How cool are these Fire and Ice Luminaries from Jessica Hill? Made by freezing water balloons, these ice luminaries are perfect for parties and evening gatherings. Try coloring the water before putting it in the balloon for a neat effect!
Materials:
- 1 package of 3 punch balloons from the dollar store
- 1 package of 3 LED tea lights from the dollar store
- Bowls
- Small cylinder (shot glass, pop bottle, etc.)
- Water
- Freezer or below-freezing outdoor temps
Instructions:
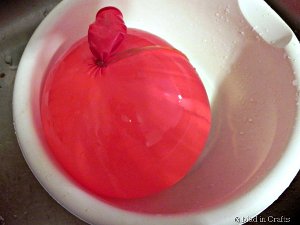
- First, stretch the opening of one punch balloon over your faucet. The punch balloons are thicker than normal party balloons, so they can take quite a bit of stretching and snapping.
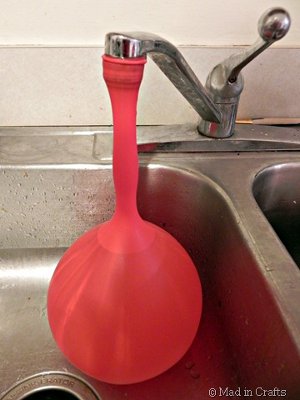
- Turn on the faucet and let the water pressure fill the balloon to your desired size. My lanterns were about 6-8 inches in diameter.
- Pinch off the opening of the balloon and wrap the attached rubber band around the neck of the balloon (like a ponytail) to temporarily tie it off. This will take a little finesse. The water in the balloon won’t want to stay in there, so it will try to spout back at you.
- If you were to freeze the balloon as it is, you could make a lovely ice orb. If you want to be able to insert a light inside the ice lantern, you need to create a notch for it in the candle.
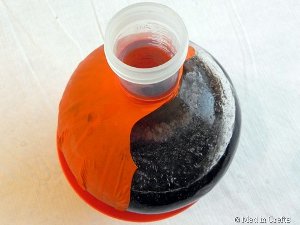
- Stretch the opening of the balloon neck over whatever cylinder you choose to use. Just make sure the diameter of the cylinder is slightly larger than your candle.
- Once the cylinder is fully plugging the opening of the balloon, you can remove the rubber band. Little by little, work the neck of the balloon over the cylinder until a few inches of the cylinder are submerged in the water.
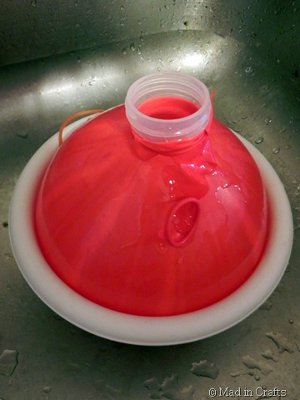
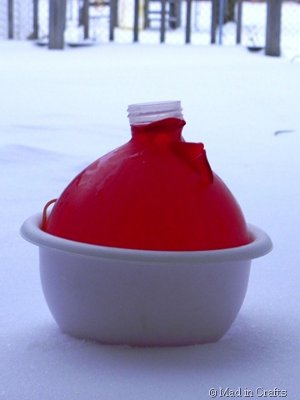
- Place the balloon in a bowl that is roughly the size and shape of the filled balloon. For two of my lanterns, I used a bowl that was too small, which resulted in more egg-shaped lanterns than perfect spheres. Place the bowl in a freezer or in a snow bank for 12-24 hours.
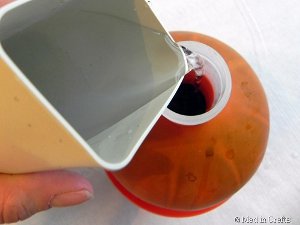
- I brought in my first lantern after 12 hours. I poured hot water into the cylinder to loosen it from the ice.
- One quick slice with a knife and the balloon peels away from the ice. Carefully remove the ice lantern from the bowl. Because this lantern only froze for 12 hours, the shell of ice was thin and the center was not frozen. The water inside the shell will need to be emptied into the sink to avoid a mess.
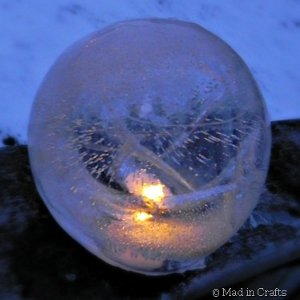
- Place an LED tea light onto your table and set the lantern carefully over it. If you choose to use a real candle instead of a tea light, you will need to create a “chimney” at the top of the lantern, either by drilling or melting, to allow oxygen into the lantern. Also, the lantern will obviously melt more quickly with real fire inside.

- The thin shell of the lantern allows a lot of light to shine through the ice, but it is quite fragile.
- As an experiment, I added some blue food coloring to the water on the final lantern as I filled it. The result was pretty cool. When making these again, I might try other add-ins, like glitter or flower petals.
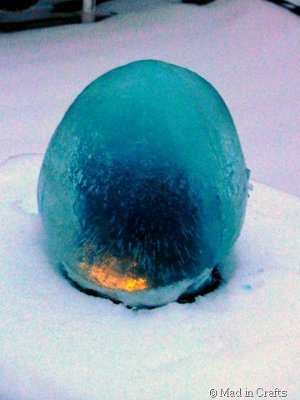
- If you use food coloring in a lantern, realize that the dyed water will melt onto whatever surface on which you have place the lantern; and food coloring stains. A placemat or lipped tray would catch the drips.
Read NextScrap DIY Garden Stakes
Your Recently Viewed Projects
Thanks for your comment. Don't forget to share!
flowergirl
May 25, 2018
When I saw the word luminaries I immediately thought of party lighting but then this luminary doesn't last very long so it isn't appropriate for summer. However it makes the perfect evening lighting for a winter event. It does look better with some colour and if you like a little more dazzle and some glitter into the water.
princess6860504
Jun 21, 2017
Oh yes, these would be stunning for those winter weddings. I can imagine the globes lining the pathway to mark where the happy couple will walk on the way to the alter. An addition of pretty flower petals in the colors of the wedding party is a great idea, too. I always thought making something like this was beyond my abilities. I see now how EASY it is. Appreciate the instructions!
FrasierFan1901
May 18, 2017
What a really neat and clever idea! I will have to try this next winter. I like the idea of using LED lights for this, and I really love the food coloring.
The Designing Peng uin
Oct 17, 2016
Can't wait to make these -- shall put them on the porch steps and along the railing. A truly delightful way to greet guests.
Member 16532
Feb 06, 2013
My duaghter will be having a winter wedding next year. These will light the way to the reception.
anneberrett3 64942 95
Feb 01, 2013
what a great idea. can imagine a grouping of 3-5 orbs. asacenterpiee
bpackfrgldy 789348 4
Jan 29, 2013
think this would be great fun to try with the kids ( mine are older) - would be great to do at camp when the weather is brrr cold out
mreich9 7142892
Jan 22, 2013
Can anyone tell me what happens to the patterns we save in our project area. Was so busy over the holidays to do any crafts, but took the time everyday to save the projects that I would like to do, and now that I have time I went there and most of the projects I saved are not there. Is there a time limit or a limit of how many we can save. I am just heart broken as I got up an hour early every day so that I could save the projects I wanted.
jilllorraine 39739 41
Jan 28, 2013
I save my stuff in an email folder, never to be lost even when my computer crshed!!!
lott
Feb 03, 2013
I thought I had lost all mine too but found them in Adobe Reader X. It also creates a PDF so you can print then easily.
tylers82 6402863
Jan 21, 2013
I like the idea of this winter decoration to brighten things back up after taking Christmas things down!!
Palmersara 7056065
Jan 21, 2013
I have made these using empty 1/2 gallon ice cream containers. Weight a glass in the container before the ice freezes and when froze take out glass and use a real candle. Several lining the sidewalk in winter is pretty.
mema1drfl 6244680
Jan 21, 2013
I love these. I made them when I lived in Minnesota, 20 some years ago. You certainly need a very cold place to make these. Or if you have a really big freezer. They looked beaityful up and down my sidewalk and driveway during the holidays!
janemarie1960 0578 761
Jan 21, 2013
Very creative! Thanks for sharing.I can't wait to to try this!
uspsred 9497614
May 12, 2012
Sorry I am not really a crafter but I really want to try this. What is the "cylinder"? Is it closed on one side or open on both ends?
janemarie1960 0578 761
Jan 21, 2013
My understanding is the cylinder is something a bit bigger than the diameter of your light, like a small plastic cup or shot glass.it creates the hole that the light fits into.
Member 6940677
Apr 02, 2012
I have to say Jessica, that this is *Coolest* idea I have seen in a long time. I can't wait to make these! They would be really nice to make in a light orange and set on my steps for Halloween too. Red & Green on the steps to great guests over for Christmas Celebrations, etc. With your Beautiful craft, the ideas are limitless. Thank You for sharing! I Love Them!
mcconsbruck5775 43 75191
Apr 02, 2012
we've put everygreen/holly snips in-beautiful--------remember the haloween ones would depend on weather conditions outside as far as long lasting
Report Inappropriate Comment
Are you sure you would like to report this comment? It will be flagged for our moderators to take action.
Thank you for taking the time to improve the content on our site.