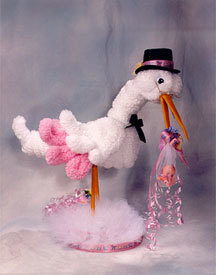
Baby Stork on its Way
Babies are the most precious thing in this world. Help welcome these babies with a little stork. It's great for baby showers as a gift or decoration.

Materials:
- STYROFOAM* Brand Products:
- 1- Discs: 10" x 1"; 1- 7 1/2" x 1 1/4"
- 1- Egg, 3"
- 1- Cone, 9" x 4"
- Jumbo loopy chenille: 1- yds., blue or pink; 6- yds., white 3" Styrofoam Egg (FloraCraft)
- 8" 1- Extruded wreath ring
- 1- Poster board, 8 1/2" x 10"
- 1/4" Wooden dowel, 10 - inches long
- 1- Felt, 9" x 12", gold
- 1- Baby doll, 3"
- 2- Flower picks, 1 1/2"
- 3- yds. #9 ribbon, blue or pink
- 1- Black felt top hat, 5"
- 2- yds. Curling ribbon, pink or blue
- 1- Purchased eyes (pair), 28mm
- 1- Pair of plastic eyeglasses, 4"
- 1- yd. 7/8" Satin ribbon, black
- 32-gauge tie wire
- 2- Craft sticks
- T-pins
- Floral pins
- Serrated knife
- Scissors
- Nail file
- Low temperature glue gun and glue sticks
Steps:
- Measuring from outside of the extruded foam wreath, mark and cut a 5 1/2" piece for neck.
- To make the body, round the sharp edge of the cone base by rolling and pressing it along the table.
- To join the neck to the body, saw out a piece of the cone at the base so one inch of the neck fits into the body and the rounded part of the neck is flush with the cone base. Adjust it so the neck is turned slightly to one side and glue in placeFor the head, hold the large end of the egg at a slight downward angle next to the neck. Push and turn the head onto the neck. Glue in place. Cut a 7 1/2" piece of white jumbo loopy chenille and glue lengthwise around the egg from the neck back around the egg and to the neck front. Cut two 13" pieces of white chenille. Shape each one into a spiral and glue one to each side of the head.
- Cut a 2 2/3 yard piece of white jumbo loopy chenille. Wrap it around and around the cone from point to the base. Secure it with glue and floral pins. Cut a 17" piece of white chenille make it into a coil and glue it to the chest. Cut a 6" piece of white chenille bend it in half and glue it to the back for a tail covering the tip of the cone.
- Cut a 28" piece of white jumbo loopy wrap it around the neck from the cone to the egg. Secure it with glue.
- To make the top of the bill mark the center of one short end of the 5" x 2" posterboard. Draw lines from the center mark to the corners of the opposite side. Cut out the triangles. Repeat with 5" x 1 1/2" posterboard for the bottom of the bill. Wrap the posterboard pieces in gold felt cutting them to fit so the edges are flush with the center of the bill. Glue and curve the top bill to fit the bottom one. Glue and pin them together with t-pins to the bottom of the head.
- To make the wings cut two 13" pieces of white jumbo loopy. Coil each piece into a circle glue and pin (with t-pins) one coil to each side of the body of the body just below the neck. Cut two 20" pieces of white chenille to make feathers. Fold and twist each piece so you have a 4" feather, a 3" feather and a 2" feather. Glue and pin one on each side of the body, under the edge of the coiled piece of loopy and pointing to the back of the body. Cut two 20" pieces of blue jumbo loopy chenille and repeat to make another group of feathers. Pin and glue one to each side of the stork just under the first set of feather (use t-pins).
- To make legs, cut the dowels into two 9" pieces . Cut two 9" x 1 1/4" pieces of gold felt. Cover and glue felt to dowels. Push one end of the dowels into the body 3" back from the front of the storks chest and 1 1/2" apart. Push the other end of the dowels into the 7 1/2" disc. Secure with glue.
- Glue the 7 1/2" disc to the top of the 10" disc and 1/2" from one edge (this edge is the back). Cut a 33" piece of #9 Pastel ribbon. Glue it around the edge of the 10" disc. Cut a 24" piece of #9 pastel ribbon. Glue it around the 7 1/2" disc.
- Glue an eye to the face 1/2" back from each side of the bill. Push the glasses onto the face so they rest on the bill. Secure with glue.
- Cut a 12" piece of #9 pastel ribbon glue it around the hat above the brim. Glue a small bunch of pastel flowers to the back of the hat. Glue the hat to the top of the head.
- Using tie wire and 3/4 yard black satin ribbon make a single bow. Glue it to the front of the stork just below the neck for a tie.
- Use the 3/4 yard piece of Tulle, lay it between the storks legs with a little more in the front than in the back. Using a nail file gather and tuck the tulle into the disc's until the discs are covered.
- Cut a 6" x 14" piece of Tulle. Fold the tulle piece in half and tie at the top with tie wire. Slip the baby doll inside the fold. Glue the tied end to the inside of the bottom of the stork's bill. Cut a 24" piece #9 pastel ribbon. Using tie wire make a single bow. Glue it to the top of the tulle bag. Cut two 1 yard pieces of curling ribbon. Curl and glue them to the back of the bill behind the pastel bow. Glue a small bunch of flowers to the neck of the stork in the bow tie.
®™ Trademark of The Dow Chemical Company ("Dow") or an affiliated company of Dow. For more project ideas, please see styrofoamstyle.com.
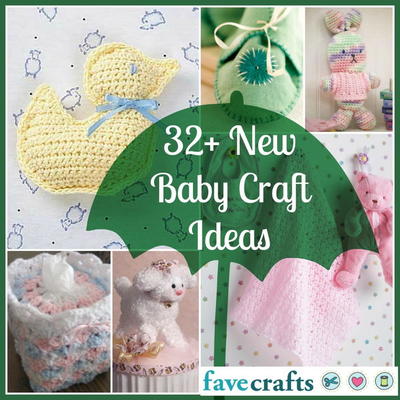
Read Next32 New Baby Craft Ideas
Your Recently Viewed Projects
Thanks for your comment. Don't forget to share!
Weberme
Nov 30, 2018
This stork would make a great centerpiece for a baby shower with the color of the baby gender or just make in green or yellow if you are not telling the gender. Put the stork on a pedastal and put gifts around it. Super cute idea and it can be put as a decoration in the nursery.
Report Inappropriate Comment
Are you sure you would like to report this comment? It will be flagged for our moderators to take action.
Thank you for taking the time to improve the content on our site.