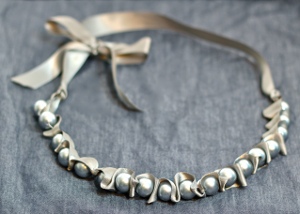
Ladylike Ribbon and Pearl Necklace
Combine ribbon with pearls for an inexpensive, trendy DIY necklace that works equally well for an evening out and at the office. This ribbon necklace DIY is simple enough for a beginner jewelry crafter.
Materials:
- Thin wire
- Ribbon (2 yards)
- Needle
- Pearl beads (about 12 inches worth)
- Crimp beads
- Pliers
- Lighter
Video:
Supply Tips:
- You’ll need some thin wire, about 2 1/2 feet. You could also use clear monofilament or fishing line, but it’s a little more difficult to work with because it’s harder to see.
- You’ll need a strand of pearl beads. They come in a variety of sizes and colors, and can be found at craft stores. This strand cost $6 on sale, and I’ll have some beads left over. You’ll need a sewing needle.
- And, you’ll need about 2 yards of ribbon. Make sure that it’s two-sided– that is, you don’t want to choose a ribbon with a pattern on only one side. I chose a gray satin.
- It’s also a good idea to buy crimp beads for extra durability.
Instructions:
- Cut about two yards of ribbon. Thread a needle with your wire. You can either tie a knot at the end of your wire, or you can leave it on the spool until you’re finished.
- Poke the needle through the ribbon, about 20 inches from one end. Pull the wire through, then thread a bead onto the wire. Poke the needle back through the ribbon, close to the bead.
- Now take the loose end of the ribbon and fold it over at a right angle. Poke the needle up through the ribbon triangle this creates.
- Pull the wire taut and thread another bead on. Repeat the previous steps of poking the needle down through the ribbon close to the bead, folding the ribbon up over itself at a right angle, and threading the needle up through it.
- Continue adding pearls in this manner until it’s the length you desire. The beaded portion of my ribbon measures 12 inches.
- Now tie a knot in each end of the wire, close to the last pearl. Thread a crimp bead onto the wire. Then loop the end of the wire and tuck it back through the crimp bead. Use pliers to pinch the bead, securing it in place.
- Then, tie a knot in the ribbon to cover the crimp bead. Repeat on the other end of the necklace.
- I left my ribbon long to tie a pretty bow. I decided I like it on the side, rather than the back, so I trimmed one end shorter. It’s best to try your necklace on, then cut the ends of the ribbon to the desired length.
- Finally, singe the ends of the ribbon with a lighter to prevent fraying.
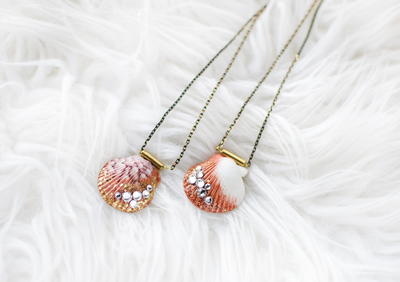
Read NextShimmer Seashell Necklace DIY


Thanks for your comment. Don't forget to share!
Delphine Bryant
Nov 07, 2018
Great idea Bronze Hazel. This would be perfect as a bracelet and necklace set. With only the one picture and written directions (video no longer available) I may have a little trouble as I am not a jewelry maker. I would love to give it a try and see who it turns out though.
Morehouse17
Oct 31, 2018
I have no idea why I thought of the song by the artist formerly known as Prince, "Diamonds and Pearls", but I can't get the tune out of my head now. This is really pretty. Simple and classy. Really sorry the attached video was not longer available and hoping the written instructions will see me through.
Bronze Hazel
Feb 07, 2017
This is so beautiful and elegant. I just love it and it definitely looks easy enough for a beginner jewelry maker. I think it would be lovely to match it up with a bracelet. It was also be lovely to make it as a multi-strand necklace or bracelet. There are so many possibilities, I can't wait to give it a go.
Weberme
Apr 04, 2016
This looks so elegant. Seems to be easy so I guess I will find out soon.I have some ribbon and pearls on hand from leftover projects.I love the colors you choose. Thank you so much for the video to go with it. Makes it so much easier by watching it. I have seen these necklaces on people but they looked so complicated. Can you use other beads besides pearls? Has anybody used anything else? How did it turn out?
EditorLP
Feb 05, 2016
This necklace is so pretty and glam while also being really easy! I think I'll try it with a smaller amount of ribbon to make a bracelet.
jljapple 7260154
Sep 02, 2014
Instead of playing with fire, ie. a lighter, you could dab the ribbon edges with a little clear nail polish. If you prefer playing with fire, I hope you keep it away from the nail polish! I usually have neither a lighter nor the nail polish at home, but think they cost about the same amount. I consider Grace Kelly to have been an exquisite beauty. Thank you for sharing this craft!
Cath M
May 13, 2014
The necklace is lovey. The only problem was finding a needle that had a large enough eye for the wire, but narrrow enough to get through the bead. It may take a while to get this right. We got through this by poking through the ribbon with the wire and not using the needle.
Member 0441962
Mar 29, 2014
I think this bracelet will be great for my granddaughter who is 10 yrs. Old. All this would make a great craft to teach her, she is a quick learner & loves all kinds of crafts for us to spend quality time together. Thanks. Jackie
fancywriter 337204 5
May 15, 2013
I cannot start a new hobby right now, I am so heavily vested in Pen and Ink supplies and card-making supplies. But it looks like a simple project and very forthcoming details.
akwittig
Mar 13, 2013
What is a crimp bead?
mariahadams16 3175 371
Mar 19, 2013
It's a little metal bead you use to keep other beads on and to keep them from sliding around. You put it at the end and then make a loop with the string and put it back through the crimp bead and then use pliers to squeeze the bead flat. Before I make the loop I usually thread the string through a jump ring.
MomLara
Mar 13, 2013
I like it, very simple directions. I can assume that you need a beading needle as a regular needle's eye probably won't fit though the pearls, right?
Report Inappropriate Comment
Are you sure you would like to report this comment? It will be flagged for our moderators to take action.
Thank you for taking the time to improve the content on our site.