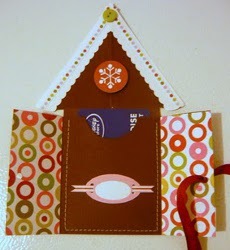
Gingerbread Gift Card Holder
If you're giving any gift cards this holiday season, you'll want to wrap them up in a creative and special way. Make the Gingerbread Gift Card Holder from Heather Parsons and you'll have the perfect way to give away your present.

Materials:
- Brown cardstock
- White cardstock
- A small scrap of decorative paper for the inside of the doors
- Embellishments
- Ribbon
Instructions:
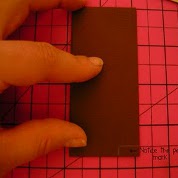
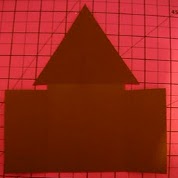
- Start by making the base of the house. To do this cut a piece of cardstock 3 1/2 x 5 3/4".
- Score a line along each side at 1 1/2 inches to form the doors.
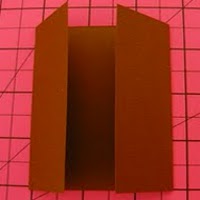
- Fold in doors and crease.
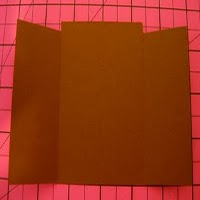
- Cut a piece off the top of each door, about a 1/4 inch down from the top and all the way to the fold (see image)

- Now make the roof. I am sure there is some mathematical equation for this; if so, I long forgot it. This is the method I came up with. Start with a piece of paper 3 3/4 x 4".

- Fold in half with 3 3/4 being the height of the paper.
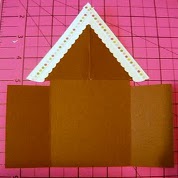
- Draw a notch in towards the fold about 5/8 inch long and about a 1/4 inch deep (see image)
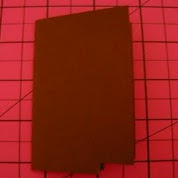
- Cut out the notch.
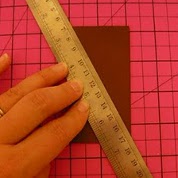
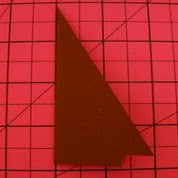
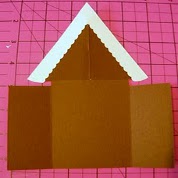
- Now place a ruler from the corner to the center fold. Cut with an Exacto knife or draw a line and cut with scissors. It will look like this (below) after the cut.
- Now open the roof piece and glue to the back side of the house base. It will look like this(below):
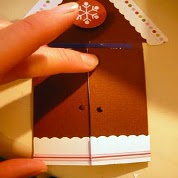
- All that is left is to decorate. To make the snow I cut strips of white paper with some decorative scissors that have a scalloped edge.
- I added a strip of polka dot paper to each side. The remaining decorations are all up to you. I added a piece of decorative paper to the inside of each door. I put a strip of snow on the outside of the doors as well. You could add buttons or brads. The sky is the limit really. There is no wrong way to decorate a gingerbread house.
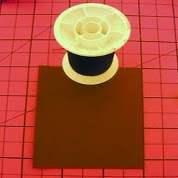
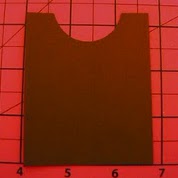
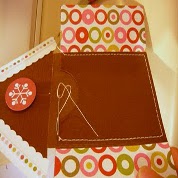
- Now to make the gift card pocket. I cut a piece of paper that was 2 3/4 x 3 1/4". I wanted a circle notch cut from the top so I traced a spool of thread as my pattern for that.
- Looks like this when cut.
- I decided to sew my gift card pocket in place. It could be attached with brads or eyelets. I wouldn't recommend glue or tape as it would be hard to get the gift card in and out. If you decide to sew then what I always do once I have completed my sewing is thread the top strings through a needle and then through the card to the back side. I tie them in a knot and then cut. Don't attempt to backstitch on paper. That doesn't work so well.
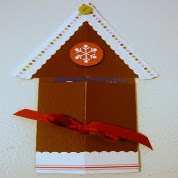
- Lastly punch two holes (one on each side) in the doors. Tie a ribbon through both and into a bow and you are done.
See the outside of the finished card below:
Read NextRecycled Christmas Cards