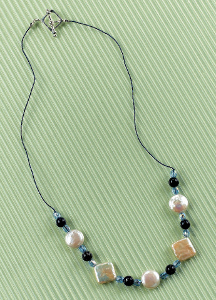
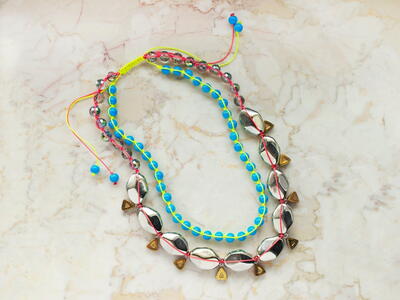
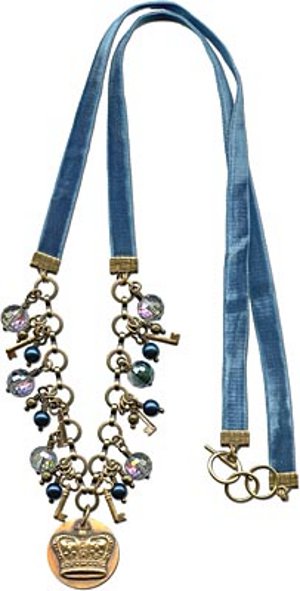
A Charming Life Necklace
These cute charms are the perfect addition to this Charming Life Necklace from Rings and Things. With beads and random jewelry accessories, making chain jewelry is easy, fun, and budget friendly! The soft ribbon on this necklace is a nice, comfortable touch.
Materials:
- 1 ea Adhesive, EcoGlue™, 2oz
- 1 strand [use 6] Bead, Glass, Faceted Round, 10mm
- 1 strand [use 6] Bead, Metal, Faceted, 4mm
- 1 spool [use 6.5"] Chain, Footage, Ring/Connector, 9mm
- 1 doz [use 1] Charm, Crown, 21x22mm
- 1 doz [use 6] Charm, Key, 17x7mm
- 1 0.5 gross [use 4] Clamp, Necklace, 10mm
- 1 ea #39-181-57-6 Clasp, Toggle, 3 Ring, 12mm
- 1 strand [use 6] Crystal Pearl Bead, Round, 6mm, Strand
- 1 doz [use 1] Disk, Round, 25mm, 1 Side Scored
- 1 ea Flux, Simply Swank, 0.5oz
- 1 pkg of 100 [use 18] Head Pin, 1.5", Standard, Ball End
- 1 oz [use 1] Jump Ring, Round, 8mm
- 1 oz [use 32] Jump Ring, Round, Heavy, 4.5mm
- 1 ea Novacan Black Patina
- 1 spool [use 22"] Ribbon, Velvet, 3/8", 10yd
- 1 ea Solder, Simply Swank, 2oz
- Polishing Cloth, Brilliant
- Butane Micro Torch
- Fire Block
- Glitter
- Nylon Jaw
- Flat-Nose Pliers
- Lindstrom® Four-Piece Set
- Simply Swank, Soldering Iron Stand
- Simply Swank, Soldering Iron, 60 Watt
- Titanium Soldering Pick
- Steel wool
- Paper towels
- Tooth picks
Instructions:
Method 1 – Cut then bend…
- String selected beads on the head or eye pin.
- Keep about 8mm (1/3") of wire. Cut off any extra.
- Use round nose pliers to grasp the wire just above the bead, at the arrow, and bend sharply away from you.
- Now use small round nose pliers to grasp the tip of the wire, and bend it smoothly around the pliers down close to the beads.
Method 2 – Bend then cut…
- String selected beads on the head or eye pin.
- Use round nose pliers to grasp the wire just above the bead, at the arrow, and bend sharply away from you.
- Keep about 8mm (1/3") of wire. Cut off any extra.
- Now use small round nose pliers to grasp the tip of the wire, and bend it smoothly around the pliers down close to the beads.
Wire-wrapped beaded head or eye pins:
(For best results, use both chain-nose and round-nose pliers.)
- Use chain-nose pliers to grasp the wire just above the top of the bead.
- Use your fingers to bend the wire sharply over the top of the pliers, at a 90° angle. You should have 2-3mm of straight wire between the bead and the bend (less for fine-gauge wire, more for heavy wire or more wraps).
- Use round-nose pliers to grasp a spot just above the bend, and use your fingers to smoothly bend the wire all the way around the tip of the pliers. (For different sizes of loops, bend the wire around thinner or thicker portions of the pliers’ tip.)
- Now use pliers to grasp the wire firmly across the loop. Use your fingers or chain-nose pliers to carefully wrap the wire around the stem. For best control, experts recommend you break this step into a series of half wraps.
- Trim excess with flush cutters.
Jump-Ring Hint:
- When you open and close jump rings, twist sideways instead of “ovalling” them. This keeps their shape better, which makes them easier to close all the way.
Chain Links:
- Open un-soldered chain links the same way you would a jump ring.
Double Jump Rings:
- Double them up for extra security, or a chain-mail look.
How to Use Crimps:
- For all crimping, use firm pressure, but don’t squeeze so hard that you cut the stringing material or break your tools.
- To simply flatten a crimp bead or tube, use fl at-nose pliers.
- To achieve a smaller, rounder crimp, use crimp pliers.
- Use a crimp cover to hide the crimp inside what looks like a 3-4mm round bead.
- Small center-crimp tubes may require needle-nose pliers or fine-tipped fl at-nose pliers.
- Use the outside indent to shape the crimp into an oval.
- With the cord on either side of the indent, use the inner indent to secure the crimp around the cord.
- Move the crimp back to the outer indent to fold it into a round shape.
Bullion (aka French Wire):
- Cut two pieces in precise equal lengths (approx ½-¾”), add one crimp or bead and one piece of bullion to the end of wire cable. Loop the cable through one portion of clasp and back through the crimp or bead. Pull gently until the bullion is inside finishing bead or flush against the crimp. Crimp closed.
Designer Tips
- Punch a hanging hole in the brass disk to match the placement of the hole in the crown charm.
- Solder the crown to the brass disk. Clean, patina and polish the pendant.
- Add a jump ring and attach to the center link of the chain.
- Patina and polish the key charms.
- Create wire-wrapped dangles with the crystal pearls, sparkly glass beads, and metal beads.
- Use jump rings to attach the dangles and key charms to the remaining links of the chain.
- Cut the ribbon into two equal pieces. Use EcoGlue™ and nylon-jaw flat-nose pliers to attach necklace clamps to each end of the velvet ribbon.
- Vary the length of ribbon to customize the length of the necklace.
- Use jump rings to attach the adorned chain to the necklace clamps. Use jump rings to attach the toggle clasp to the opposite necklace clamps.
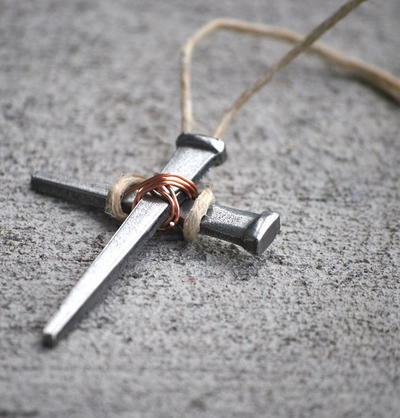
Read NextCross Necklace Kids Craft