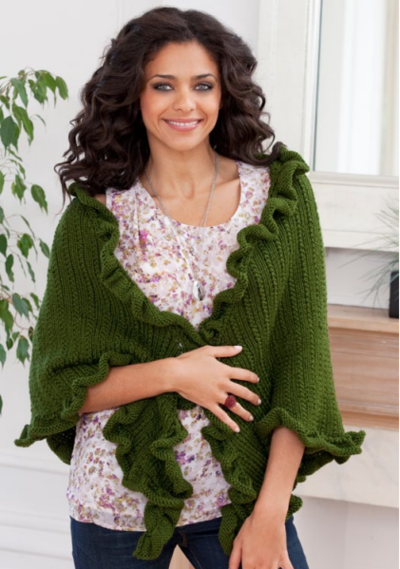
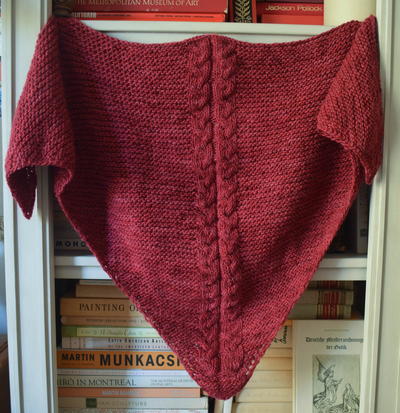
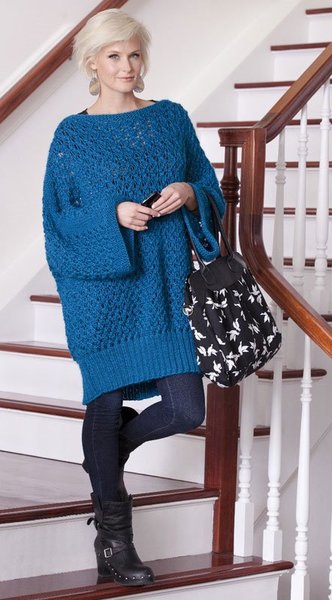
Cable Front Cardigan
Practice your knitting technique with this Cable Front Cardigan free online pattern. The big sweater is comfy and perfect for chilly evenings.

Materials:
- Caron International's Simply Soft (100% acrylic; 6 oz/170 g, 315 yds/288 m skein): #9730 Autumn Red (MC), 2 (3, 3, 3) skeins
- Caron International's Simply Soft Paints (100% acrylic; 4 oz/133 g, 200 yds/182 m skein): #0008 Sunset (CC), 2 (3, 3, 3) skeins
- One pair US size 9 (5.5 mm) knitting needles or size to obtain gauge
- Cable needle (cn)
- Stitch markers
- Yarn needle
SIZES: Small (Medium, Large, X-Large)
KNITTED MEASUREMENTS:
Bust 38 (42, 46, 50)”
Length 30”
Instructions:
GAUGE
In Stockinette stitch using MC, 15 sts and 20 rows = 4”/10 cm
In Stockinette stitch using CC, 15 sts and 20 rows = 4”/10 cm
In Cable Band pattern, using MC, 28 sts and 33 rows = 6"/15 cm
SPECIAL ABBREVIATIONS
4-st RC (4-st Right Cable): Slip 2 stitches to cable needle (cn) and hold to back of work, knit 2, knit 2 from cn.
4-st LC (4-st Left Cable): Slip 2 stitches to cable needle (cn) and hold to front of work, knit 2, knit 2 from cn.
STITCHES USED
Stockinette stitch (St st)
2x2 rib (multiple of 4 sts + 2)
Row 1 (RS): *K2, p2; repeat from *, end k2.
Row 2: *P2, k2; repeat from *, end p2.
Repeat Rows 1-2 for 2x2 rib.
Cable Band Pattern (worked on 28 sts)
Rows 1, 3, 7, 9 (RS): K6, p4, k8, p4, k6.
Row 2 and all WS rows: K the knit sts and p the purl sts.
Row 5: K2, 4-st RC, p4, 4-st LC, 4-st RC, p4, 4-st RC, k2.
Row 11: K6, p4, 4-st RC, 4-st LC, p4, k6.
Row 12: Repeat Row 2.
Repeat Rows 1-12 for Cable Band pattern.
NOTE: The three top pieces are knitted horizontally from side to side. The three bottom pieces are knitted vertically.
BACK TOP
Using CC, cast on 30 (34, 38, 38) sts.
Begin with left sleeve on a RS row, work in 2x2 rib for 6 rows. Place a marker at end of RS row for upper edge.
Change to St st.
Shape top edge: Note: Inc 1 st at upper edge on next row, then every foll 3 (4, 6, 6) rows 9 (15, 13, 13) times and every 4 (7, 0, 0) rows 12 (2, 0, 0) times; AT THE SAME TIME, when piece measures 12" from beginning mark for left sleeve – 52 sts. Work even until piece measures 16 1/2 (17, 17 1/2, 18)" from beginning. Place marker for beg of neck. Work even until piece measures 10 (11, 12, 13)" from neck marker and place another marker for end of neck.
Shape top edge: Dec 1 st at upper edge on next row, then every foll 3 (4, 6, 6) rows 9 (15, 13, 13) times and every 4 (7, 0, 0) rows 12 (2, 0, 0) times -- 30 (34, 38, 38) sts.
Work even until piece measures 42 (44, 46, 48)" from beginning, end WS row.
Work in 2x2 rib for 6 rows. Bind off.
Measure 12" from final rib bottom and mark for right sleeve.
RIGHT FRONT TOP
Using CC, cast on 30 (34, 38, 38) sts.
Begin with right sleeve on a RS row, work in 2x2 rib for 6 rows. Place marker at end of RS row for upper edge.
Change to St st.
Shape top edge: Inc 1 st at upper edge on next row, then every foll 3 (4, 6, 6 ) rows 9 (15, 13, 13) times and every 4 (7, 0, 0) rows 12 (2, 0, 0) times; AT THE SAME TIME, when piece measures 12" from beginning, mark for sleeve – 52 sts. Work even until piece measures 16 1/2 (17, 17 1/2, 18)" from beginning, end WS row. Bind off.
LEFT FRONT TOP
Work as for Right Front Top, reversing all shaping.
BACK BOTTOM
Using MC, cast on 98 (106, 114, 122) sts.
(RS) Work in 2x2 rib for 6 rows.
Change to St st
Shape sides: Dec 1 st each side of next row, then every foll 13 rows 5 times - 86 (94, 102, 110) sts.
Work even until piece measures 15 1/2" from beginning, end WS row.
Next row: K, dec 13 (14, 14, 15) sts evenly across -- 73 (80, 88, 95) sts. P 1 row. Bind off.
RIGHT FRONT BOTTOM
Using MC, cast on 34 (38, 42, 46) sts.
(RS) Work in 2x2 rib for 6 rows.
Change to St st.
Shape side: Dec 1 st at outside edge (end of RS row) on next row, then every foll 13 rows 5 times -- 28 (32, 36, 40) sts.
Work even until piece measures 15 1/2" from beginning, end WS row.
Next row: K, dec 9 (11, 13, 15) sts evenly across -- 19 (21, 23, 25) sts. P 1 row. Bind off.
LEFT FRONT BOTTOM
Work as for Right Front Bottom, reversing all shaping.
CABLE BAND
Using MC, cast on 30 sts.
(RS) Work in 2x2 rib for 6 rows.
Change to Cable Band pattern and dec 1 st at each end of next row -- 28 sts.
Work Cable Band pattern until piece measures approximately 74 (74, 76 1/2, 76 1/2)" from beginning, ending on pattern row 12 and inc 1 st each end -- 30 sts.
Work in 2x2 rib for 6 rows. Bind off.
FINISHING
Sew Front tops to Back top from ribbing to neck markers forming shoulder/ sleeve seams.
Sew Back Bottom to Back Top, gathering piece as necessary to fit between sleeve markers.
Sew Front bottoms to Front tops, gathering pieces as necessary stopping at sleeve markers.
Sew side and underarm seams.
Pin Cable Band in place, starting at Front bottoms on both sides. Seam to Front bottoms first, then cont around top and neck, stretching Cable Band to fit as necessary. NOTE: Center front (outside) edge of Cable Band rolls to inside.
Weave in ends. Block and steam lightly.
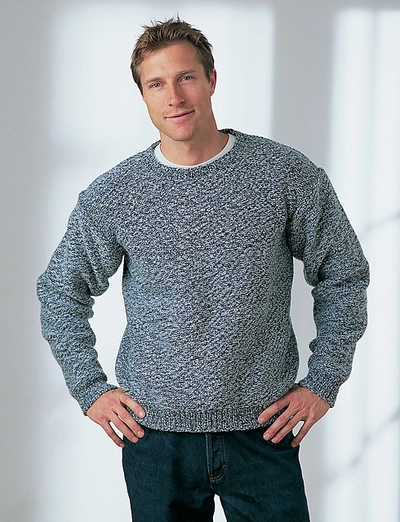
Read NextSimple Men's Knit Sweater Pattern


Thanks for your comment. Don't forget to share!
schiebet
Mar 01, 2017
I have not knit this yet, aamazone, but I think that means to do an increase row then stockinette stitch two rows even. Then do another increase row followed by two more rows even. Do that nine times. What I have explained above would be two repeats already. I find it handy to write out my row count and then circle the rows I need to increase. After each row a mark off a number. It helps me keep track.
aamazone 4335121
May 03, 2015
working on the Back Top. Place a marker on the second last stitch end of row after you st st for one row? Then increase a stitch at marker for the following 3 rows for 9 times is that increased stitches 9 times for each row? and every four rows for 12 times.... I'm not sure how to read this! please help
Report Inappropriate Comment
Are you sure you would like to report this comment? It will be flagged for our moderators to take action.
Thank you for taking the time to improve the content on our site.