Glowing Ghost
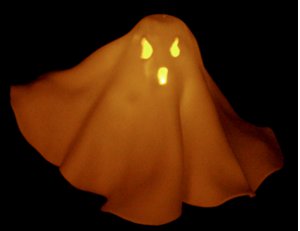
Set the mood for a spooky Halloween with these Glowing Ghosts from Gloria Uhler. Made with soft clay and an LED light, these cute Halloween decorations are perfect for hanging from your trees or using to decorate your table. You can make the face of your ghost cute or scary...better yet, make several ghosts for a lit display that everyone is sure to love!
Materials:
- White Polymer Clay
- LED light
- Clear fishing line or stretchy bracelet cord
- Heavy duty aluminum foil
- Wax paper
- Rolling pin
- Plastic wrap
- Tart shaper or round object for shaping the head
- Wooden pic
Instructions:
-
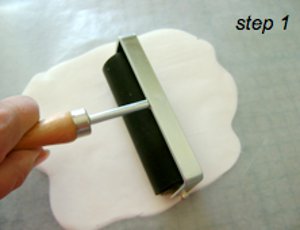
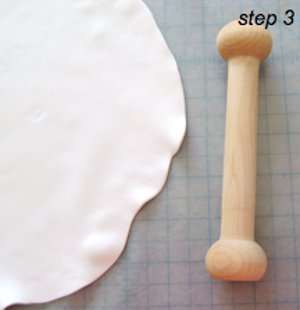
Cover your work surface with wax paper. Tape it down so it doesn’t shift while you work. Condition clay by kneading it in your hands until it’s soft and pliable. Flatten it with your hands, creating a round shape. Cover the clay with wax paper. Using a brayer or rolling pin, move across the clay to create a large circle measuring 10 to 12”. The clay should be about a 1/4” thick. Stretch it with your hands if necessary to achieve the size you want.
-
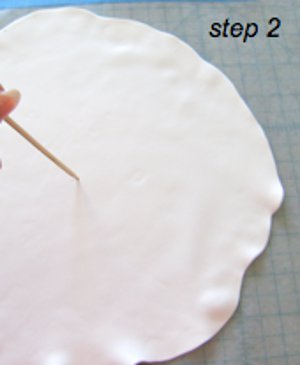
Use a wooden pick to mark the center of the circle. This will be the spot for the hole. If you are not hanging your ghost skip this step.
-
Find an object to act as a form for the ghost head. It should be somewhat rounded. The wooden tart shaper pictured is a good choice because it can stand on end.
-
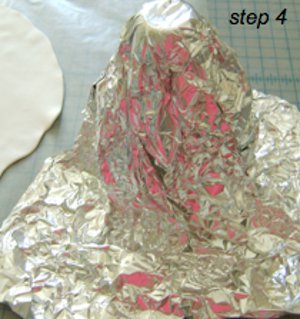
Stand the shaper and cover it with a generous sheet of heavy duty aluminum foil. Mold the foil into a basic ghost shape.
-
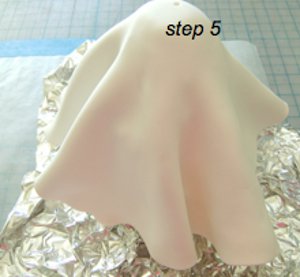
Drape the clay over the foil, letting it fall freely.
-
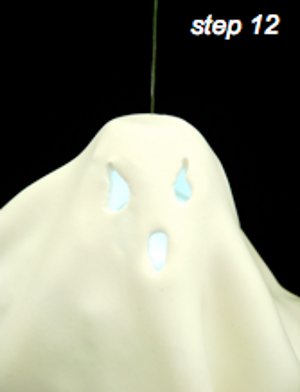
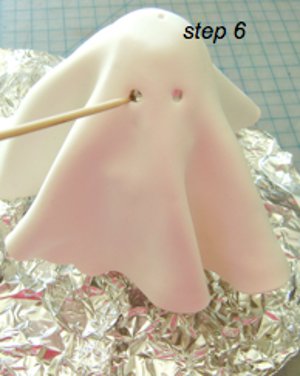
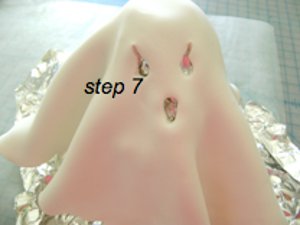
Use a wooden pick to create the holes for the eyes.
-
To create spooky eyes, pull the pick up at the corners of the eye holes and down on the mouth hole. Use the wooden pick to enlarge the hole in the head of the ghost if you will be hanging your creation.
-
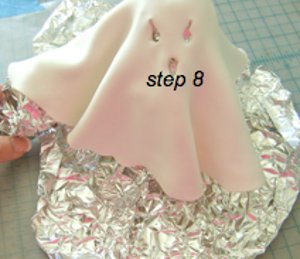
Remove the shaper tool from under the foil and let the foil stand on its own. Flatten the foil at the base for support. For a more interesting shape wad up separate pieces of foil and tuck them under the clay where desired. Place on a foil lined cookie sheet and bake at 275 degrees for 15 minutes. Let cool completely.
-
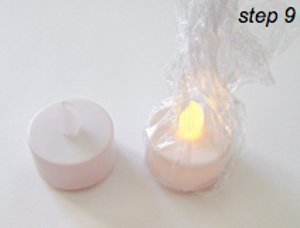
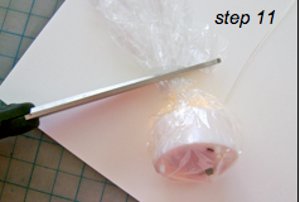
Wrap an LED light in kitchen plastic wrap.
-
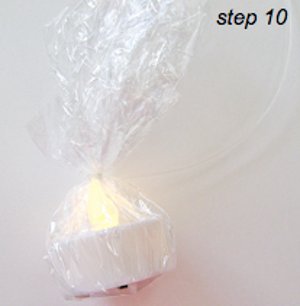
Secure the plastic wrap with fishing line. Cut off the excess plastic wrap above the fishing line and thread the line up inside the ghost into the hole at the top. The flexible plastic wrap makes it easy to flip the switch at the bottom of the LED case and turn the light on or off at any time.
-
Pull the fishing line out the hole in the ghost head. Your ghost is reading for hanging.