DIY Cheesecloth Ghost Centerpiece
Follow these simple instructions to learn how to make cheesecloth ghosts-- video tutorial, included!

The DIY Cheesecloth Ghost Centerpiece is just the homemade Halloween decoration you need to take your home from boring to spook-tacular. With this craft video tutorial from Terri O., you can make a ghostly centerpiece your guests will absolutely adore (you may just find yourself crowned "The ghost-ess with the mostest"). Don't want to replace your candy bowl centerpiece? No need to worry. Learning how to make cheesecloth ghosts works for more than just your table. Place each "floating" ghost strategically around your house to create an atmosphere fit for all ghouls. Homemade Halloween decorations are a wonderful way to pass the time while waiting for the big day to arrive. So, breathe life into this quick and easy DIY cheesecloth ghost, and it will keep your house haunted all season long.
If you're loving what you're seeing, let us know by subscribing to our free newsletter, FaveCrafts Quick and Crafty.
Time to CompleteUnder an hour

SeasonFall
HolidayHalloween
Materials List
- Cheesecloth
- Fabric stiffener
- Small container
- Splat mat
- Black felt for eyes and mouth
- Small terra cotta pot
- Styrofoam — 1 to fit snuggly inside the pot, 1 large piece for the head, and 2 small for the arms
- Wood dowels
- Plastic wrap
- Scissors
How to Make Cheesecloth Ghosts:
Instructions:
-
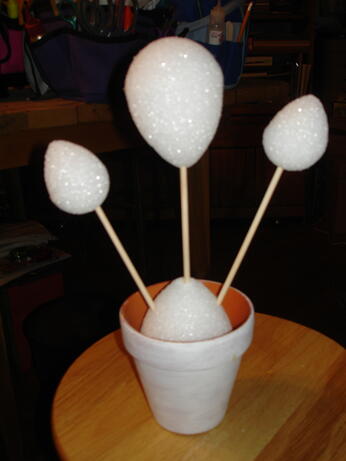
Make a form for your ghost. This is how I made mine but you can come up with your own idea too. Insert the large Styrofoam ball into the pot. Insert the dowel into the Styrofoam and add the head to the top.
-
Insert dowels into the Styrofoam for the arms. Wrap plastic wrap around the Styrofoam so that the cheesecloth won’t stick.
-
Cut a piece of cheesecloth making sure it is big enough to drape over the form.
-
Set the pot on the mat in a place where you can leave it over night.
-
Saturate the cloth with Stiffy and drape over your form. Mold it and shape it the way you like it. Let dry.
-
Once dry, pull out the form and cut round eyes and a mouth. Glue it to your ghost.
Why This Halloween Craft is Scary Great!
Looking for some spooky fun? Here are the top 3 reasons to make the DIY Cheesecloth Ghost Centerpiece:
1. Easy and Affordable: This craft project requires just a few simple materials, like cheesecloth, white glue, and foam balls. It's a budget-friendly way to add some Halloween spirit to your home without breaking the bank. Plus, the step-by-step video tutorial from Terri O. makes it super easy to follow along and create your own ghostly centerpiece in no time.
2. Versatile Decor: Not only does this craft make for a boo-tiful centerpiece, but you can also place the cheesecloth ghosts around your home in different locations to create a haunted atmosphere. Whether they're hanging from the ceiling, lurking in the corners, or floating in a window, these spooky ghosts will surely delight your guests and trick-or-treaters alike.
3. Family Fun: Get the whole family involved in making these adorable cheesecloth ghosts. It's a fantastic way to spend quality time together and get everyone into the Halloween spirit. Kids will love getting creative with the crafting process and watching as their ghosts come to life. Plus, once you're done, you'll have a handmade decoration that the whole family can be proud of.
So why wait? Get crafting and bring some ghostly charm to your home with the DIY Cheesecloth Ghost Centerpiece! And don't forget to subscribe to our free newsletter for more crafty inspiration.
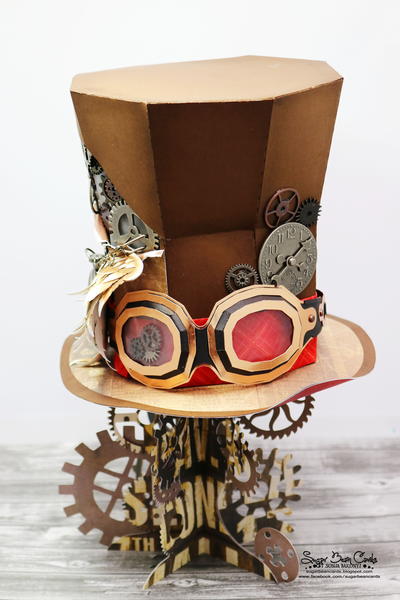
Read NextSteampunk Top Hat
Your Recently Viewed Projects
Thanks for your comment. Don't forget to share!
Sigo
Oct 02, 2018
What a cool and fun looking project for Halloween! I really like the transparent look of it. Thanks for sharing this idea!
Weberme
Oct 05, 2016
I can see a bunch of these ghost in different sizes sitting on an end table looking all scary. A fun and cheap project to make with kids ,grandkids,or even adults. A great project to do with your friends while kids are in school. I love these ghosts. I think I will even try google eyes and see what they look like.Great tutorial.
IncurableRomantici st
Oct 09, 2014
How can you call it the cutest ghost decoration ever, really?
smartie 2872569
Sep 03, 2013
Wouldn't this look really spooktacular with a battery operated candle under it?
Crafter 14515
Oct 11, 2010
I've made the Halloween Ghost Centerpiece many times I like the look of the arms but my poor ghosts have no arms Instead of styrophome for the shape of the head I used a balloon blown up to the size I want and set it on an uprighted disposable plastic glass of any size you'd like I prefer the taller plastic glasses You can get a large bag of plastic glasses at a dollar store and just throw away the used ones when your project is completed You can use the leftovers on a picnic camping trip at home for the kids or whatever you'd like The knot of the balloon is sitting inside the cup It looks just fine with no arms tho I do like the arms now that I've seen them The draping of the cheesecloth with the balloon works fine too I just take a pin needle…Read More opened paper clip or whatever and pop the ballon when the cheesecloth has dried In the instructions along with what you said you have to wrap the styrofoam with a plastic wrap By using a balloon the cheesecloth doesn't stick and there's no cost for the styrofoam balls Thanks you reminded to get mine out of storage and set them up around the house Sue
Report Inappropriate Comment
Are you sure you would like to report this comment? It will be flagged for our moderators to take action.
Thank you for taking the time to improve the content on our site.