Leopard Print Tape Headband
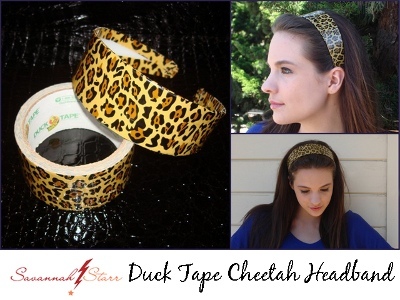
Give your plain headbands a sassy twist using Duck Tape! In this tutorial from Savannah Starr, you'll learn how to make headbands look even cooler with just a few pieces of tape. You can make a leopard print headband, or use any pattern or color you can find.
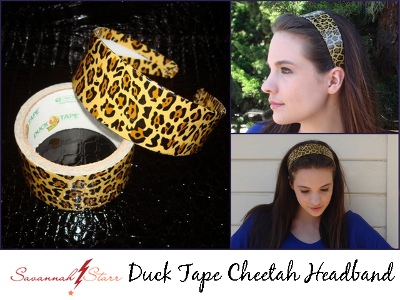
Materials:
- Duck Tape
- Large Headband approx. 1 7/8’ wide
- Non Stick Scissors
Video:
Instructions:
- Measure the head band from edge to edge and cut the Duck Tape about 1 inch longer.
- Cut two pieces this size.
- Cut one of the two pieces in ½ length wise.
- Starting at one tip of the headband allow ½ inch to hang over and ½ inch to hang over the side.
- Carefully secure the strip of Duck Tape to the headband.
- Take your scissors and cut slits along edge of Duck Tape strip that is hanging over the side.
- Carefully fold the slits to the inside of the headband.
- Repeat steps 4-7 on the other side of the headband.
- Take your remaining pre-cut piece of Duck Tape and center it on one of the headband tips with ½” hanging over the tip.
- Carefully apply the Duck Tape strip to the entire headband making sure it is even and smooth as you continue.
- Carefully trim off the excess.
Read NextBlinged-Out DIY Headband

