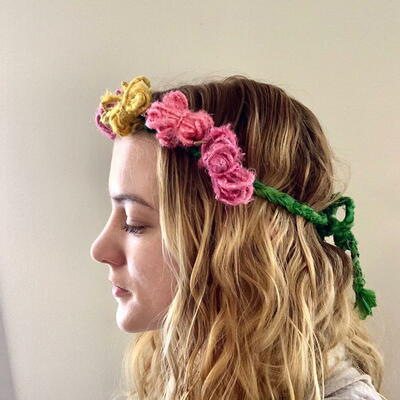
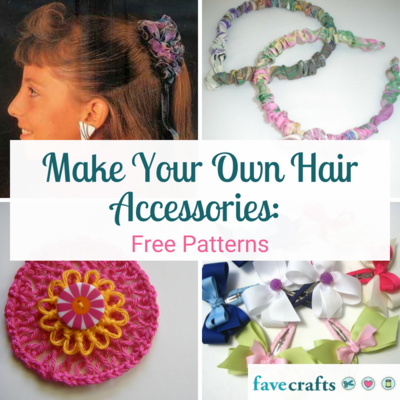
How to make a Yarn Flower Crown

Nothing brightens a day quite like beautiful flowers, and now you can create your own flower crown to wear anytime. This flower crown design by Sammi May over at Feather Box Art is great for little hands to help and you only need a few household supplies to transform your DGY fibers into wearable art!
Watch Sammi's Video Tutorial here
PLUS Enter to win the Banana Fiber Darn Good Yarn Bundle Giveaway as part of our 12 Days of Christmas in July giveaways as well as our 12 Days Grand Prize!

Materials List
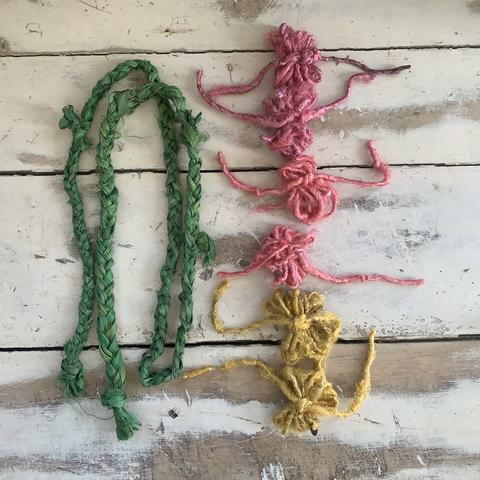
- Approx. 300 inches or 8.3 yards total of Darn Good Yarn Banana Fiber Yarn (as many or as few colors as you like to create the flowers, this tutorial uses Coral, Rich Magenta, and Sunflower)
- Approx. 180 inches/5 yards of Darn Good Yarn Sari Silk Ribbon Yarn in Pickled Pear
- A measuring tape
- 1 pair of scissors
-
Don’t have the yarn on hand? Purchase the same yarn used in this tutorial here.
Banana Fiber Yarn - Rich Magenta
Banana Fiber Yarn - Sunflower
Sari Silk Ribbon Yarn - Pickled Pear
DIRECTIONS
Measure and Cut Yarn
-
Cut (3) 60” lengths of DGY Sari Silk Ribbon Yarn in Pickled Pear
-
Cut (6) 40” lengths of DGY Banana Fiber Yarn in chosen colors (this tutorial uses (2) Coral, (2) Rich Magenta, and (2) Sunflower)
-
Cut (6) 10” lengths of DGY Banana Fiber Yarn in chosen colors (this tutorial uses (2) Coral, (2) Rich Magenta, and (2) Sunflower)
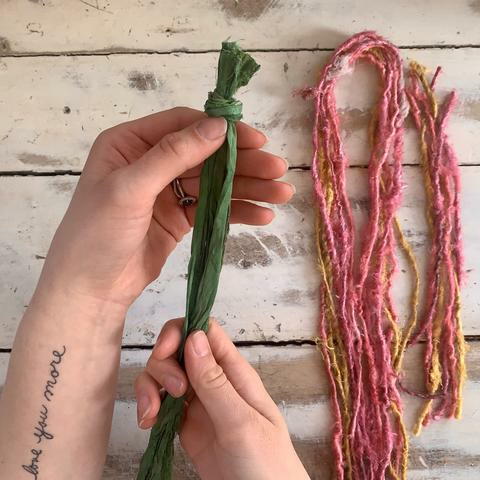
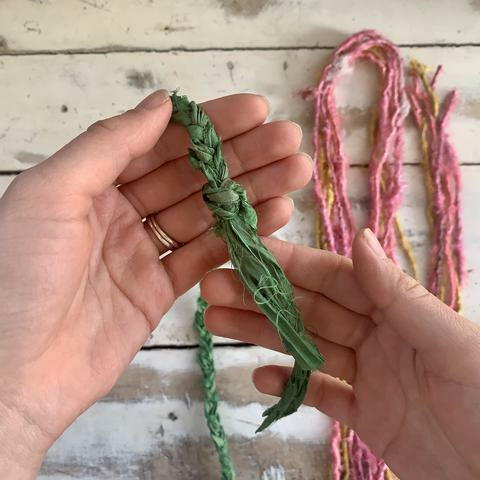
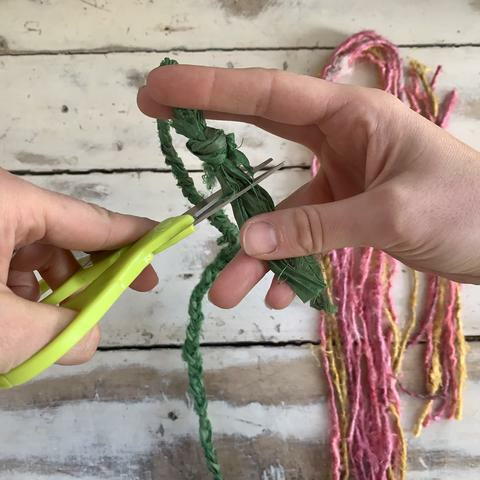
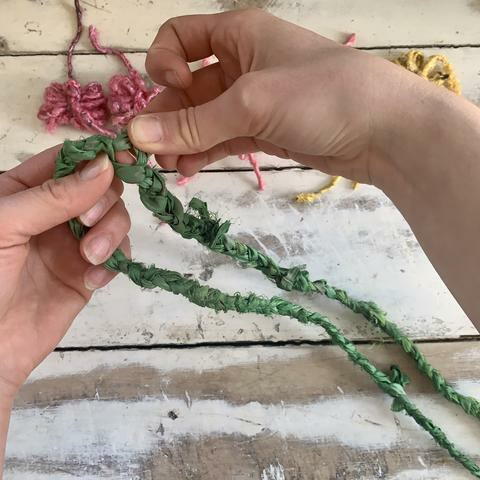
Create the Vine Headpiece
-
Knot the ends of the (3) strands of the DGY Sari Silk Ribbon Yarn together
-
Braid until about 1” from the ends
-
Secure the end of the braid with a knot
-
Trim to even ends
Make the Flowers
-
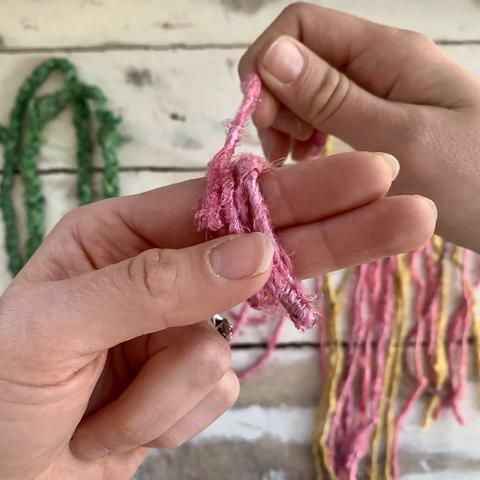
Using one of the 40” strands of the DGY Banana Fiber Yarn, pinch one end between your thumb and pointer and index fingers
-
Wrap the yarn around your pointer and index fingers to create a small loops of yarn
-
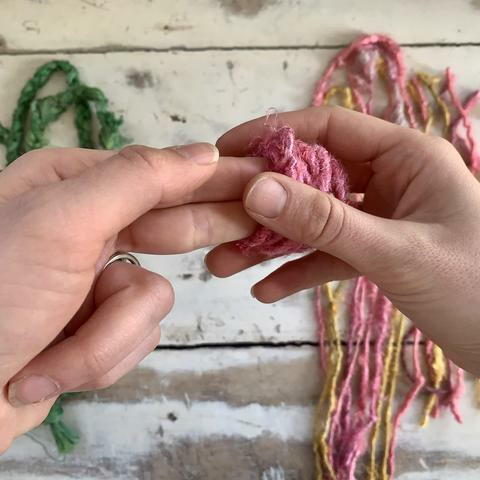
Carefully slide the loops off your fingers and set aside
-
Take one of the 10” lengths of DGY Banana Fiber Yarn* and wrap around the set side loops you created
-
Adjust the 10” strand so the loops are in the middle**
-
Tie a tight knot to secure
-
Leave excess yarn to attach to vine headpiece
-
Repeat for remaining (5) 40” lengths of yarn, using the (5) 10” strands to secure the loops

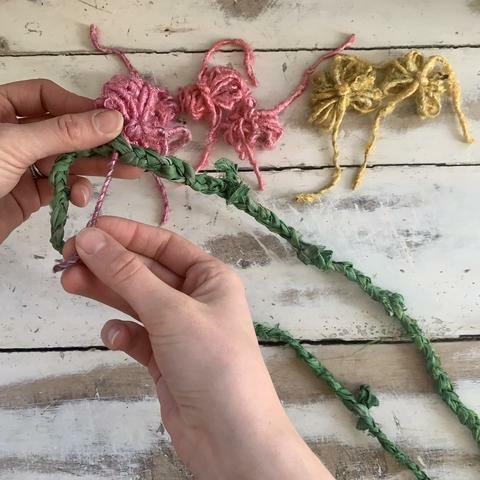
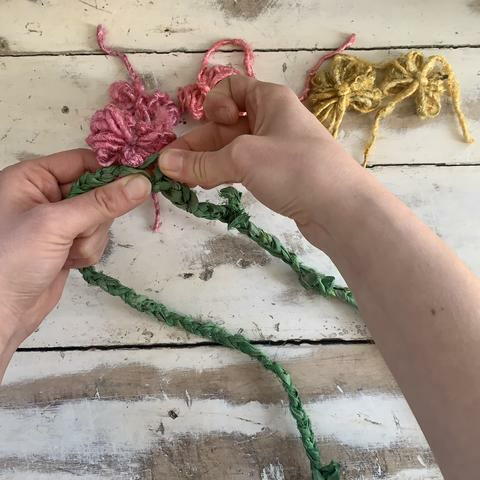
Attach Flowers to Headpiece
-
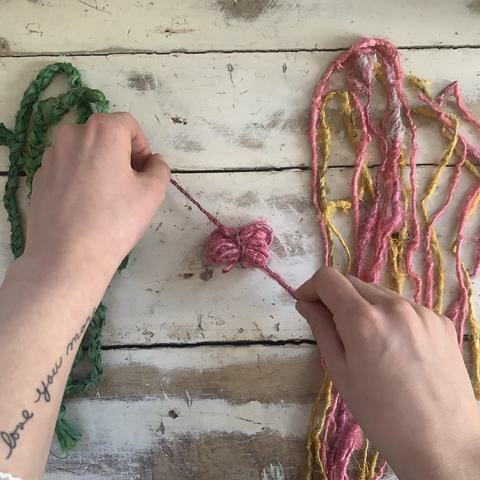
Lay the braided vine down on a flat surface, divided evenly in half
-
Select a spot near the middle of the vine, and gently tug one of the braided strands to form a space
-
Take one of the puffy fluffy flowers you created, and slide one of the tails left from Step 3 through the lifted braid loop
-
Gently lift one of the braid strands next to the one you were just working with
-
Slide the other tail through the second lifted braid loop
-
Pull the tails tight and tie together to secure flower to the vine
-
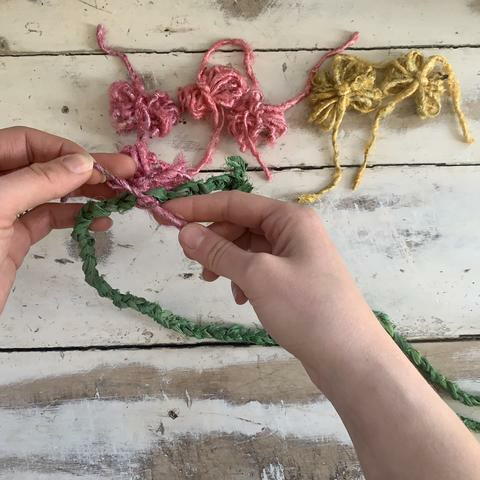
Repeat with the remaining (5) flowers, spreading the around the middle section of the vine
-
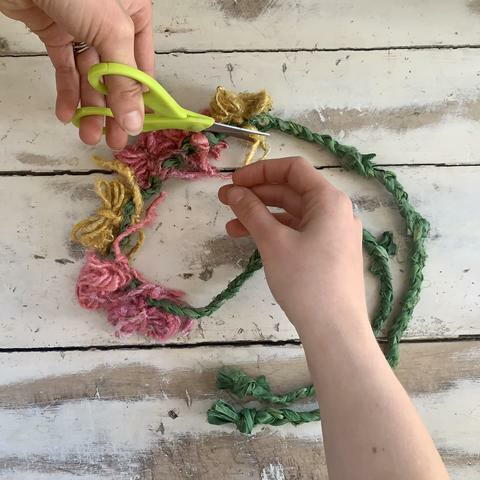
Trim excess tails/ends once knotted in place


Wear It and Show It Off!
-
Divide your flower crown in half
-
Place middle of the flower crown on the front of your head
-
Tie in a bow or knot around the back of your head
-
Enjoy!
Notes*Try mixing and matching the colors of the loops with the 10” lengths of yarn together!
**If the loops slide out, simply untie the 10” length, rearrange them, and tie again!
Read NextEasy Peasy Hairpins