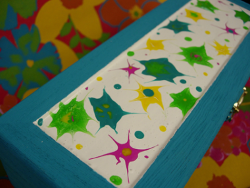
Look of Copper Enamel Pencil Box
This year, create a Look of Copper Enamel Pencil Box from Heidi Borchers before you or your favorite kid heads back to school. This is a fun and sophisticated back to school craft. The copper enameling process is complicated and difficult to achieve at home, so use this simple technique instead.

Materials:
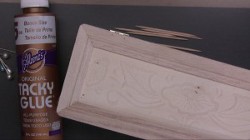
- Aleene’s Original Tacky Glue
- Wood pencil box
- Acrylic paints – one for base coat and 3 to 4 for the mixtures
- Brush for base coat
- Tooth picks/wood skewers- for mixing
- Pin – I used a corsage pin
- Waxed paper
- Blue painters tape
Instructions:
-
For my box, I used a wood box with an indentation on the top. This is ideal for this technique so that the glue mixture does not drip off the top. You can also see that my box had a design embossed into the wood. You will not see this design once you apply your glue mixture.
-
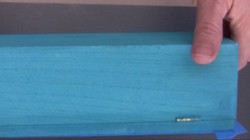
Using the brush, base coat the entire wood box. Let paint dry.
-
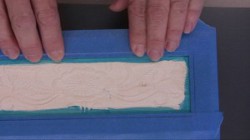
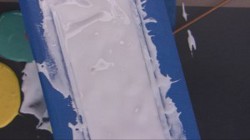
Using the blue painters tape, tape off the top area where the glue mixture will be placed.
-
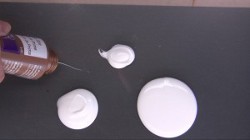
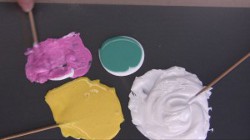
To keep your waxed paper from moving around, tape it down to your work surface. The waxed paper should be large enough to hold the box and have space for mixing the glue and paints. Place a puddle of glue for each color of acrylic paint you will be using. Make one puddle larger (for the background color).
-
Immediately squeeze acrylic paints into the puddles of glue.
-
Using the toothpick or wood skewer mix the paint into the glue, until completely mixed. (Note: For the white background, you will need to mix the white paint into the glue. (If you only used the glue, it would be clear when dry which would be another technique all together).
-
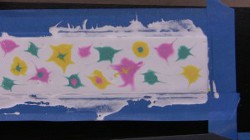
Using a wooden skewer, place the background mixture (white paint and glue) into the area you taped off. Make sure all of the wood area is covered with the mixture. Don’t worry about the uneven texture, it will flatten out.
-
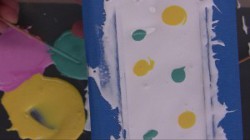
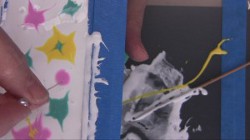
Immediately drop small drops of the other mixtures into the wet background mixture.
-
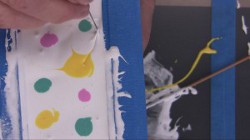
To create your designs,place point of the pin in the center of the drop and pull outward through the glue mixture. Wipe the pin point off and continue to draw through and wipe pin off after each time.
-
You can add more dots of colors on colors, and repeat pulling pin through colors.
-
Carefully remove blue tape after about two hours. Let glue dry completely. If necessary touch up the box base coat paint color with a brush.
-
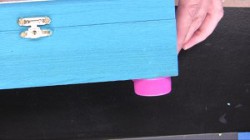
For legs on box, glue plastic water bottle caps onto the bottom of the box and paint. Let paint dry.
For a comprehensive video tutorial, check out How to Make the Look of Copper Enamel with Aleene's Tacky Glue.
Read NextDiaper Caddy DIY Basket