This project was submitted by one of our readers, just like you.
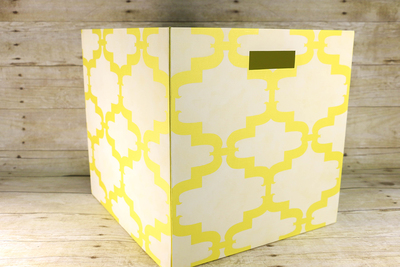
Mini Art Journal Holder
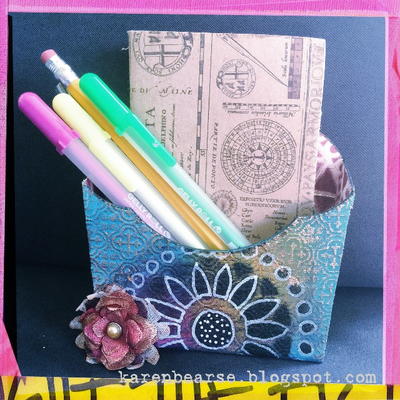
Add a pretty little pocket to your craft room organization to store pens and papers.

Mini Art Journal Holder
In the Designer's Words: "Make this fun, inky, colorful Flower Pocket that can be used in so many ways! Sturdy mat board construction makes this perfect to hold a mini art journal kit, as a gift basket or whatever your imagination comes up with. This project can be altered to suit your needs. Use your favorite scrapbook paper, printed fabric, painted paper, embossed metal etc. It works for any theme, in any season. Or take the techniques learned and use with other dies, boxes etc. Gotta love versatility!"
Making darling and decorative little boxes and baskets is the best way to create crafty ideas that you will actually use. This Mini Art Journal Holder is the perfect solution for crafting in a small space. Perfect for keeping pens tucked into at your desk or storing crafting supplies close by in your craft room, this gorgeous DIY craft will shimmer its way to helping you de-cluttering your space. Easily customizable, this pretty craft will easily find a place in your life.
Estimated Cost$31+
Time to CompleteWeekend project
Primary TechniqueMixed Media
Project or Page SizeCard
Type of Paper UsedTextured Paper

Materials List
-
Eileen Hull dies by Sizzix
66112- Flower Pocket
657721- Hydrangeas Die
658053- Heart Petals
Little Sizzles Mat Board
Optional- embossing folder
-
AirBrainz airbrush system & acrylic paint by Testors Corp.
-
DecoFoil Adhesive, Transfer Sheets & Easy-Cut adhesive by Therm*O*Web.
-
Pen-touch White & Pigma black pens by Sakura.
- Glimmer Mist & Glimmer Glam.
- Sticky back canvas, fabric canvas.
- Decorative brad.
Instructions
-
Using Sizzix dies and die cut machine, cut Flower Pocket from mat board & canvas. For directions http://d3r06h67fvmy8.cloudfront.net/media//uploads/pdfs/instructions/661112.pdf
-
Let's make the flower! Cut flower shapes from canvas. You will need at least 1 small, 2 medium, 3 large flower cuts. Spritz flower pieces with various colors of Glimmer Mist and set aside to dry or use heat gun. When dry paint with Twinkle Toes Glimmer Glam to help stiffen fabric and add glitter. Let dry. Scrunch pieces to add shape & assemble flower adding a brad to hold it together. Distress edges of petals using a metallic paint and fine paint brush.
-
Prepare mat board pieces: Using AirBrainz airbrush system paint cut side of large flower pocket mat board piece and non cut side of smaller piece *not the canvas pieces* I painted a solid color on the smaller one (this will be the inside front and bottom of your box). Use a simple stencil pattern with 2 colors for the larger side (this will make up the back and sides of your project). Leave other side plain. Set aside.
-
Canvas Pieces: Run smaller canvas piece through an embossing folder to create extra texture if desired.
-
Painting Canvas Pieces- Cover both pieces (on one side only) with a stencil & airbrush using the AirBrainz system. Hold device 4-5 inches above stencil pressing softly while moving hand to create even color. If you use too much paint it will seep under the stencil blurring the image. Build up color in layers.
-
Add metal accents: Take dry painted canvas pieces and use DecoFoil Adhesive to outline parts of your image. Use enough so image outline will be slightly thick. Let dry 1-2 hours until the glue is set & sticky. Cover with Transfer Sheets shiny color side up & rub image with finger. The foil will transfer easily to the glued image.
-
Doodle Time: Make sure paint is dry to avoid damaging pen. Outline parts of your image using a white paint pen. This will help your images pop.
-
Assembly: Adhere Easy-cut Adhesive to plain side of mat board pieces rubbing well. Peel off backing and adhere painted canvas to mat board color side up. Rub canvas to adhere well.
-
Let's put the box together! Follow Sizzix directions to glue box together.
-
Optional: To highlight embossed area of canvas. Put a thin dab of metallic paint on finger and swipe over high points of embossed sections to make image pop.
-
Finishing Touches: Glue the flower using hot glue or another strong glue. Your box is done!!!
-
Other Tips- use for a holiday candy box. Just change up the colors and theme! Put shredded document paper in the bottom & use to house your business cards. This would make a great box for some treats & a gift card. My favorite is a mini art journal with some colored pens, stamps whatever you want to have easy access for a quick arty page. Enjoy!

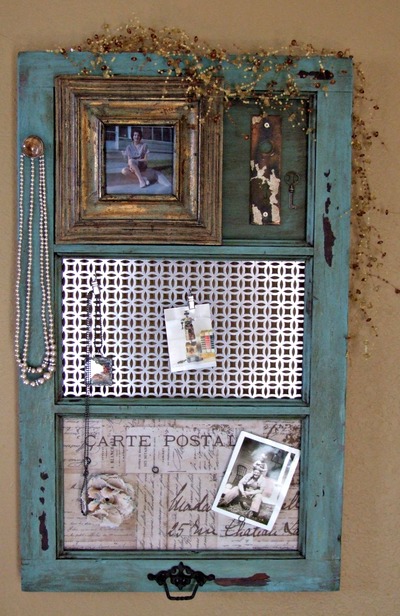
Read NextDIY Vintage Window Frame Organizer