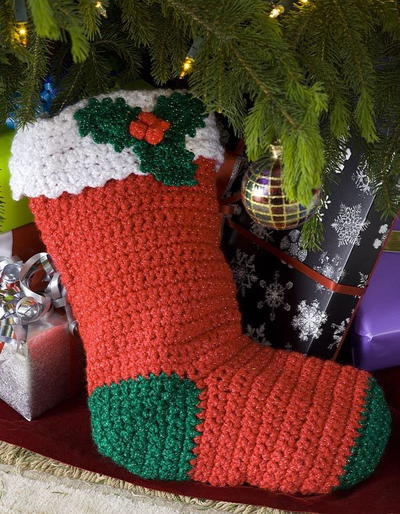
Holly Stocking
Make this beautiful crochet Christmas stocking pattern to hang above your fireplace this year. The Holly Stocking from Red Heart Yarn is a wonderful addition to your holiday decorations. Made with sparkly Red Heart Holiday yarn, this stocking will glimmer in the light of your tree or fireplace. Embellish the stocking with an initial or name if you'd like...or fill it with baked goods and hand them out to your neighbors and friends. This is an easy crochet project that's great for a beginner.

Materials:
- 1 ball Red Heart Holiday Yarn in White w/Silver Metallic
- 1 ball Red Heart Holiday Yarn in Green w/Silver Metallic
- 2 balls Red Heart Holiday Yarn in Red w/Silver Metallic
- 6.5 mm [US K-10.5] and 4mm [US G-6] crochet hook
- Yarn needle
Gauge:
- 13 sts = 5”; 14 rows = 4½” in sc with double strand of yarn and larger hook. CHECK YOUR GAUGE. Use any size hook to obtain the gauge.
Instructions:
Use 2 strands of a color held together as one unless otherwise specified.
Cuff
- With larger hook and A, ch 43.
- Row 1 (Right Side): (Sc, hdc) all in 2nd ch from hook, * sc in next ch, hdc in next ch; repeat from * to last ch; (sc, hdc) all in last ch; turn – 44 sts.
- Rows 2-8: Ch 1, * sc in hdc, hdc in sc; repeat from * across; turn.
- Row 9: Ch 2, slip st in first 2 sts, * ch 2, slip st in next 2 sts; repeat from * across. Fasten off.
Stocking
- LEG: With larger hook and B, ch 43.
- Row 1 (Right Side): Sc in 2nd ch from hook and in each ch across; turn – 42 sc.
- Next Row: Ch 1, sc in each sc across; turn.
- Repeat last row until 10" from beginning, end wrong side row. Fasten off.
Heel
- With right side facing skip 32 sc; join C; ch 1, sc in last 10 sc; bring other side of leg around and sc in first 10 sc; turn –20 sc.
- Next Row: Ch 1; draw up a loop next 2 sc, yo and draw through all 3 loops on hook – dec made; sc in each sc to last 2 sc; dec; turn –18 sc.
- Repeat last row to dec 1 st each end of every row until 4 sts remain. Work 1 row even. Now inc 1 st (inc = work 2 sc in a st) each end of every row until there are 20 sc. Fasten off.
Foot
- With right side facing, skip first 10 sc of heel, join B in next sc; ch 1, sc in last 10 sc of heel, skip row ends of heel, [dec over next 2 sc of leg] twice, sc in next 14 sc, [dec] twice, skip row ends of heel, sc in remaining 10 sc of heel; turn –38 sc. Continue in sc, dec 1 st each end of every 6th row twice – 34 sts. Work even until foot measures 5" from last row of heel, end wrong side row, changing to C. Cut B.
Toe
- Next Row: With C, ch 1, dec, sc in next 13 sc, [dec] twice, sc in next 13 sts, dec; turn – 30 sts.
- Next Row: Ch 1, dec, sc in next 11 sc, [dec] twice, sc in next 11 sc, dec; turn – 26 sts.
- Next Row: Ch 1, dec, sc in next 9 sc, [dec] twice, sc in next 9 sc, dec; turn – 22 sts.
- Next Row: Ch 1, dec, sc in next 7 sc, [dec] twice, sc in next 7 sc, dec; turn – 18 sts.
- Next Row: Ch 1, dec, sc in next 5 sc, [dec] twice, sc in next 5 sc, dec; turn – 14 sts.
- Next Row: Ch 1, dec, sc in next 3 sc, [dec] twice, sc in next 3 sc, dec; turn – 10 sts. Fasten off.
Finishing
- Holding right side of cuff against wrong side of leg, attach yarn and work slip st in each st across through both layers. Fasten off.
- Sew toe, foot, heel, leg and cuff seams. If heel rows have formed gaps in the fabric, weave matching yarn through sts on wrong side to close them. Turn cuff to right side.
Hanging Loop
- With A, ch 13; sc in 2nd ch from hook and in each ch across. Fasten off. Fold in half and sew inside cuff at seam.
Leaf (Make 3)
- With smaller hook and a single strand of C, ch 8.
- Rnd 1: 3 Dc in 4th ch from hook, hdc in next 2 ch, sc in next ch, 3 sc in last ch; working across opposite side of ch, sc in next ch, hdc in next 2 ch, 3 dc in same ch as first 3 dc; join with a slip st in top of ch-3.
- Rnd 2: Ch 1, 3 sc in same st as joining, * sc in next st; ch 2, slip st in side loops of last sc made – picot made; [sc in next st, (sc, picot) all in next st] 3 times *, (2 sc, ch 3, slip st in 3rd ch from hook, sc) all in next sc; repeat from * to * once more; join to first sc. Fasten off.
Berries (Make 4)
- With smaller hook and a single strand of B, ch 2; 8 sc in 2nd ch from hook; join with a slip st to first sc. Fasten off.
- With needle, weave yarn end through top loops of all sts; draw up tightly and secure. Sew leaves and berries to cuff as shown. Weave in ends.

Thanks to Red Heart, more free patterns for Christmas projects fill the Jolly Holidays eBook.
Up Next:
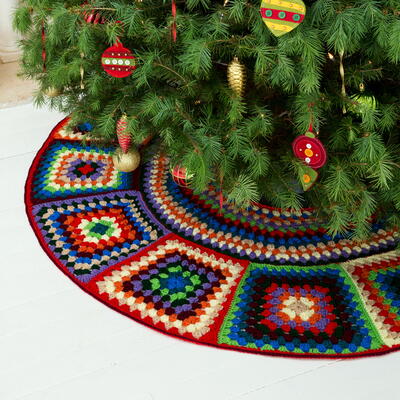
Read NextGranny Square Tree Skirt Pattern
Your Recently Viewed Projects
Thanks for your comment. Don't forget to share!
glorinari 7840633
Sep 17, 2014
l la media esta muy bonita pero realmente falta mucha explicacion hay siglas que no las entiendo y con cuentos puntos se empieza mil gracias por atenderme
FaveCrafts Editor JL
Sep 17, 2014
Hi there - Some of the acronyms included above as ch = chain, sts = stitches, hdc = half double crochet, sc = singly crochet, dec = decrease. Are there any that i missed? - Julia from FaveCrafts
tuominen26 1952336
Dec 18, 2013
I seem to be at the place where everyone has trouble I have the top portion of the leg done I need lots of help with the heal, I have tried but it just won.t go the way I want it. Please help.
Kaylee
Dec 08, 2015
Hi tuominen26 1952336! I am sorry your experienced difficulty with this pattern. If you are still looking for help, we recommend you contact the designer of the pattern. - Kaylee, Editor of FaveCrafts
froggylady850
Nov 11, 2013
There is a tube video for this pattern but I just started with the toe and crocheted in the round adding 1 ROW OF SC IN BETWEEN INCREASE ROWS up to 3sc and increase row and then sc around again. If anyone would like to try it like I did it I can help but other way confused the heck out of me too ! My stockings turned out great !!!!!!!! :)
leenleen25
Nov 25, 2012
as far as the foot part goes i don't get what's confusing about it, i worked it all nicely, but i added a little depth to it and used a blanket stitch for the leg and foot, it turned out beautifully.
Melissa Ryan
Oct 30, 2012
Hey crafters! If you're still having trouble with this pattern, we recommend contacting the designer (in this case, Red Heart Yarn)...they may have a diagram that will help you assemble the pattern. We'll see what we can find, too! Thanks!
hphmama
Sep 04, 2012
Can someone please send me a diagram of where to begin the 'FOOT' and how this stocking goes together??
hphmama
Sep 04, 2012
Began this project and finally GAVE UP!! It is very hard without having some kind of pattern telling you WHERE to begin adding yarn, and WHERE to add stitches to this pattern!! It would be VERY HELPFUL to include some sort of diagram on where to add, esp. at the FOOT part. That's where I got completely and totally LOST.
bjposton 0457745
Jun 24, 2011
I made this pattern for Christmas this past year. I like each family member having a different color for their stockings and had been looking for a pattern to try for a couple of years not finding anything I liked. This stocking worked up very fast, was strong, and was a very good size. I made eight of these in different colors and everyone loved them. Thanks for all the patterns.
hphmama
Sep 04, 2012
NEED HELP. Got as far as the "FOOT" and was LOST completely! Please help.
hphmama
Sep 04, 2012
Since you have made several of these stockings, can you give me some help, beginning with the "FOOT" part?? I just can't seem to be able to 'place' this altogether. Thanks so much!!!
Report Inappropriate Comment
Are you sure you would like to report this comment? It will be flagged for our moderators to take action.
Thank you for taking the time to improve the content on our site.