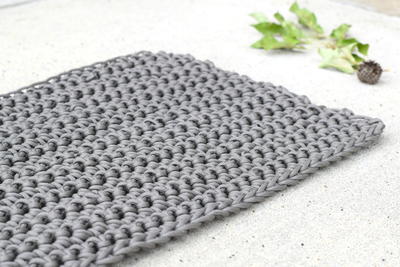
Spa Bath Mat
Keep your feet nice and clean when you step out of the shower and onto this Spa Bath Mat from Bernat Yarns. This easy crochet pattern makes a great gift for a housewarming party and is a fun and inexpensive way to redecorate your bathroom. Use whatever colors you'd like to make this simple and soft bathroom rug.

Materials:
- Bernat® Handicrafter Cotton (Twists: 42.5 g/1.5 oz; 62 m/68 yds; Solids: 50 g/1.75 oz; 73 m/80 yds)
- Main Color (MC) (41220 Dream Twists) 8 balls
- Contrast A (13712 Hot Green) 2 balls
- Contrast B (00001 White) 7 balls
Size 6 mm (U.S. J or 10) crochet hook or size needed to obtain gauge.
GAUGE: 10 sc and 11 rows = 4 ins [10 cm].
MEASUREMENTS: Approx 18 x 24 ins [45.5 x 61 cm].
Instructions:
-
Center Section: With MC, ch 42.
-
1st row: (WS). 1 sc in 2nd ch from hook. 1 sc in each ch to end of ch. Turn. 41 sc.
-
2nd row: Ch 1. 1 sc in first sc. *1 tr in next sc. 1 sc in next sc (push long post of previous tr to front of work). Rep from * to end of row. Turn.
-
3rd row: Ch 1. 1 sc in each st to end of row. Turn.
-
4th row: Ch 1. 1 sc in each of first 2 sc. *1 tr in next sc. 1 sc in next sc. Rep from * to last sc. 1 sc in last sc. Turn.
-
5th row: As 3rd row. Turn. Rep last 4 rows until work from beg measures 12 ins [30.5 cm], ending with 3rd or 5th row. Fasten off.
- Note: Join all rnds of Edging with sl st to first st.
Edging:
-
1st rnd: (RS). Join A with sl st to top right corner. Ch 2 (does not count as st). 1 sc in each of next 40 sc. 3 sc in last sc (corner). 28 sc down left side to bottom corner. 3 sc in corner. 1 sc in each of next 39 rem loops of foundation ch. 3 sc in next st. 28 sc up right side to top corner. 2 sc in first sc. Join. Turn.
-
2nd rnd: (WS). Ch 1. Working in back loops only, *1 sc in each sc to corner sc. 3 sc in corner sc. Rep from * around. Join. Turn.
-
3rd rnd: (RS). Ch 1. Working in back loops only, *1 sc in each sc to corner sc. 3 sc in next sc. Rep from * around. Join B. Do not turn.
-
4th rnd: With B, ch 3. Working in both loops, *1 hdc in each sc to corner sc. (1 hdc. Ch 8. 1 hdc) in corner sc. Rep from * around. Join.
-
5th rnd: Ch 2. *Yoh and draw up a loop around post of next st at front of work inserting hook from right to left. (Yoh and draw through 2 loops on hook) twice - 1 dcfp made. 1 dcfp in each st to last hdc before ch-8 sp. (1 hdc. 1 dcfp) in next hdc. Ch 8. (1 hdc. 1 dcfp) in next hdc. Rep from * around. Join.
-
Rep last rnd for 4 ins [10 cm] total, having 2 more sts at each corner on every rnd.
-
Next rnd: Ch 2. *1 dcfp in each st to last hdc before ch-8 sp. (1 hdc. 1 dcfp) in next hdc. Ch 8. (1 hdc. 1 dcfp) in next hdc. Rep from * around. Join. Pull ch-8 loops as follows: from 6th rnd through 5th rnd, from 7th rnd through 6th rnd, from 8th rnd through 7th rnd. Rep in same manner for all ch-8 loops of rem rnds as shown in picture.
-
Next rnd: Ch 1. *1 sc in each st to 1 hdc before ch-8 sp. 2 sc in next hdc. 5 sc in next ch-8 sp. 2 sc in next hdc. Rep from * around. Join.
- Next rnd: Ch 1. Working from left to right, instead of from right to left as usual, work 1 reverse sc in each sc around. Join. Fasten off.
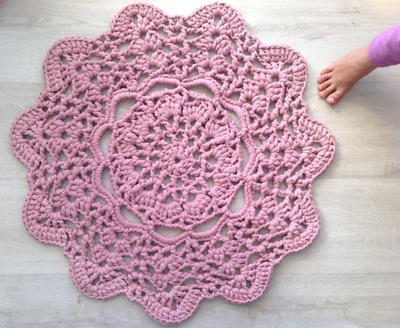
Read NextBrilliant DIY Rag Rug
Your Recently Viewed Projects


Thanks for your comment. Don't forget to share!
princess6860504
Feb 07, 2017
This bath mat will cost you the price of 17 balls of yarn. I think I could almost buy one at the store that would be less money. However, the whole point of this is to make it yourself, and make it personal. I would love to see a monogram somewhere on that bath mat. In a classic navy and white or gray and white, the neutral color choice would go good with anyone's decor.
Lacyreif
Dec 01, 2016
I love the way this pattern looks. I am not a big fan of the green used in the picture, but I can imagine in different colors it would look fantastic. It does seem that there is an error in the pattern in step 4 of the edging, as stated in another comment, but it is one that if noticed early, isn't a problem. This will be a great fit for my bathroom and a great way to add more color.
shellmcd
Feb 23, 2012
This is turning out beautifully. However I'm sure there must be a mistake in the instructions. Edging step 4 says to ch 8, but the beg of that row is a ch 3. I had to redo this row and change all ch 8 to ch 3 to make it look right.
Report Inappropriate Comment
Are you sure you would like to report this comment? It will be flagged for our moderators to take action.
Thank you for taking the time to improve the content on our site.