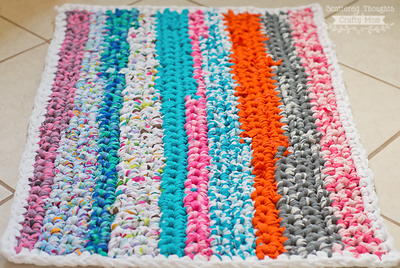
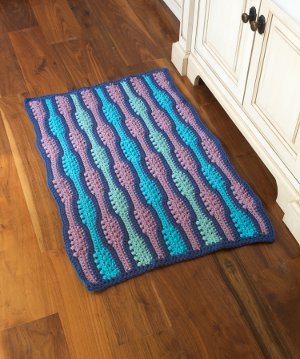
Bubble and Bulge Rug
 Crocheted with 2 strands of yarn, this Bubble and Bulge Rug is thick and comfy on your feet. Great for the kitchen or bathroom, this crochet throw rug is textured and artistic in design. Make it in whatever color you'd like, from colors that brighten up the room to colors that mirror the flow of the sea.
You can find this project, as well as many others, in our new eBook, Welcome to Our Home: Knit and Crochet Ideas from Red Heart. Download your own free copy today!

Materials:
- 2 skeins Red Heart® Super Saver® yarn in Orchid (A)
- 2 skeins Red Heart® Super Saver® yarn in Blue Suede (D)
- 1 skein Red Heart® Super Saver® yarn in Turqua (B)
- 1 skein Red Heart® Super Saver® yarn in Aruba Sea (C)
- Susan Bates® Crochet Hook: 9mm [US M-13]
- Yarn needle
- Non-slip rug pad
Gauge: 9 sts = 4" [10cm]; 8 rows = 4" [10cm] in Pattern st using 2 strands of yarn held together. CHECK YOUR GAUGE. Use any size hook to obtain the gauge.
Special Abbreviations:
- C2dc (Crossed 2 Double Crochet): Skip next st, dc in next st, working in front of st just made, dc in skipped st.
Instructions:
Rug measures 24" (61cm) x 38" (96.5cm)
Rug is worked with 2 strands of yarn held together throughout. Carry D along side edges when not in use.
- With 2 strands of D held together, ch 83.
- Row 1 (RS): Sc in 2nd ch from hook and each ch across; turn – 82 sc.
- Row 2: Ch 1, sc in each st across.
- Row 3: Change to 2 strands of A, ch 3, turn, *[C2dc] 5 times, sc in next 10 sts; repeat from * 3 more times, sc in last st.
- Row 4: Ch 1, turn, sc in first st, *sc in next 10 sts, [C2dc] 5 times; repeat from * 3 more times, dc in last st. Cut A.
- Rows 5-6: Change to 2 strands of D, ch 1, turn, sc in each st across.
- Row 7: Change to 2 strands of B, ch 1, turn, sc in first st, *sc in next 10 sts, [C2dc] 5 times, repeat from * 3 more times, dc in last st.
- Row 8: Ch 3, turn, *[C2dc] 5 times, sc in next 10 sts; repeat from * 3 more times, sc in last st. Cut B.
- Rows 9-10: Change to 2 strands of D and repeat Rows 5 and 6.
- Rows 11-12: Change to 2 strands of A and repeat Rows 3-4. Cut A.
- Rows 13-14: Change to 2 strands of D and repeat Rows 5-6.
- Rows 15-16: Change to 2 strands of C and repeat Rows 7-8. Cut C.
- Rows 17-18: Change to 2 strands of D and repeat Rows 5-6.
- Repeat Rows 3-18 once more, then repeat Rows 3-14.
- Fasten off.
Finishing
- Side Edging: Row 1: Join 2 strands of D in D-st in one corner ready to work along one long edge, ch 1, sc evenly spaced along long edge to D-st at next corner.
- Row 2: Ch 1, turn, sc in each st across.
- Fasten off.
- Repeat along opposite side edge.
- Weave in ends.
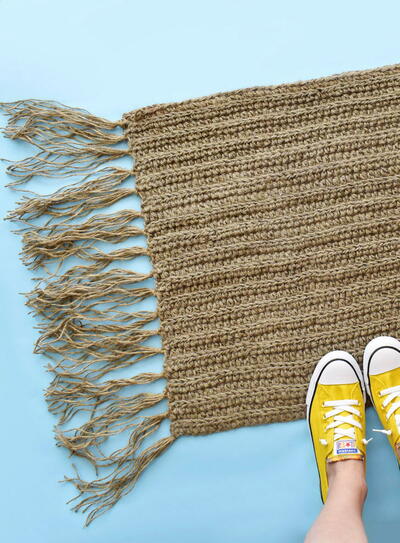
Read NextHow to Make a Jute Rug
Your Recently Viewed Projects
Thanks for your comment. Don't forget to share!
princess6860504
Mar 02, 2017
That is a unique pattern for sure. And I wonder how they came up with that name? In reviewing the pattern specifics it would seem fairly easy to complete. I think once you figure out/memorize how to work up the pattern you could do it by sight as you go and not have to keep referring to the pattern. I think you could also sew a rug pad or canvas on the backside.
apisacone43 1243
Oct 20, 2014
The pattern is on the upper part of the page in full. It's called Bubble and Bulge Rug.
srberry40 0416593
Feb 27, 2014
Well that's sad. It's been at least 4 months and there is still no pattern. I really like the look of this rug, very disappointed
MaryF
Feb 16, 2014
Love making these rugs. I made 4 of them in different colors. They are great for putting in my dogs bed as a blanket as well for these cold nights.
Report Inappropriate Comment
Are you sure you would like to report this comment? It will be flagged for our moderators to take action.
Thank you for taking the time to improve the content on our site.