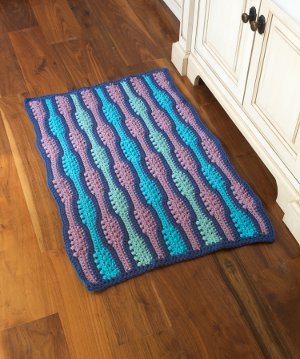
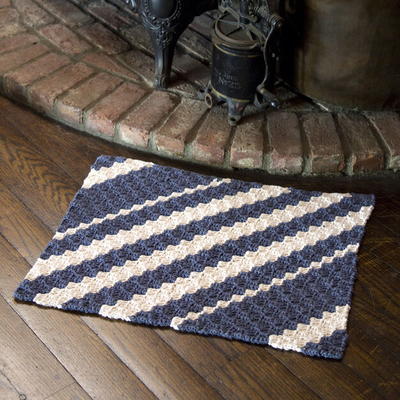
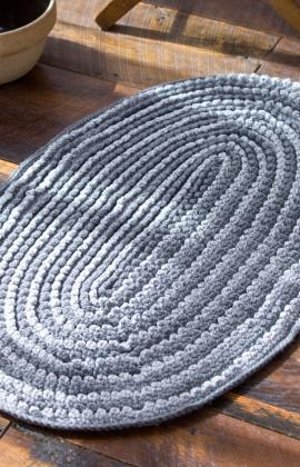
Infinity Rug
Warm up your hardwood floors with this Infinity Rug from Red Heart Yarn. This crochet mat is an intermediate level, but don't let that scare you! The directions are easy to follow. This mat would be great in a kitchen, bathroom, or living room.

Materials:
- RED HEART® “Fiesta®”: 2 skeins 6341 Millennium A
- RED HEART® “Super Saver®”: 2 skeins 500 Grey Heather B
- Crochet Hook: 6.50mm [US K-10.5]
- Yarn Needle
Size: RUG measures 22½” x 35¾ “.
Gauge/Tension: GAUGE: Working with 2 strands held together, 12 sc = 4”; Rounds 1-5 = 2” wide. CHECK YOUR GAUGE. Use any size hook to obtain gauge.
Instructions:
NOTE: Work with 2 strands of yarn held together throughout.
RUG:
- With B, ch 40.
- Round 1: Sc in 2nd ch from hook, sc in each ch across to last ch, 3 sc in last ch, working on bottom of foundation ch, sc in each ch across to last sc, 2 sc in last sc, join with slip st in front loop of first sc – 80 sc.
- Round 2: Ch 1, sc in front loop of first 2 sc, (ch 3, slip st) in top of last sc made, *sc in front loop of next 2 sc, (ch 3, slip st) in top of last sc made; repeat from * to last sc, sc in front loop of last sc, join with slip st to beginning sc. Fasten off.
- Round 3: Join A in back loop of beginning sc 2 rounds below (Round 1), ch 1, 2 sc in back loop of beginning sc, sc in back loop of next 37 sc, 2 sc in back loop of next 3 sc, sc in back loop of next 37 sc, 2 sc in back loop of next 2 sc, join with slip st to top of beginning sc – 86 sc.
- Round 4: Ch 1, working in both loops, 2 sc in beginning sc, 2 sc in next sc, sc in next 37 sc, 2 sc in next 6 sc, sc in next 37 sc, 2 sc in next 4 sc, join with slip st in front loop of beginning sc – 98 sc.
- Round 5: Ch 1, sc in front loop of beginning sc, sc in front loop of next sc, (ch 3, slip st) in top of last sc made, *sc in front loop of next 2 sc (ch 3, slip st) in top of last sc made; repeat from * around, join with slip st to top of beginning sc. Fasten off.
- Round 6: Join B in back loop of beginning sc 2 rounds below (Round 4), ch 1, sc in back loop of each sc around, join with slip st to beginning sc.
- Round 7: Ch 1, working in both loops, 2 sc in beginning sc, 2 sc in next sc, sc in next 42 sc, 2 sc in next 7 sc, sc in next 42 sc, 2 sc in next 5 sc, join with slip st in front loop of beginning sc – 112 sc.
- Round 8: Repeat Round 5.
- Round 9: With A, repeat Round 6.
- Round 10: Ch 1, working in both loops, sc in next 52 sc, 2 sc in next 3 sc, sc in next 53 sc, 2 sc in next 3 sc, sc in next sc, join with slip st I front loop of beginning sc.
- Round 11: Repeat Round 5.
- Round 12: With B, repeat Round 6.
- Round 13: Ch 1, working in both loops, sc in next 53 sc, 2 sc in next 5 sc, sc in next 54 sc, 2 sc in next 5 sc, sc in next sc, join with slip st in front loop of beginning sc.
- Round 14: Repeat Round 5.
- Round 15: With A, repeat Round 6.
- Round 16: Ch 1, working in both loops, sc in each sc around, join with slip st in front loop of beginning sc.
- Round 17: Repeat Round 5.
- Round 18: With B, join in back loop of beginning sc 2 rounds below (Round 16) ch 1, *sc in back loop of next 54 sc, (2 sc in back loop of next sc, sc in back loop of next sc) 5 times, repeat from * around, join with slip st in beginning sc.
- Round 19: Repeat Round 16.
- Round 20: Repeat Round 5.
- Round 21: With A, join in back loop of beginning sc, ch 1, 2 sc in back loop of beginning sc, sc in next sc, (2 sc in back loop of next sc, sc in back loop of next sc) 3 times, sc in back loop of next 37 sc, (2 sc in back loop of next sc, sc in back loop of next sc) 16 times, sc in back loop of next 37 sc, (2 sc in back loop of next sc, sc in back loop of next sc) 12 times, join with slip st in beginning sc.
- Round 22: Repeat Round 16.
- Round 23: Repeat Round 2.
- Round 24: With B, repeat Round 6.
- Round 25: Repeat Round 16.
- Round 26: Repeat Round 2.
- Round 27: With A, repeat Round 6.
- Round 28: Ch 1, *sc in next 61 sc, (2 sc in next sc, sc in next sc) 12 times, repeat from * around, join with slip st in front loop of beginning sc.
- Round 29: Repeat Round 5.
- Round 30: With B, repeat Round 6.
- Round 31: Repeat Round 16.
- Round 32: Repeat Round 5.
- Round 33: With A, repeat Round 6.
- Round 34: Repeat Round 16.
- Round 35: Repeat Round 5.
- Round 36: With B, join in back loop of first sc 2 rounds below (Round 34), ch 1, 2 sc in back loop of beginning sc, *sc in back loop of next 7 sc, 2 sc in back loop of next sc, repeat from * around to last sc, sc in back loop of last sc, join with slip st to beginning sc.
- Round 37: Repeat Round 16.
- Round 38: Repeat Round 2.
- Round 39: With A, repeat Round 6.
- Round 40: Ch 1, working in both loops, 2 sc in beginning sc, * sc in next 5 sc, 2 sc in next sc, repeat from* around to last 2 sc, sc in last 2 sc, join with slip st in front loop of beginning sc.
- Round 41: Repeat Round 5.
- Round 42: With B, repeat Round 6.
- Round 43: Repeat Round 16.
- Round 44: Repeat Round 5.
- Round 45: With A, repeat Round 6.
- Round 46: Repeat Round 16.
- Round 47: Repeat Round 5.
- Round 48: With B, repeat Round 6.
- Round 49: Repeat Round 16. Fasten off.
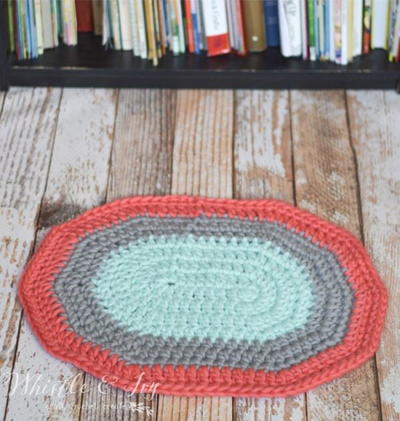
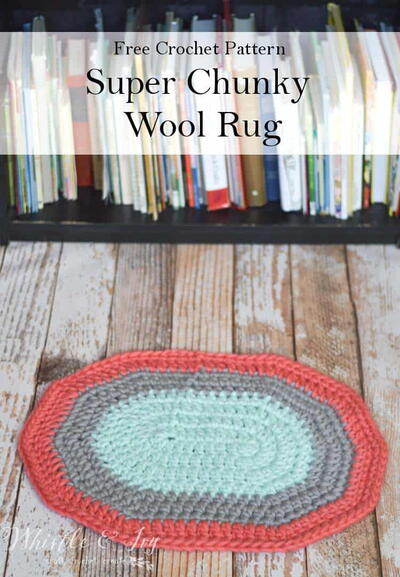
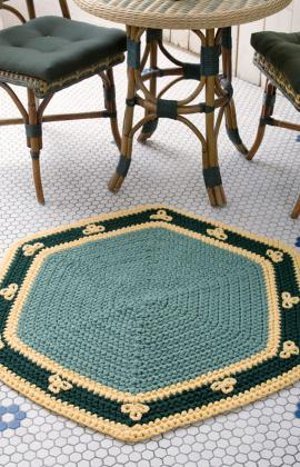
Read NextEasy Hexagon Rug
Your Recently Viewed Projects
Thanks for your comment. Don't forget to share!
Cheryl Y
Oct 25, 2016
I have been looking for a easy crochet pattern for a rug like this Infinity Rug! Thanks, I love the look of it and the pattern is very easy to follow. I will be making this rug for every room in my home. I wonder how it will look and feel with different types of yarn? I'll be trying different yarns and see what I can come up with. Looking forward to making these and hope my children don't want to steel them.. Thank you so much for sharing this free crochet rug pattern.
bobbylonardo 50143 99
Aug 17, 2014
Rugs like this are very nice but also very slippery! Be careful especially if you have small kids running around.
Kstahl46 1500314
Jul 24, 2014
Want to save pattern. No save button! Where did it go?!?
FaveCrafts Editor JL
Jul 25, 2014
Hi there, The save button is below the project, in between the print button and the comment button. It is located above the Ratings & Comments section. You should be able to see it if you are logged in. Thanks!
sandimac6 7990311
Oct 10, 2017
Sorry, maybe I'm half asleep, but, i still cannot find the "save" button???
Editor Dana
Oct 10, 2017
Hi there! The save button has been moved! You can find it now at the bottom of the article after the 50th step. There are social media buttons and there is a gray button with a plus sign you'll use to save. I hope that helps!
ebrowncrochet 0644 937
Dec 25, 2012
my grandmother made rugs and hot pads in this style when I was a child. My grandfather worked at a company that made the knitted cording that was used around electric cords. He took the odds and ends of cording home to my grandmother. I call them life time rugs and hot pads. My grandmother died in the 1980. I still use them.
JMitchell
Nov 28, 2012
Redheart has a printable version here: http://www.redheart.com/free-patterns/millennium-loop-rug
lbreeves 8566518
Oct 25, 2012
I am having trouble with round 2. The part that says sc in front loop of first 2 sc, I understand this part. It is this next sc that I am not sure where I am suppose to (ch 3, slip st) in top of last sc made. And is it forming some sort of loop? When I read the next round it sounds like they are all just sc and no mention of the ch 3, slip st's.
pawood 8483600
Sep 13, 2012
If you right click your mouse and do a print preview you can change font size there. Will use more paper, but, you can read it. I have old eyes to.
luckysea13
Sep 02, 2012
This looks easy to make & my daughter needs a couple of this mates. Thanks for the pattern.
glenso1 7462839
Aug 04, 2012
Just a note: When I printed this, the font was so small I couldn't read it. Looks like a about 6 or at best 8 font size. Please increase the Font Size for us oldies. The Rug and instructions are great. Thank You
Melissa Ryan
Aug 10, 2012
@glenso1 Thanks for the comment! If the pattern is too hard to read, you could also copy all the text and paste it into a word document, then increase the size so it's easier to read.
BHerb
Jun 12, 2012
Hi WebbyDeber, A and B are designated to each different color of yarn. If you look in the materials needed for the pattern, the first yarn is noted as 'A' and the second is noted as 'B'. Patterns use letters as abbreviations for different colors. I hope this helps!
webbydeber 6841588
Jun 08, 2012
Hi, If you use two stands of yarn held together what is meant by the "with A" & "with B" mean?
Lynn48
Jun 08, 2012
With 2 strands of the same color, you complete a given round. The next round is done with 2 strands of the other color. This is easiest to do if you work with 2 skeins of the given color (see Materials) at once, rather than trying to work with both ends of the same skein.
Report Inappropriate Comment
Are you sure you would like to report this comment? It will be flagged for our moderators to take action.
Thank you for taking the time to improve the content on our site.