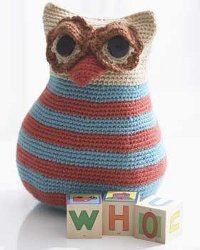
Crochet Owl Toy
Make a fun crochet owl toy from Bernat Yarns for that owl-lover you know. It also makes a great gift for a child or a cute gift for a graduate. This is an easy crochet pattern for anyone who's new to amigurumi. This project is also cuddly and soft and is great for new babies. Mix and match your favorite yarn colors to create an owl that's unique, fun, and totally you!
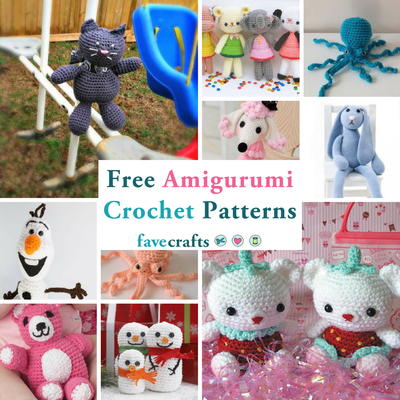
Find this and other fun amigurumi patterns at "19 Free Amigurumi Crochet Patterns"!

Materials:
- 1 ball Bernat Satin Yarn in Camel (MC)
- 1 ball Bernat Satin Yarn in Aqua (A)
- 1 ball Bernat Satin Yarn in Rouge (B)
- 1 ball Bernat Satin Yarn in Amber (C)
- 3.75 mm (US F or 5) crochet hook
- 2 buttons for eyes
- Stuffing
Gauge: 18 sc and 22 rows = 4 ins [10 cm].
Instructions:
Approx 10 ins [25.5 cm] high.
Stripe Pattern
- With A, work 4 rnds.
- With B, work 4 rnds.
- These 8 rnds form Stripe Pat.
Body
-
With A, ch 2.
-
1st rnd: 8 sc in 2nd ch from hook. Join with sl st to first sc.
-
2nd rnd: Ch 1. *2 sc in next sc. Rep from * around. Join with sl st to first sc. 16 sc.
-
3rd rnd: Ch 1. *1 sc in next sc. 2 sc in next sc. Rep from * around. Join with sl st to first sc. 24 sc.
-
4th rnd: Ch 1. *1 sc in each of next 2 sc. 2 sc in next sc. Rep from * around. Join B with sl st to first sc. 32 sc.
-
First 4 rnds of Stripe Pat are complete. Keeping cont of Stripe Pat, work as established, inc 8 sc every rnd until there are 96 sc. Place marker on last rnd.
-
Next rnd: Ch 1. 1 sc in each sc around. Join with sl st to first sc.
-
Keeping cont of Stripe Pat, rep last rnd until work from marked rnd measures 4 ins [10 cm].
-
Next rnd: Ch 1. *1 sc in each of next 10 sc.
-
Draw up a loop in each of next 2 sc. Yoh and draw through all loops on hook – sc2tog made. Rep from * around. Join with sl st to first sc. 88 sts.
-
Next 4 rnds: Ch 1. 1 sc in each st around. Join with sl st to first sc.
-
Keeping cont of Stripe Pat, rep last 5 rnds until there are 64 sc.
-
Work even in rnds until work from marked rnd measures approx 5½ ins [14 cm], ending with 4 rnds of A, and joining MC at end of last rnd.
-
Place marker at end of last rnd.
-
With MC, work even in rnds until work from last marker measures 3 ins [7.5 cm].
-
Shape head: Next rnd: Ch 1. *1 sc in each of next 6 sc. Sc2tog over next 2 sc. Rep from * around. Join with sl st to first sc. 56 sts.
-
Next rnd: Ch 1. 1 sc in each st around. Join with sl st to first sc.
-
Next rnd: Ch 1. *1 sc in each of next 5 sc.
-
Sc2tog over next 2 sc. Rep from * around. Join with sl st to first sc. 48 sts.
-
Next rnd: Ch 1. 1 sc in each st around. Join with sl st to first sc. Fasten off.
- Stuff Body. Sew top edge closed.
Eyes (Make 2)
- With MC, ch 2.
-
1st rnd: 8 sc in 2nd ch from hook. Join with sl st to first sc.
-
2nd rnd: Ch 1. *2 sc in next sc. Rep from * around. Join with sl st to first sc. 16 sc.
-
3rd rnd: Ch 1. *1 sc in next sc. 2 sc in next sc. Rep from * around. Join with sl st to first sc. 24 sc.
-
4th rnd: Ch 1. *1 sc in each of next 2 sc. 2 sc in next sc. Rep from * around. Join C with sl st to first sc. 32 sc.
- 5th rnd: With C, ch 1. *4 dc in next sc. Miss next sc. 1 sc in next sc. Miss next sc. Rep from * around. Join with sl st to first dc. Fasten off.
Eyelids (Make 2)
-
With C, ch 10.
-
1st row: 1 sc in 2nd ch from hook. 1 sc in each ch to end of ch. Turn. 9 sc.
-
2nd row: Ch 1. 1 sc in each sc to end of row. Turn.
-
3rd row: Ch 1. Sc2tog over first 2 sc. 1 sc in each sc to last 2 sc. Sc2tog over last 2 sc. Turn.
- Rep last row twice more. 3 sc. Fasten off at end of last row.
Beak
-
With B, ch 2.
-
1st row: 3 sc in 2nd ch from hook. Turn.
-
2nd row: Ch 1. 2 sc in first sc. 1 sc in next sc. 2 sc in last sc. Turn. 5 sc.
-
3rd row: Ch 1. 2 sc in first sc. 1 sc in each sc to last sc. 2 sc in last sc. Turn. 7 sc.
-
Rep last row twice more. 11 sc at end of last row.
-
Next row: Ch 1. 1 sc in each sc to end of row. Turn.
- Rep last row 3 times more. Fasten off.
Finishing
-
Sew buttons to Eyes. Sew Eyelids onto Eyes.
- Attach Beak to front of Body. Sew on Eyes as shown in picture.
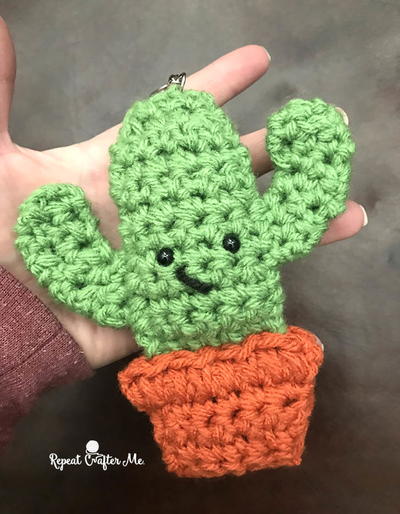
Read NextCrochet Cactus Amigurumi
Your Recently Viewed Projects
Thanks for your comment. Don't forget to share!
lisaetheredge 1657 221
May 19, 2013
Can anyone explain what #6 after 4th round means? Not grasping the concept here!! Thanks!
Melissa Ryan
Dec 07, 2012
What a fun and easy pattern. This is a great project to try if you're new to crocheting toys.
mcdermottjulie518 0264810
Aug 05, 2012
Of the two items I would make the crocheted owl . That's my favorite
babinebear 9749698
Aug 04, 2012
Of the 2 patterns, I prefer the crocheted owl. I don't sew much anymore, but hey, why don't you combine the two?? Crocheted body with fabric embellishments....the best of 2 worlds.
asil
Sep 08, 2010
I've just finished making this pattern. I didn't use buttons for eyes as I didn't have any so I did the first two rows of the eyes using the contrasting colour. http://crochetquackers.blogspot.com/2010/09/owl.html You can see a photo of the finished owl at the site above. My finished owl is also 28 cm tall which is a bit bigger than the pattern suggested. Thank you for another great pattern.
Report Inappropriate Comment
Are you sure you would like to report this comment? It will be flagged for our moderators to take action.
Thank you for taking the time to improve the content on our site.