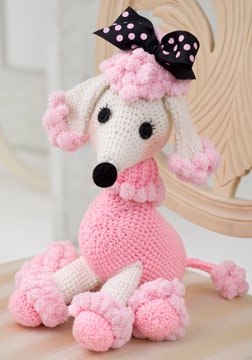
Cute Crochet Doll

Any easy crochet pattern like this one is great for any young girl. Bright shades of Bernat Handicrafter Cotton are used for this cute pattern from Lily Sugar n' Cream. Learn how to crochet a doll pattern that is equal parts cuddly and adorable. This simple free crochet doll pattern shows you how to make a DIY doll from start to finish. From crocheting her cute dress to creating her darling doll shoes, this pattern is not one to be missed, especially if you have a granddaughter or daughter who loves dolls.

Crochet HookE/4 or 3.5 mm hook, H/8 or 5 mm hook
Yarn Weight(4) Medium Weight/Worsted Weight and Aran (16-20 stitches to 4 inches)
Crochet GaugeDoll: 16 sc and 20 rows = 4 ins [10 cm].
Dress: 13 sc and 14 rows = 4 ins [10 cm].
Finished SizeDoll: Approx 13 ins [33 cm] tall. Dress: Approx 4 ¼ ins [11 cm] long.
Materials List
- Bernat® Handicrafter Cotton (Solids: 50 g/1.75 oz; 73 m/80 yds, Twists: 42.5 g/1.5 oz; 62 m/68 yds)
- Main Color (MC): 00002 Off White 2 balls
- Contrast A: 13111 Mod Blue 1 ball
- Contrast B: 13699 Tangerine 1 ball
- Contrast C: 41554 In Motion Twists 1 ball
- Doll: Size 3.5 mm (U.S. E or 4) crochet hook or size needed to obtain gauge. Stuffing. 2 small black beads for eyes. Small amount of red embroidery floss for mouth. Small amount of black embroidery floss for eyelashes.
- Dress: Size 5 mm (U.S. H or 8) crochet hook or size needed to obtain gauge.
INSTRUCTIONS
DOLL
Head
-
With MC, ch 2.
-
1st rnd: 8 sc in 2nd ch from hook. Join with sl st to first sc.
-
2nd rnd: Ch 1. 2 sc in each sc around. Join with sl st to first sc. 16 sc.
-
3rd rnd: Ch 1. *2 sc in next sc. 1 sc in next sc. Rep from * around. Join with sl st to first sc. 24 sc.
-
4th rnd: Ch 1. *2 sc in next sc. 1 sc in each of next 2 sc. Rep from * around. Join with sl st to first sc. 32 sc.
-
5th rnd: Ch 1. *2 sc in next sc. 1 sc in each of next 3 sc. Rep from * around. Join with sl st to first sc. 40 sc.
-
6th rnd: Ch 1. 1 sc in each sc around. Join with sl st to first sc.
-
Rep last rnd 10 times more.
-
Next rnd: Ch 1. *Draw up a loop in each of next 2 sc. Yoh and draw through all loops on hook – sc2tog made. 1 sc in each of next 3 sc. Rep from * around. Join with sl st to first sc. 32 sts.
-
Next rnd: Ch 1. *Sc2tog over next 2 sc. 1 sc in each of next 2 sc. Rep from * around. Join with sl st to first sc. 24 sts. Stuff Head.
-
Next rnd: Ch 1. *Sc2tog over next 2 sc. 1 sc in next sc. Rep from * around. Join with sl st to first sc. 16 sts.
-
Next rnd: Ch 1. *Sc2tog over next 2 sts. Rep from * around. Join with sl st to first st. Fasten off.
Body
-
With MC, ch 30. Join with sl st to first ch.
-
1st rnd: Ch 1. 1 sc in each ch around. Join with sl st to first sc. 30 sc.
-
2nd rnd: Ch 1. 1 sc in each sc around. Join with sl st to first sc.
-
Rep last rnd until work from beg measures 2 ins [5 cm].
-
Next rnd: Ch 1. *Sc2tog over next 2 sc. 1 sc in each of next 3 sc. Rep from * around. Join with sl st to first sc. 24 sts.
-
Next rnd: Ch 1. 1 sc in each st around. Join with sl st to first sc.
-
Rep last rnd until work from beg measures 4 ins [10 cm].
-
Next rnd: Ch 1. *Sc2tog over next 2 sc. 1 sc in each of next 2 sc. Rep from * around. Join with sl st to first sc. 18 sts.
-
Next rnd: Ch 1. 1 sc in each sc around. Join with sl st to first sc.
-
Rep last rnd twice more. Fasten off.
-
Sew bottom edge of Body closed. Stuff Body.
Arms (make 2).
-
With MC, ch 2.
-
1st rnd: 5 sc in 2nd ch from hook. Join with sl st to first sc.
-
2nd rnd: Ch 1. 2 sc in each sc around. Join with sl st to first sc. 10 sc.
-
3rd rnd: Ch 1. 1 sc in each sc around. Join with sl st to first sc.
-
4th rnd: Ch 1. 1 sc in each of next 4 sc. 1 tr in next sc (thumb). 1 sc in each of last 5 sc. Join with sl st to first sc.
-
5th rnd: Ch 1. 1 sc in each st around. Join with sl st to first sc.
-
6th rnd: Ch 1. (Sc2tog over next 2 sc. 1 sc in each of next 3 sc) twice. Join with sl st to first sc. 8 sts.
-
7th rnd: Ch 1. 1 sc in each st around. Join with sl st to first sc.
-
Rep last rnd until Arm from beg measures 4 ins [10 cm]. Fasten off. Stuff Arms lightly.
Legs (make 2).
-
Shoe: With A, ch 5.
-
1st rnd: 1 sc in 2nd ch from hook. 1 sc in each of next 2 ch. 3 sc in last ch. Do not turn. Working in rem loops of foundation ch, 1 sc in each of next 2 ch. 2 sc in last ch. Join with sl st to first sc. 10 sc.
-
2nd rnd: Ch 1. 2 sc in first sc. 1 sc in each of next 2 sc. 2 sc in each of next 3 sc. 1 sc in each of next 2 sc. 2 sc in each of last 2 sc.
-
Join with sl st to first sc. 16 sc.
-
3rd rnd: Ch 1. 2 sc in first sc. 1 sc in each of next 4 sc. 2 sc in each of next 4 sc. 1 sc in each of next 4 sc. 2 sc in each of next 3 sc. Join with sl st to first sc. 24 sc.
-
4th rnd: Ch 1. Working in back loops only, 1 sc in each sc around. Join with sl st to first sc.
-
5th rnd: Ch 1. 1 sc in each of next 7 sc. (Sc2tog over next 2 sc) 3 times. 1 sc in each sc to end of rnd. Join MC with sl st to first sc. Place marker at end of rnd. 21 sts.
-
6th rnd: With MC, ch 1. Working in back loops only, 1 sc in each of next 6 sc. (Sc2tog over next 2 sc) 3 times. 1 sc in each sc to last 2 sc. Sc2tog over last 2 sc. Join with sl st to first sc. 17 sts.
-
7th rnd: Ch 1. 1 sc in each of next 5 sc. (Sc2tog over next 2 sc) 3 times. 1 sc in each sc to end of rnd. Join with sl st to first sc. 14 sts.
-
8th rnd: Ch 1. 1 sc in each st around. Join with sl st to first sc.
-
Rep last rnd until Leg from marker at top of Shoe measures 5 ins [12.5 cm]. Fasten off.
Shoe strap
-
Join A with sl st to 6th sc of marked rnd. Ch 5. Join with sl st to 13th sc of marked rnd. Fasten off.
FINISHING
-
Stuff Legs. Sew top of Legs closed using whip st. Sew to bottom of Body as shown in picture. Attach Arms to sides of Body.
-
Hair: Cut a piece of tape 11 ins [28 cm] long and secure onto a flat surface with sticky side up. Cut A, 14 ins [35.5 cm] long and lay them across tape so strip of tape is in center of yarn. Holding tissue paper over top of yarn and using sewing machine, run a line of stitching along length of tape. Remove tape when hair is secure. Remove tissue paper after stitching.
-
Pin hair to outside of head. Using backstitch and A, sew hair into place along sewn line.
-
Fold hair up and secure at top of Head tightly.
DRESS
Note: Dress is worked from top down.
-
With B, ch 31. Join with sl st to first ch.
-
1st rnd: Ch 1. 2 sc in same sp as sl st. *1 sc in next ch. Miss next 2 ch. 1 sc in next ch. 3 sc in next ch. Rep from * 4 times more. 1 sc in next ch. Miss next 2 ch. 1 sc in last ch. 1 sc in first ch (where first 2 sc worked). Join with sl st to first sc.
-
2nd rnd: Working in back loops only, ch 1. 2 sc in first sc. *1 sc in next sc. Miss next 2 sc. 1 sc in next sc. 3 sc in next sc. Rep from * 4 times more. 1 sc in next sc. Miss next 2 sc. 1 sc in last sc. 1 sc in first sc. Join with sl st to first sc.
-
3rd rnd: Working in back loops only, ch 1. 3 sc in first sc. *1 sc in next sc. Miss next 2 sc. 1 sc in next sc. 5 sc in next sc. Rep from * 4 times more. 1 sc in next sc. Miss next 2 sc. 1 sc in each of last 2 sc. 2 sc in first sc. Join with sl st to first sc.
-
4th to 7th rnds: Working in back loops only, ch 1. 2 sc in first sc. *1 sc in each of next 2 sc. Miss next 2 sc. 1 sc in each of next 2 sc. 3 sc in next sc. Rep from * 4 times more. 1 sc in each of next 2 sc. Miss next 2 sc. 1 sc in each of last 2 sc. 1 sc in first sc. Join with sl st to first sc.
-
8th rnd: Working in back loops only, ch 1. 3 sc in first sc. *1 sc in each of next 2 sc. Miss next 2 sc. 1 sc in each of next 2 sc. 5 sc in next sc. Rep from * 4 times more. 1 sc in each of next 2 sc. Miss next 2 sc. 1 sc in each of last 2 sc. 2 sc in first sc. Join with sl st to first sc.
-
9th and 10th rnds: Working in back loops only, ch 1. 2 sc in first sc. *1 sc in each of next 3 sc. Miss next 2 sc. 1 sc in each of next 3 sc. 3 sc in next sc. Rep from * 4 times more. 1 sc in each of next 3 sc. Miss next 2 sc. 1 sc in each of last 3 sc. 1 sc in first sc. Join with sl st to first sc. Break B. Join C.
-
11th rnd: Working in front loops only, with C, ch 1. 2 sc in first sc. *1 sc in each of next 3 sc. Miss next 2 sc. 1 sc in each of next 3 sc. 3 sc in next sc. Rep from * 4 times more. 1 sc in each of next 3 sc. Miss next 2 sc. 1 sc in each of last 3 sc. 1 sc in first sc. Join with sl st to first sc. Fasten off.
-
12th rnd: Join C with sl st to back loop of first sc of 11th rnd. Working in back loops only, ch 3 (counts as dc). 1 dc in same sp as sl st. *2 dc in next sc. Rep from *around. Join with sl st to top of ch 3. Fasten off.
Straps: (make 2).
-
With 2 strands of B, ch 8. Fasten off.
-
Try dress on Doll. Attach each strap at points of top edge.
Flower: (make 1 with C, make 2 with B).
-
Ch 2.
-
1st rnd: 7 sc in 2nd ch from hook. Join with sl st to first sc.
-
2nd rnd: *Working in back loops only, ch 3. Sl st in next sc. Rep from * around, ending with ch 3. Join with sl st to first st. (7 petals). Fasten off.
-
Sew C Flower on Dress and B Flowers at ponytail.
Abbreviations
- Ch(s)
- Chain(s).
- Rem
- Remaining.
- Rep
- Repeat.
- Rnd(s)
- Round(s).
- Sc
- Single crochet.
- Sl st
- Slip stitch.
- Sp(s)
- Space(s).
- St(s)
- Stitch(es).
- Tr
- Treble crochet.
- Yoh
- Yarn over hook.
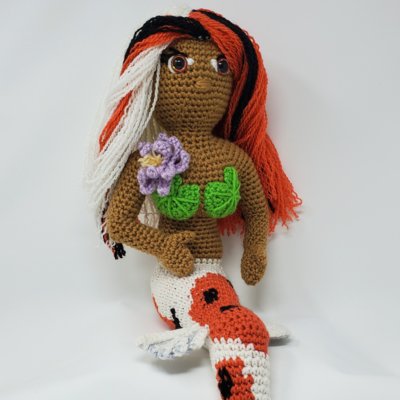
Read NextKoi Mermaid
Your Recently Viewed Projects
Thanks for your comment. Don't forget to share!
ChrisDR
Nov 09, 2021
I have really struggled with this pattern. It's the only doll pattern that starts the body at the neck and works down. Very confusing. No other doll patterns that I've seen have you chain 1 each round - Let alone directions are very confusing. Someone who has made this doll, should make another and video tape it.
princess6860504
Mar 15, 2018
Isn't this little dolly so cute?! I don't have a little girl, but dang it- so what if I want to make this anyway, just for myself? I am reading over the instructions and they are quite intricate and involved. This may take a while to work up. I am going to have to use my patented line by line marker for the written instructions so I don't lose my place. That is the hardest thing for me to do!
smudgett2129 47580 69
Dec 28, 2016
I made this for a little girl at church and it turned out great. I made it according to the pattern and didn't like how long the body ended up being so I unraveld about 10 rows. I probably crochet too big. I also had my doll with her arms through the upper portion of the dress so she has "sleeves". I also gave her a scrunchie around her ponytail. It was just a little more personalized.
BeckySue
Mar 03, 2016
I made this doll and it's cute enough for my granddaughter, but it was not an easy project for a beginner. The single crochet stitch is super easy, but there's so much more to making this doll than crochet. I watched several YouTube videos to understand everything that wasn't explicit in the directions. I still recommend this project, but maybe not as your first ever crochet project! lol
Member 2313087
Jul 23, 2015
Do you happen to have a photo of what the side/back of the head/hair looks like? I'm a tad confused on securing the hair, will the back of the head look bald?
FaveCrafts Editor JL
Jul 23, 2015
Hi there, Unfortunately the original pattern only includes one photo. However, we encourage all readers to include their own photos of the finished project, so continue to check back to see if anyone has posted their own versions on this page. - Julia from FaveCrafts
yolie3382 4159751
May 23, 2015
made a few adjustments but in all it was great thanks. would love to do one in crochet thread instead of yarn. Any patterns like this
ljmegates 5895446
Feb 07, 2015
Can't seem to access the links as to how to put this together. Any suggestions.
FaveCrafts Editor JL
Feb 09, 2015
Hi there, the complete instructions for this project are listed above. You shouldn't need any additional links. Thanks! - Julia from FaveCrafts
leonor8818 6074930
Nov 02, 2014
Hi I wish you have a video also because I don't know how to follow this written instructions. Thanks a lot :)
FaveCrafts Editor JL
Nov 03, 2014
Hi there, Thanks so much for your comment - unfortunately we don't have a video tutorial for this project. If you have a specific question related to this pattern, contact Lily Sugar 'n Cream directly. Thanks! - Julia from FaveCrafts
morgansmamaw13 075 6650
Jan 22, 2013
I am making this for my granddaughters birthday I will take your advice and go to lilly for complete directions on this dolls hair I think it will turn out cute but I will do the hair my own way thank you for getting me dtarted on this pattern
BeckySue
Mar 03, 2016
I made this doll and used different hair and attached it more securely. Instead of just pulling the strand of cut yarn through a stitch opening and slip knotting it, I pulled it back through another stitch and out again through a lower row stitch. It was a gift for my 14 month old granddaughter, and I knew she'd be carrying it around by the hair! I also used yarn for the eyes instead of the plastic safety eyes.
Angela 9207543
May 23, 2012
Go to http://www.sugarncream.com/pattern.php?PID=5023 the Lily site to download the full pattern. You have to register with them, but it's free.
moxamomma
Mar 01, 2012
has anyone figured out how many strands of yarn to use for the doll hair?
moxamomma
Feb 28, 2012
Cute Crochet Doll http://www.favecrafts.com/Crochet-Amigurumi/Cute-Crochet-Doll I want to know where in this pattern does it tell you to attach the doll head to the body!!?? Please and thank you asap. Iris
Devonviolet
Mar 10, 2012
Hi Moxamomma I just finished my doll I did my hair differently than the directions recommended and made the hair longer It took about of a oz skein of Caron Simply Soft The texture is wonderful I can't say how many strands these directions would take since I did my hair differently but I would think if you did a sample by sewing about or two inches of yarn on the tape you could multiply it out for how ever many inches of tape you plan to use When I was first thinking of following these instructions I was planning to do a longer tape and sew a tighter spiral than inches would allow But that is me You might get fine results doing the inches What I did was cut pieces long I finished the head except for the last four decrease rows to give my hands room to get…Read More into the head Before I stuffed the head I used my crochet hook and using every other stitch I attached the yarn by going around the post stitch a full circle When I was doing the hairline I did every stitch so there weren't any gaps This made the hair longer and thicker than the photo but with the silky Simply Soft yarn the hair is gorgeous When I was finished the hair came a little longer than her feet so I trimmed about an inch off while holding the doll upside down This caused the lower end of the hair to be slightly tapered which is a cool effect You could also hold the doll upright and trim evenly blunt cut all the way around When I was finished doing the face I stuffed the head tightly finished the decrease rows leaving a three foot tail that I could use to sew the head to the top of the neck using a whip stitch I made sure the head opening was the same size as the neck opening so I could pretty much match stitch for stitch from the neck to the head When I had about an inch of opening left I stopped and TIGHTLY stuffed the neck so it could support the weight of the hair and head Then I finished sewing the gap closed I hope this comes in time to help you finish your doll I just HATE it when I get so far on a project and can't figure out how to finish it This doll is just darling when she is all finished
Devonviolet
Mar 10, 2012
I just re-read my reply and wanted to clarify about how I did the hair Each strand was inches When I pulled the strand through the hole between stitches I started by pulling one end of the strand from the inside to the outside leaving half on the inside In the hole on the other side of the crochet stitch post that I was using I pulled the second end from the inside to the outside equalizing the length This next part is important to make sure it is secure Then I went back into the head with my hook and pulled one of the strands back into the head through the other hole and then back out again through the hole on the other side of the stitch post This essentially wraps the yarn totally around the stitch post When both strands are on the outside again pull them both…Read More to snug the wrap So far my strands haven't come out so I think this should stay nicely I hope that makes sense if anyone wants to try it
kreeves
Feb 15, 2012
If you purchase the Lily Sugar N' Cream book that has this pattern in it..it will tell you how to attach the head.
Crafter 6385544
Feb 09, 2012
pattern is cut however, there is nothing about attaching the head and IT DOESN'T TELL YOU HOW MANY STRANDS OF YARN TO USE FOR THE HAIR or am I missing something???
effie2749 7476612
Jan 10, 2012
the hair was difficult so i changed it i just wrapped a bunch of yarn on a piece of cardboard about 9 in long (u can alway cut the hair shorter after you place it on the dolls head) then i braided it . its very cute.
adamiake 2802286
Jan 06, 2012
I think my grandchildren will enjoy this doll. Are there patterns for more clothes?
charlottecevans 01 21744
Oct 12, 2011
I made this for our granddaughter almost 2 years ago and she still loves it. She puts different clothes on it.
mrsnap1 2953432
Aug 08, 2011
I am having trouble understainding how to attach the hair.... where is the sewing line?? can someone explain it to me please....?? thank you...
EvieDun
Feb 26, 2011
I made this doll for my grand-daughter and she and the rest of the people who saw it, loved it. Instructions were great and it was a pleasure to make.
Romania1977
Feb 24, 2011
In the middle of making this, I'm a little worried about attaching the hair, not sure how to do it exactly.
edabarbie 1257460
Feb 14, 2011
I love this it soooooooooo cute I think everybody should crochet such a cute thing!
Mackena
Feb 14, 2011
You know this is a Lily pattern right?? Anyway... here is the link to the lot of them: http://www.sugarncream.com/lilydolls/ There are also two brand new versions for Valentines Day: Date Night Lily: http://www.sugarncream.com/pattern.php?PID=5150 Date Night Billy: http://www.sugarncream.com/pattern.php?PID=5149 ENJOY!!!!
oliversoliver
Oct 12, 2010
My grand daughter love it . The pattern worked up quickly and was completed in a day
Report Inappropriate Comment
Are you sure you would like to report this comment? It will be flagged for our moderators to take action.
Thank you for taking the time to improve the content on our site.