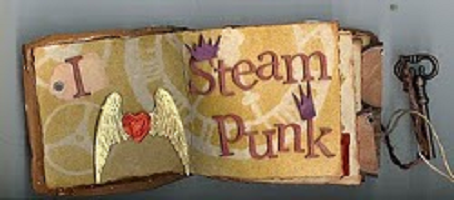
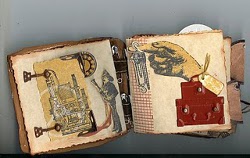
Steampunk Paperclay Book
This Steampunk Paperclay Book from Terri Sproul is a must-have accessory for anyone who likes to play dress up! Using clay, safety pins, ribbon, and more, you'll create a craft that looks like it came from the Victorian era. Add your own touches to this DIY steampunk project, and this piece will truly be one of a kind. Use this craft to complete your Halloween costume, or give it as a gift to someone who is up on science fiction trends.

Materials:
- Alchohol ink: Pesto, Ginger, Butterscotch
- Memories Mist: Pale Ale
- Memories Ink Pads: Ruby, Plum,
- India Ink Pad
- Palette InkPads: Cognac, Raw Sienna
- Acryclic Paints: Shade of Browns
- 3-D Crystal Lacquer
- Jewelry Findings from Sakura Hobby Craft
- Stamps: Plate #1267 (Steampunk)
- Paperclay
- Red Line Tape
- Ribbon
- Safety Pins
- Door Knob by 7 Gypsies
- Clock parts
- Large old fashion keys
- Grunge dies from Tim Holtz
- Mini, larger tags
- Old-fashioned safety pin
- Glue Dots
Instructions:
-
Make your paperclay book as seen in the video. Let dry overnight.
-
Measure your paperclay book to figure out what size to make your pages. My book is about 4 1/4” x 4 1/4” so I made my pages 3 3/4” x 3 3/4”. I cut out 4 pages out of cardstock to measure 3 3/4” x 7 1/2” and folded the pages in half. Read step 3 before cutting pages.
-
I started with 2 – 8 1/2” x 11” cream cardstock and added Tim Holtz gear and clock masks to my cardstock. Spray Memories Mist “Pale Ale” over the masks on each sheet of cardstock. Cut out pages.
-
Have fun! I stamped different steampunk images on my background and added lots of fun embellishments.
-
Once all my pages were done, I bound my book.

-
I painted the cover with a different color of brown acrylic paint to make it look like leather.
-
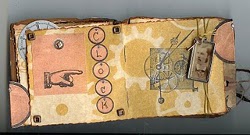
On the first page, I used Tim Holtz's mini grunge letter with Plum and Ruby ink. I used my Micro Glue Dots for the letters.
-
The key on the side is on a string, I can use it to keep the book closed. Spray the background with Memories Mists.
-
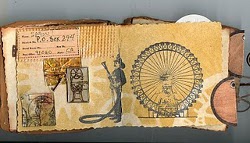
On these pages, I used the Hinges from Tim Holtz. The stamps are all from VivaLasVegaStamps. For the fireman, I used both Ruby and India inks. I cut out the fireman and used Pop-Up Glue Dots to adhere him to the page. The suitcase is a very large brad, and the finger is a stamp from Stampotique
-
On these pages, I used the fireman stamp and a Ferris Wheel stamp. I inked the edges to give them an aged look.
-
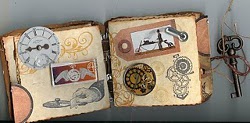
I used copper wire to hang a small key next to the Sakura Jewelry Finding.
-
I folded a tag in half and added it to the side of the page to create a tab.
-
The clock face is real, but I used the Tim Holtz Spinner for the center of the clock face. The Glass Tile embellishment is from Sakura.
-
I made the embellishment on the right side page with the gears in it. Here is the video on how I made the embellishment in this book.
-
This page I used a sticker from EK Success. The stamp on the right hand page is one from the sheet of steampunk stamps I got from VivaLasVegaStamps.
-
I wrapped the side of the page with string and hung a Jewelry Finding with Steampunk clip art. See video for detailed instructions. I used another tag to make a tab for the page.
-
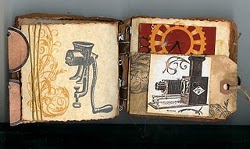
On this page, I stamped the Food Grinder from VivaLasVegaStamps using India Ink.
-
I adhered a tag with Miracle Tape from VivaLasVegaStamps and added some clip art.
-
On the final page, you can still see how I used the gear mask and Memories Mist "Pale Ale" to make my background. I stamped the man riding large wheel with India Ink. There is a large, old fashioned safety pin embellishment. See video for detailed instructions. I used a Stamp Die Cut to cut the image in silver paper, then used alcohol inks to age the silver.

-
Now it's time to bind the book. Grab your safety pins!
We interviewed Terri Sproul on FaveCrafts Radio and asked her about this project. Listen to the April 6th show to hear her tips and tricks.
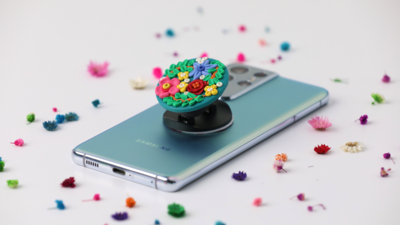
Read NextCustomized Pop Socket For Your Phone