Sparkling Beaded Ornaments
These easy-to-make spheres will add an artistic touch to your decor and are also a simple homemade Christmas ornament project. All you need is STYROFOAM Brand Foam, assorted micro-beads and adhesive and you'll be on your way. Create your own patterns and designs to match your decor.
Materials:
- STYROFOAM Brand Foam:
- Balls, 4", four
- Block or sheet, 6" square scrap
- Foam-safe metallic gold spray paint.
- Micro-bead assortments: crystal, four bags; blue, three bags; black, three bags.
- Metallic gold micro-beads, one bag.
- Double-sided adhesive: 6"x9" sheets; 1/4", 1/2", and 1" tape.
- Pencil
- Ruler
- Compass or small circle template (1-3/4")
- Newspaper or drop cloth
- 5 Paper plates
- 4 Wooden skewers
- Scissors
- Optional: Large cardboard box.
Instructions:
- Protect work surface with newspaper. Insert wooden skewer into each foam ball; place skewers in scrap foam stand. If desired, place balls inside cardboard box to contain overspray. Paint balls gold; let dry.
- Draw line around circumference of two balls; set aside. Place one ball in foam stand.
- Cut double-sided adhesive sheets into 2"x3" pieces. Remove paper liner from one piece and press firmly to rounded surface of ball. Remove remaining liner. Carefully continue until entire surface of ball is covered; do not touch exposed adhesive with fingers. Cut smaller pieces as needed to cover remaining spaces.
- Gently shake assorted bead bags to move tiniest beads to bottom; these will be used as filler. Carefully open bead bags and pour larger beads onto three paper plates, keeping colors separate; extra beads may be returned to bags upon completion. Pour gold micro-beads onto fourth paper plate.
Crystal (shown at center bottom)
- Holding skewer, gently roll ball in crystal beads. Use fingers to press beads to open areas. Remove skewer; cover hole with tiny piece of adhesive, then beads. Note: If making ornaments, leave skewer hole intact to insert wire or fiber hanger.
- Holding ball over empty paper plate, pour remaining beads from bag over surface. Use fingers to press beads to open areas.
Striped (shown at left)
- Repeat Step 3 to cover ball surface with adhesive. Center and wrap 1"-wide tape strip around circumference of ball marked in Step 2; do not remove protective liner. Carefully remove skewer; handle ball by center strip. Wrap 1/4"-wide tape strips around ball, 1/2" above and below wider strip; do not remove liner. Cut two 1-3/4" circles from adhesive and apply to top and bottom of ball; do not remove liner.
- Gently cover exposed areas with black beads; fill in with smaller beads from bag. Remove 1" liner and roll in blue; fill in. Remove round liners and roll in crystal; fill in. Remove 1/4" liners and roll in gold micro-beads.
Triangles (shown at top)
- Repeat Step 3 to cover ball surface with adhesive. Cut variety of four-sided and/or triangular shapes from 1/2"- and 1"-wide tapes. Place shapes on ball at random; do not remove protective liners. Carefully remove skewer; handle ball by liners.
- Gently cover exposed areas with crystal beads; fill in with smaller beads from bag. Remove liner from several larger shapes and roll in blue; fill in. Remove liners from remaining larger shapes and roll in black; fill in. Remove liners from smaller shapes and roll in gold micro-beads.
Diamonds (shown at right)
- Cut eight small and 16 large diamond patterns from adhesive.
- Using second ball marked in Step 2, repeat Step 3 to cover ball surface with adhesive. Place eight large diamonds around circumference of ball, sides touching; do not remove protective liners. Carefully remove skewer; handle ball by liners.
- Use photo as guide to place four large diamonds around ball, evenly spaced above and below circumference of diamonds; do not remove liners. Gently cover exposed areas with blue beads; fill in with smaller beads from bag.
- Remove liner from two adjoining diamonds on opposite sides of ball, as well as two opposite diamonds at top and bottom of ball. Center and place small diamonds cut in Step 1 on exposed diamonds at top and bottom of ball; do not remove liner. Gently cover exposed areas with black beads; fill in. Repeat for remaining large diamonds, covering exposed areas with crystal beads.
- Remove liners from small diamonds and roll in gold micro-beads.
®™ Trademark of The Dow Chemical Company ("Dow") or an affiliated company of Dow. For more project ideas, please see styrofoamstyle.com.
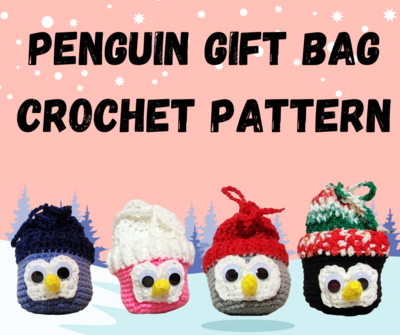
Read NextPenguin Gift Bag
Your Recently Viewed Projects
Thanks for your comment. Don't forget to share!
Crafter 18002
Aug 17, 2011
I think the pattern is good but the pictures are not with it so it would be difficult to get the ornaments to come out correctly.
JessiCAN
Aug 08, 2011
@gails: Unfortunately, our patterns are contributed by independent designers and manufacturers, and we do not always have access to photos of the finished product. We do try to post photos whenever possible. If you make this project and take a photo, please feel free to submit it so that we can post it on the pattern page. Thank you! -- Editor of FaveCrafts
Report Inappropriate Comment
Are you sure you would like to report this comment? It will be flagged for our moderators to take action.
Thank you for taking the time to improve the content on our site.