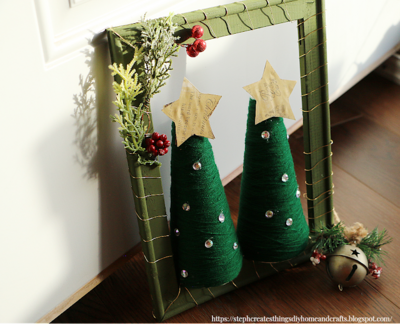
Mirror Christmas Box
Give your Christmas gifts in something great this year. Create your very own mirror Christmas box from Etchworld Armour. It's decorative and colorful. You can even use it to store small crafts or materials.

Materials:
- Christmas Rub N Etch stencil #20-0482,#20-0462,20-0460 OR #20-0446
- 3oz Armour Etch Cream #15-0150
- 5x6 Chipwood box
- 4x5 Oval Mirror #28-6523
- 2 White frosted pine cones
- 1 Sprig glittered holly
- 1 Yd red satin rope trim
- 24” Red gimp braided trim
- 18” Green gimp braided trim
- Anita’s Durable Water clean-up Polyurethane semi-gloss varnish
- Apple Barrel Acrylic Craft Paint by Plaid-Red Spice
- Apple Barrel Acrylic Craft Paint by Plaid-Christmas Green
- 1” wide masking tape
- Glass cleaner
- Paper towels
- craft brush #08-9606
- Scissors, pencil, small ruler
- Plastic gloves #08-9999
- Hot Melt glue-gun or white craft glue
- Running water
Prepare Box:
- 1-Paint lid of box with Red Spice and bottom of box with Christmas Green. Let dry.
- Apply a coat of varnish to both pieces with a foam brush and let dry thoroughly.
Etching the Mirror:
- Clean mirror thoroughly with glass cleaner, set aside.
- With frosted backing sheet attached, cut out desired stencil from stencil sheet (we chose the 2 ornaments on a branch).
- Remove frosted backing sheet and position stencil over center of mirror with shiny side up, smooth out flat and tape down using a few pieces of masking tape.
- Rub down stencil onto mirror using wood stick included in package. As stencil transfers from mylar cover to the mirror, it will turn from dark blue to light blue. When entire design has been transferred, slowly remove tape and mylar cover sheet, starting at one corner, lifting gently. If any piece of the design is still adhered to mylar, lay it back down and rub over it again until it transfers to mirror.
- Cover the entire mirror around stencil with masking tape, over lapping edges slightly, so no part of the mirror around stencil is exposed.
- Rub over entire stencil and tape with frosted paper from stencil package to ensure everything is firmly attached to mirror.
- Put on rubber gloves. Apply a layer of etch cream 1/8”-1/4” thick over stencil design using disposable craft brush. Check for missed areas. Leave on for 1 minute and rinse under running water until no etch cream is visible. Remove tape, rub off rest of stencil under running water until no etch cream or blue stencil remains. Dry with paper towel. Image will appear when dry.
Box Assemble:
- Put box lid back on bottom half. With a pencil and ruler, mark the halfway point between the bottom edge of box and the lid. Repeat all the way around the box. This is your centerline for placing the red gimp braid. Starting at the box seam on side, run a bead of glue along pencil line, a few inches at a time, and lay down braid over glue line.
- Spread glue on back of mirror. Center mirror over lid and set in place. Starting at the spot where rope bow will be placed, lay a bead of glue along edge of mirror, a few inches at a time and lay green braid over glue, laying half of braid over onto edge of mirror to hide the raw edge.
- Tie red rope trim into a double loop bow, leaving about 5” tails on the ends. Tie knots in end of braid about 2” from center of bow. Trim excess to desired length as shown.
- Glue rope bow as shown in photo over green gimp braid, hiding raw edges. Glue glitter holly and pine cones under center knot of bow.
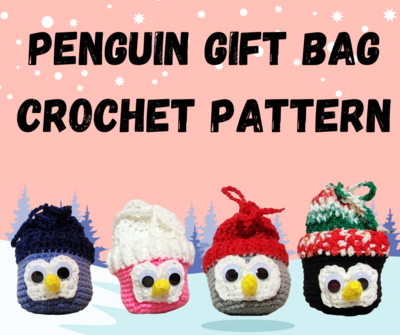
Read NextPenguin Gift Bag