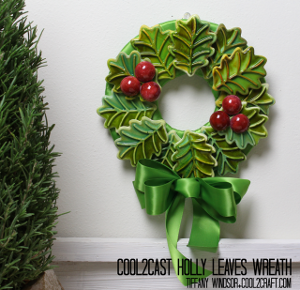
Holly Jolly Cool2Cast Christmas Wreath
Wreath craft ideas are fun for any time of year, but around Christmas, they're absolutely essential. You only need a little bit of time and a few inexpensive supplies to make a Holly Jolly Cool2Cast Christmas Wreath - it's a great last minute project. Use green and red ink to bring your wreath to life. Don't forget to hang it on your door - it's a great way to greet guests during the holiday season.

Materials:
- Cool2Cast – available in the polymer clay section at Michaels or on-line
- Water and measuring cups
- Wilton Pumpkins and Leaves Silicone Mold (I used 12 leaves on wreath)
- Half-round Cool2Cast shapes (for holly berries and spacers)
- Ranger Adirondack Alcohol Ink – Meadow, Lettuce, Cranberry
- Soft bristle brush (I use kids craft brushes to apply alcohol inks)
- Sakura 3D Crystal Lacquer
- e6000 Glue
- Ribbon
- Scissors
- Foamboard
- Craft knife
- Wire (for hanger)
Instructions:
-
Create leaves and half-rounds from Cool2Cast. (Follow package directions to mix and pour or check out the video tutorials at www.cool2cast.com.) Let dry completely.
-
Apply Meadow and Lettuce alcohol inks to leaves directly from bottle. This will give you a very intense color. Vary the colors for shading and highlights.
-
Mix drops of Lettuce with water and brush on to 6 of the half-round spacers. Apply Cranberry directly from bottle to 6 of the half-rounds to create holly berries. Let ink dry.
-
Apply Crystal Lacquer directly from bottle to flat surface of leaves. You want a nice thick coat. Apply to berries (when working on curved surfaces, just apply with fingertip.) Set aside to dry overnight.
-
Measure, mark and cut approximate 9″ circle from foamboard. Cut approximate 3″ circle from center. (You can vary the size of your wreath depending on the look you want to create. Just lay out your leaves in different patterns to decide on size of finished wreath.)
-
Apply a dab of glue to the end of ribbon and glue to back of foam board. Begin to wrap ribbon around and around the wreath shape pulling tightly as you wrap. Cut off excess ribbon and glue end to back of wreath.
-
Arrange leaves on front of wreath, spacing to create two overlapping layers. (6 leaves on each layer). Glue first layer to ribbon wreath.
-
Glue half-round spacers between leaves. (These spacers will help to level the second row of leaves.)
-
Apply glue to top of spacers and ends of middle leaves. Press in place to create second layer.
-
Apply glue to back of berries and glue in place. Set aside to dry.
-
To create hanger, cut 3″ strip of ribbon. Twist wire into loop, crossing wires and twisting several times. Spread wire ends perpendicular to loop. Positioning so that loop appears above ribbon edge, glue wire to back of ribbon. Glue ribbon to center top back of wreath. Let dry.
- Display indoors.
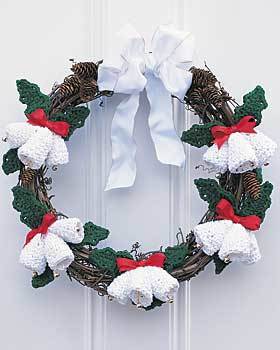
Read NextCrochet Christmas Wreath