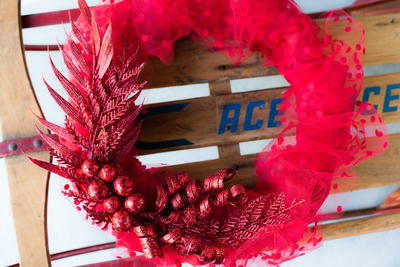
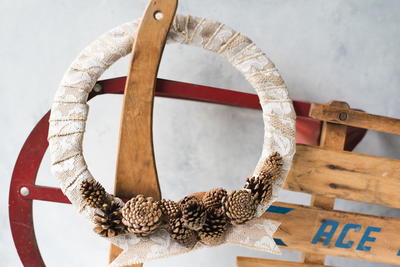
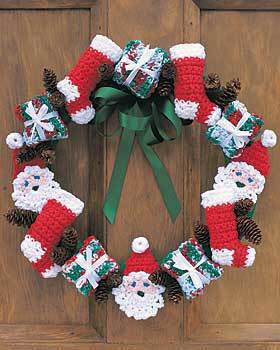
Crochet Christmas Wreath
Crochet festive little stockings, wrapped presents and Santas for this free crochet patterned Christmas wreath. Crocheting each motif is quick, making this a fun project for Christmas.

Materials:
- Yarn: Lily Sugar’n Cream Cotton 4 ply Solids 2.5 oz [70.9 g]/Sparkles 2 oz [56.7 g]
1 ball Sugar’n Cream (Emerald) to wrap Wreath (optional)
Color A - (Red) 1 ball
Color B - (Baby Pink) 1 ball
Color C - (White) 1 ball
Color D - (Mistletoe Sparkle) 1 ball
Small amount of blue yarn.
- Crochet hook: Size 4 mm (U.S. G or 6) crochet hook or size needed to obtain gauge
- Stuffing
- Glue gun and glue sticks
- 2 yds [1.8 m] of 5/8 inch [15 mm] wide green ribbon
- 3 yds [2.75 m] of 1/4 inch [10 mm] wide white ribbon
- 20 small dried pine cones
- Styrofoam Wreath 12 ins [30.5 cm] in diameter
Note: 1 ball each of A, B and C makes 15 Santas. 1 ball each of A and C makes 7 Stockings. 1 ball of Sparkle makes 5 Gift Boxes.
Gauge: 16 sc and 16 rows = 4 ins [10 cm].
Instructions:
SANTA (make 3)
Face: With B, ch 6. Join with sl st to form ring.
1st rnd: Ch 3. 7 dc in ring. Break B and join C in last dc. With C, 8 dc in same ring. Sl st in first dc.
2nd rnd: Ch 3. Sl st in top of first B st. *Ch 3. Sl st in top of next st.* Rep from * to * for all B sts. **Ch 5. Sl st into next C st.** Rep from ** to ** to complete ring. Fasten off.
Hat: With A, ch 9.
1st row: 1 sc in 2nd ch from hook. 1 sc in each sc to end of ch. 8 sc. Turn.
2nd row: Ch 1. Miss first sc. 1 sc in each sc to end of row. Turn.
Rep 2nd row until one st remains. Fasten off.
Pompom: Join C with sl st to point of Hat. Ch 4. Join with sl st to form ring.
1st rnd: Ch 1. 12 sc in ring.
Break yarn leaving 6 ins [15 cm] end. Thread yarn through a needle and draw through top of each st in ring. Draw up firmly and fasten off.
FINISHING: Sew Hat to Face as illustrated. Embroider two eyes using blue yarn.
STOCKING (make 4)
Cuff: With C, ch 13.
1st row: (RS). 1 sc in 2nd ch from hook. 1 sc in each ch to end of ch. 12 sc. Ch 1. Turn.
2nd row: 1 sc in each sc to end of row. Ch 1. Turn.
Rep 2nd row once more, joining A at end of last row.
Leg: With A, 1 sc in each sc to end of row. Ch 1. Turn.
Rep last row until work from beg measures 3 ins [7.5 cm] ending with RS facing and omitting turning ch at end of last row. Fasten off.
Heel: With RS of work facing, miss first 9 sc. Join C with sl st in next sc. Ch 1. 1 sc in same sc. 1 sc in each of last 2 sc. Bring other side of leg around. Work 1 sc in each of first 3 sc. Ch 1. Turn.
Next row: 1 sc in each of first 4 sc. Ch 1. Turn.
Next row: 1 sc in each of first 2 sc. Ch 1. Turn.
Next row: 1 sc in each of next 2 sc. 1 sc in next sc of long row below. 3 sts. Ch 1. Turn.
Next row: 1 sc in each of next 3 sc. 1 sc in next sc of long row below. 4 sts. Ch 1. Turn.
Cont as for last 2 rows until 6 sts of Heel have been worked, omitting turning ch at end of last row. Fasten off.
Foot: With RS of work facing, miss first 3 sc of Heel. Join A with sl st in next sc. Ch 1. 1 sc in same sc. 1 sc in each of next 2 sc of Heel. Miss next sc of Leg. 1 sc in each of next 4 sc. Miss next sc of Leg. 1 sc in each of next 3 sc of Heel. Ch 1. Turn. 10 sts.
Next row: 1 sc in each sc to end of row. Ch 1. Turn.
Next row: 1 sc in each sc to end of row, changing to C in last sc. Ch 1. Turn.
Toe: Next 2 rows: With C, 1 sc in each sc to end of row. Ch 1. Turn.
Next row: (Draw up a loop in each of next 2 sc. Yoh and draw a loop through all loops on hook - Sc2tog made) 5 times. Fasten off.
FINISHING: Sew Cuff and Leg back seams. Sew Foot and Toe seams. Sew corners of Heel closed. Stuff lightly.
GIFT BOX (make 5)
Box
Main Piece: With D, ch 8.
1st row: 1 sc in 2nd ch from hook. 1 sc in each ch to end of ch. Turn. 7 sc.
**2nd to 6th rows: Ch 1. 1 sc in each sc to end of row. Turn.
7th row: Ch 1. 1 sc in back loop only of each sc to end of row. Turn.
8th to 10th rows: Ch 1. 1 sc in each sc to end of row. Turn.**
11th row: Rep 7th row. Rep from ** to ** once. Fasten off.
Box Sides: (make 2)
Ch 7.
1st row: 1 sc in 2nd ch from hook. 1 sc in each ch to end of row. Turn. 6 sc.
2nd to 4th rows: Ch 1. 1 sc in each sc to end of row. Turn. Fasten off.
FINISHING: Sew first row of Main Piece to last row to form a box with sides open. Sew one Box Side in position. Stuff Box. Sew remaining Box Side in position. Tie a length of ribbon around Box, tie a bow, and stitch in place.
ASSEMBLY
If desired, wrap yarn around Styrofoam Wreath to cover completely. Using photo as a guide, glue Santas, Stockings and Gift Boxes on Wreath as illustrated. Glue on pine cones and ribbon bow.
Check out this wreath and many others in this eBook!
Read NextBlue and White Paper Doily Wreath
Your Recently Viewed Projects
Thanks for your comment. Don't forget to share!
mulberrygalprinces s
Jul 11, 2018
This is just perfect. Y grand daughter said I have a wreath on my front door and her mom and dad have one on their door, and she wants one on her door now too. This would be a great one for her. It's very Santa-ish, it won't be heavy and I can make it up quickly.
MelanieRafferty
Dec 03, 2016
What a great stash buster project! I'm always looking for little things I can make at the park with the kids!. Something small I can keep in my purse to pull out to keep me busy! It's such a great look. I know it would make a great gift but I don't know if I'd be able to give it up! Thanks for sharing this!
cottagecrescentkil larue 2384110
Jan 06, 2013
Fantastic such a great site of handcrafts love it.
Report Inappropriate Comment
Are you sure you would like to report this comment? It will be flagged for our moderators to take action.
Thank you for taking the time to improve the content on our site.