Christmas Reindeer Wreath
Felt, silk holly, the works, adds to this wonderful Christmas reindeer wreath. This holiday season create you and your friends a decorative piece to hang on the door.

- STYROFOAM* Brand Products:
- Cone, 5" x 12"
- Ball, 2-1/2"
- Felt: red, one 9" x 12" sheet; butterscotch, four 9" x 12" sheets; bronzed copper shaggy plush, 18" x 22-1/2"
- 42mm comical shank eyes, two
- Silk holly picks, five
- 12"-14" artificial pine wreath
- Extra loft quilt batting
- Wood dowel, 36" x 1/4"
- 1-1/2" red ribbon, 4 yds.
- 2 3/8"-3 1/4" gold jingle bell
- 26-gauge craft wire
- Compass
- Pencil
- Scissors
- Ruler
- Wire cutters
- Serrated and table knives
- Candle stub or paraffin
- Wood spoon
- Sewing machine and matching thread
- Craft knife
- Glues: white craft; low-temp glue gun and glue sticks
Pattern
Steps:
- Using patterns, cut reindeer pieces from felt as indicated.
- Wax serrated knife with candle stub or paraffin and then cut 3" from tip of foam cone. (Hint: Trimmed cone is reindeer's head with large end at top and small end at bottom when assembled.)
- From bronzed copper shaggy plush felt, cut one 6" circle and one 2-1/2" circle. Glue circles centered on corresponding ends of cone. Fold excess felt over sides and glue. Wrap and glue shaggy plush felt head piece around sides of cone, aligning edges. Trim any excess felt.
- Use a pencil or wood spoon handle to poke a 1/2" hole 1" deep in foam ball. Cut a 7" square of red felt and place ball in center with hole at top. Wrap felt taut around ball, poking excess fabric into hole with a table knife or scissors blade. Continue manipulating felt until smooth. Squeeze glue inside hole and then glue red nose to narrow end of cone.
- Cut four ears from shaggy plush felt. Pair ears right sides together and sew together along curved edges, using a 1/4" seam. Clip curves and turn right side out. Position ears at back of head to mark placement and then poke a hole at each mark (refer to photo). Fold bottom of one ear in half to cup slightly and glue in a hole. Repeat to attach remaining ear to head.
- Poke two holes for eyes in front of head on upper half (refer to photo). Glue shank eyes in holes and then shaggy plush felt eyelids slightly overlapping tops of eyes.
- Shape pine wreath as desired. Wire and glue reindeer to center of wreath (refer to photo).
- Cut two antlers from batting slightly smaller than butterscotch felt antlers. Cut wood dowel in half. Layer two felt antlers with batting and an 18" dowel in between, letting dowel extend at bottom (refer to pattern). Glue felt antlers together along edges to close. Gather and glue bottom of antlers to wood dowel. Repeat to make a second antler. Poke two holes for antlers in top of head behind ears, angling them slightly toward center (refer to photo). Glue antlers in holes.
- Make a multi-loop bow with two 9" streamers and wire center to secure. Wire bow to top left of wreath near reindeer's neck area (refer to photo). Glue a jingle bell to center of bow.
- Glue holly clusters randomly to wreath and between reindeer's antlers and ears.
- Attach a wire loop hanger to top center back of wreath.
®™* Trademark of The Dow Chemical Company ("Dow") or an affiliated company of Dow
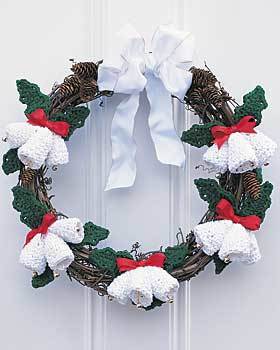
Read NextCrochet Christmas Wreath