Vintage Burlap Fringed Flower
All out of fresh fabric craft ideas? Make a Vintage Burlap Fringed Flower from Tiffany Windsor using a classic Aleene technique! This no-sew project uses glue, burlap and other easy-to-find materials that can be purchased at your local craft store.

Materials:
- Aleene’s Original Tacky Glue Tacky Pack
- Burlap
- Scissors
- Cardboard squeegee
- 18 gauge stem wire – green
- Large button with shank
- Florist tape – green
Instructions:
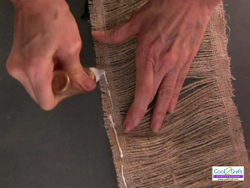
- For full-size flower, cut a piece of burlap 6″ x 18″. For small flower or bud, cut burlap to 6″ x 5″. Apply Aleene’s Original Tacky Glue along both long edges of burlap.
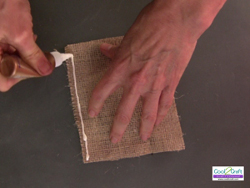
- Use a cardboard squeegee (or your fingers) to spread the glue smoothly along the edges. Let dry completely until glue is clear.
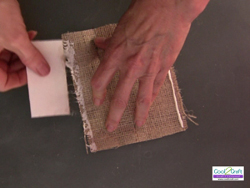
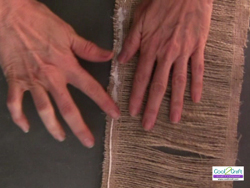
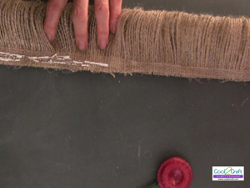
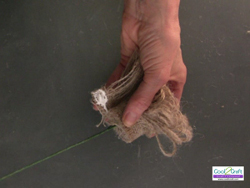
- Starting in the center, pull out one long burlap thread. Continue pulling out threads one by one.

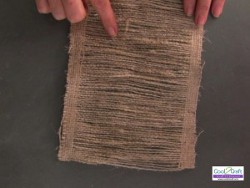
- When all the center threads are pulled out up to the glue line, your burlap piece should look like this.
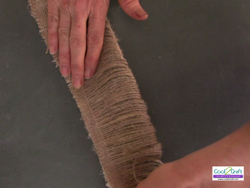
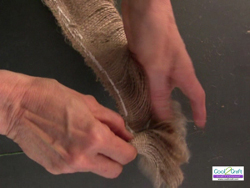
- Apply Aleene’s Original Tacky Glue along one edge.
- Spread glue smooth with fingers (or squeegee).
- Fold in half to match glued edges. Press edges together until glue holds and set aside for next step.
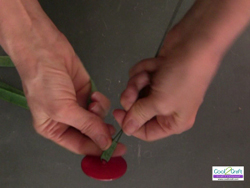
- To prepare flower center, fold wire approximately 2″ from end and loop into button shank.
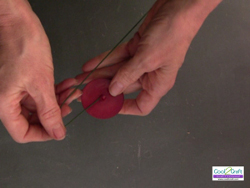
- Wrap florist wire around wire and cover entire stem.
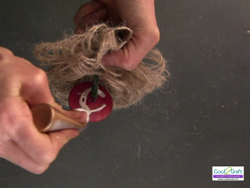
- Apply Aleene’s Original Tacky Glue along straight edge of burlap.
- Press edge of burlap onto stem just below button and begin to roll wire.
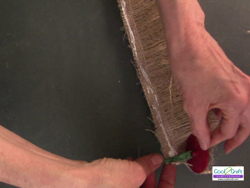
- Roll burlap around and around wire keeping loops from catching in glue and keeping edge of burlap straight. Be sure to wrap tightly!
- Apply an extra dab of Aleene’s Original Tacky Glue to end of burlap and press to secure.
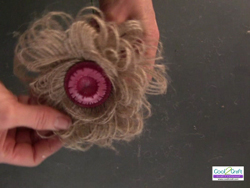
- Slightly lift button center and apply Aleene’s Original Tacky Glue to bottom of button.
- Pull snugly into center of flower and arrange burlap fringe. Let glue dry completely. When creating a burlap flower bud, loop the wire but do not use a button for the center. Assemble the flower following the same steps outlined.
For a comprehensive video tutorial of this project, check out Vintage Burlap Fringed Flower.
Read NextRetro Wallpaper Window
Your Recently Viewed Projects

Thanks for your comment. Don't forget to share!
Marilyn B
Jun 02, 2017
Thank you for such a complete and easy to follow tutorial! Burlap is very trendy especially for crabby chic or French decor and this flower would look fab on a vintage mirror frame or as a garland on a fireplace mantle using several of these either in a row or bunched up in a cluster. You could even tinge the ends with some fabric pens to add a blush of color to these blooms, perhaps to tie in your drape color. Also,lovely as wearable art!
princess6860504
May 23, 2017
What a different idea for decorating with burlap. It can be very country but it can also have a modern appeal depending on how you use it. I will admit, this DIY has extensive directions that would normally scare me away. But because of the fact that there are step by step pictures, it makes it seem doable to the uninitiated like me!
Weberme
Apr 06, 2016
So cute. Your tutorial is so good. Easy to follow the instructions. I cannot wait to try it out in different color burlap to make so many flowers to use in hair bows, brooches and even for scrapbooks( for my daughter).How can you adjust the sizes to get a bigger or smaller flower?Anyone used for a wedding yet? I think it would be nice to use on album or guest registry. The burlap is used in weddings a lot. Thanks.
jamiesturgill88 25 75584
May 19, 2015
http//duhlouisegirls.com/2015/05/19/diy-glittery-b == achelorette-decor/ I made this flower for a sash, it was great! Thanks for sharing! See link for my final product... I linked back to your tutorial
Report Inappropriate Comment
Are you sure you would like to report this comment? It will be flagged for our moderators to take action.
Thank you for taking the time to improve the content on our site.