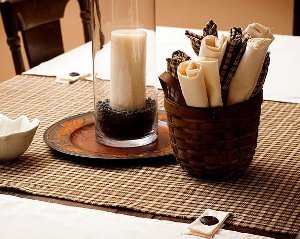
Rustic Thanksgiving Table Runner
This lovely Rustic Thanksgiving Table Runner is the perfect accent for your holiday table. With simple button embellishments and a dark brown fabric, this Thanksgiving table runner could easily be used throughout the fall and winter season. The button straps also make this table runner easy to change out for other holidays, so this could quickly become the only table runner pattern you'll ever need! Impress guests with your style and creativity with this simple and striking Rustic Thanksgiving Table Runner.

Materials:
- Cutting Mat (18" x 24")
- Ergo Control Rotary Cutter (45 mm)
- Micro-Tip® Softgrip® Scissors (No. 5)
- Fabric of your choice in a solid color
- Fabric of your choice in a patterned design
- Fabric scraps for strips
- 4 large buttons, or more depending on the length of your table runner
Instructions:
- Rather than buy a premade tablecloth this year, I decided to make my own. I designed it to be both fitting to my rustic decor but also customizable to each holiday throughout the year. I made 3 panels of equal size and connected them with removable strips of fabric. The middle panel will be replaced each holiday with a fabric that coordinates with the holiday. However, since I will continually use those end panels each holiday, I'm able to create memories for my own family just as my grandma did with her elegant white tablecloth.
- Buying enough fabric for a tablecloth can be expensive. To keep the cost down, I purchased a $5 twin bed sheet to use for my 2 outer panels. An added bonus, I was able to utilize some of the hems of the sheet!
- To construct a tablecloth like this one, begin by measuring your table's length. Decide how much space you would like to have between your 3 panels, double the number, and deduct this final number from the length of the table. Divide that number by 3. This will be the finished width of each panel. Add 2 inches to the width (1 inch for each side) to allow for seam allowances. If you have an edge that is already hemmed (a finished edge of a sheet) you do not need to add extra for a seam allowance along that side.
- To determine the length of each panel, measure from the seat of your chair on one side of the table, up and over the top of the table, and down to the seat of a chair on the other side. Again add 1 inch per side to allow for seam allowances.
- After cutting your panels, hem each edge by folding it over 1/2 inch, ironing to crease, folding over 1/2 inch again, and ironing again. Stitch each hem in place by sewing close to the fold closest to the center of the panel.
- Next, determine the approximate placement of your buttonholes for the straps and lightly mark where the center of one would be. Fold the panel in half (short edges together) to find its center. Measure from the center of the panel to the buttonhole mark. This is the distance each of your buttonholes will be from the center of your panels.
- At the buttonhole location, lightly create a 2 inch long mark (running parallel to the long edge of the panel) with the buttonhole mark being the center of this 2 inch long mark. Do this for each buttonhole, taking care to make each mark the same distance from the edges of panels. There will be 2 buttonholes on each side panel and 4 buttonholes on the center panel.
- Use your sewing machine's buttonhole feature to create the buttonholes. Use a small pair of Fiskars detail scissors, such as the No. 5 Micro-Tip Softgrip scissors, to snip the center of the buttonhole.
- Lay the panels out on your table with the desired width between them. With the panels in place, measure the distance between corresponding buttonholes on 2 panels and multiply this number by 3. Each strap will be made by cutting 2 strips of fabric to this length by 2 inches wide. Using 2 of these strips, stitch around 3 sides, 1/4 inch from the edges. Be sure to backstitch when you start and stop. Turn the strip right side out and handstitch the open end closed.
- Fold the strip in thirds and handsew a button in the center of one of the end sections. Measure your button diameter plus double its height. Add 1/4 inch to this number and make a buttonhole in the center of the section at the opposite end of the button end.
- Slip the finished straps through the buttonholes, button them in place, and you are ready to begin creating holiday memories of your own.
This year, try using our free eBook 24 Thanksgiving Dinner Recipes and Fall Craft Projects to create the perfect setting for my Thanksgiving celebration.
Your Recently Viewed Projects
Thanks for your comment. Don't forget to share!
Hannah
May 09, 2017
This rustic thanksgiving table runner will definitely make your table look very fancy. The color gives accent to it. It would be a good idea to put a small centerpiece. You will just have to spend a little time sewing and cutting. Takes a lot of effort though.
Report Inappropriate Comment
Are you sure you would like to report this comment? It will be flagged for our moderators to take action.
Thank you for taking the time to improve the content on our site.