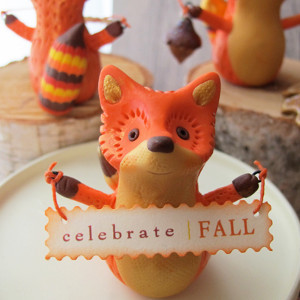
Orange Pumpkin Fox Figurine
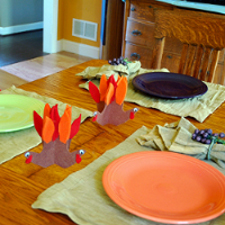
These fall craft ideas will fill your home and your guests with joy as they are greeted by a bit of orange adorableness. Create your own Orange Pumpkin Fox Figurine for a whimsical autumn touch that is exactly to your liking. This little fox can be used to decorate your holiday table as your guests sit down for an autumn feast. As Thanksgiving craft ideas, these little foxes are the perfect way to add some festive cheer to the holidays. Your kids will love this Orange Pumpkin Fox Figurine as much as you will.
Primary TechniqueClay

SeasonFall
Materials:
- Clays
- Premo! Sculpey®, 2 oz , Cadmium Yellow Hue - 1 block
- Premo! Sculpey®, 2 oz , Cadmium Red Hue - 1 block
- Premo! Sculpey®, Kit, Orange - 1 block
- Premo! Accents®, 2 oz , Bronze - 1 block
- Premo! Accents®, 2 oz , 18K Gold - 1 block
- Premo! Sculpey®, 2 oz , Burnt Umber - 1 block
- Sculpey® Clay Conditioning Machine
- Sculpey Technique Design Blocks
- Sculpey Clay Tool Starter Set
- Sculpey Style and Detail Tools, Set of 3
- Sculpey Super Slicer
- Mini heart cutter
- 1 1/2" Oval shape cutter
- Black eyelets
- Toothpick
- Gold powder - optional
- Small circle cutter - optional
Instructions:
- Do not use unbaked clay on unprotected furniture or finished surfaces. Start with clean hands and work surface area. Good work surfaces include wax paper, metal baking sheet, or disposable foil. Knead clay until soft and smooth. For best results, clean your hands in between colors. Shape clay, pressing pieces together firmly. Bake on oven-proof glass or metal surface at 275°F (130°C) for 30 minutes per ¼" (6 mm) thickness. For best baking results, use an oven thermometer. DO NOT USE MICROWAVE OVEN. DO NOT EXCEED THE ABOVE TEMPERATURE OR RECOMMENDED BAKING TIME. Wash hands after use. Baking should be completed by an adult. Begin by preheating oven to 275°F (130 °C). Test temperature with oven thermometer for perfectly cured clay. For best results, condition all clay by running it through the Clay Conditioning Machine several passes on the widest setting. Fold the clay in half after each pass and insert the fold side into the rollers first.
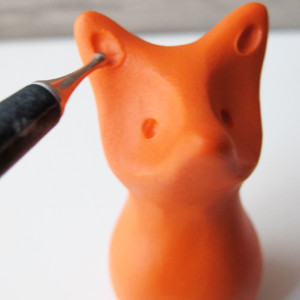
- Mix together Orange and a small amount of Cadmium Red. Use your hands to roll out a 2” high bowling pin shape out of the mixed clay. Then with your pointer finger and thumb pinch out two ears and a snout. Take your 12mm stylus tool and make indents on each side of the nose for the eyes. With the 2mm stylus tool make the eyes holes and tear drop shape for the ears.
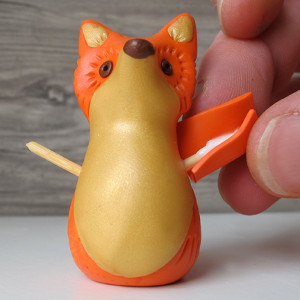
- Run a piece of 18k Gold clay on the #6 setting of your conditioning machine. Cut out an oval shape with your 1½ oval cutter for the under the nose/belly of the fox. Attach the oval shape under the nose and drape the rest over the belly and burnish it down with your finger. (If your oval is too big trim the oval down. If the oval doesn’t reach the bottom of the fox you might want to stretch out the oval to reach.) Roll two small tear drop shapes for the insides of the ears.
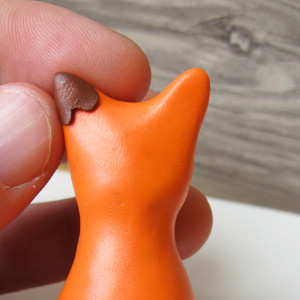
- Mix together a piece of Burnt Umber and Bronze clay and run a small piece on the #6 setting of your conditioning machine. Use your mini heart cutter and cut out two hearts and attached to the back of the ears. Then roll with your fingers two small balls for the eyes and a ball for the nose and attach.
- Take your clay knife tool and create texture on your fox to represent fur, around the eyes and all over the back of your fox.
- Cut a toothpick in half. Apply Sculpey Bake & Bond to the end of each piece and insert into the side of your fox (for the arms). Mix together another small piece of Orange and Red clay to match the color of the fox and run your piece on the #5 setting of your Clay Conditioning Machine. Cut a square piece the length of the fox arm with your Super Slicer, then apply Bake and Bond to the arm and wrap the clay and press. Use your slicer to trim excess clay off. Repeat for second arm. Roll two small balls with a piece of the mix bronze & burnt umber clay and attach it to the end of each arm to create hands. Use your clay knife tool to make fingers.
- Cut down your Black eyelets to about 3/4” long. Save excess part for later. Apply Bake and Bond and insert in to each arm.
- Roll out a tail shape proportional to the size of your fox with scraps of clay.
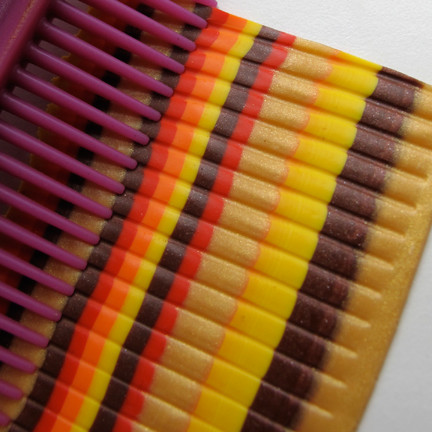
- Take a piece of Red, Orange/Red mix, Yellow, Burnt Umber/ Bronze mix and 18k Gold and one at time run the piece through the #1 setting of the conditioning machine. To vary the size thickness you can run a few colors in the #3 setting as well. Take your super slicer and cut 1/8 slices of each color and stack them so they are the length of your fox’s tail.
- Run the piece in the #5 setting of your condition machine. Cut piece large enough with your super slicer so it will wrap around the tail. Then take your Dragging tool and start at the top of your stripes and drag down your clay creating the dragging texture.
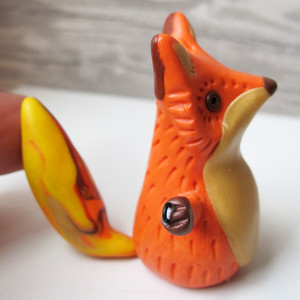
- Decide which color end you want the tip of your tail color to be, then take a piece of that color clay and apply a piece to the top of the tail. Now wrap your texture around the tail and blend together. Flatten the end of tail and apply some Bake and Bond and attach to the bottom of the fox. For add strength insert the extra wire from the black eyelet into the tail.
- OPTIONAL: If you want a base use a small circle cutter. For a little gold sparkle brush some gold powder pigment on the fox. Bake as directed above.
- Create some greeting messages on the computer. Cut out with scissors and punch holes, string color wax twine and tie them to the eyelets.
More Crafty Ideas For You
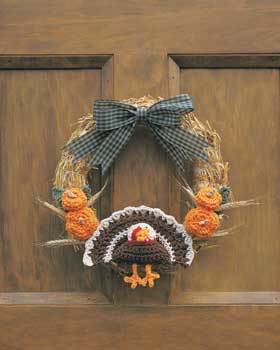
If you enjoy creating the adorable Orange Pumpkin Fox Figurine craft project, we have a few more ideas that we think you'll love! For starters, we recommend trying your hand at making a Fall-inspired felt wreath. This project is perfect for the season and will complement your pumpkin fox figurine beautifully. You can customize the colors and embellishments to match your decor and personal style.
Another fun project to consider is designing a set of hand-painted pumpkin mason jars. Use the same color palette as your fox figurine to create a cohesive look. These jars can serve as candle holders, flower vases, or even as storage containers for small craft supplies. They make great gifts for friends and family, especially during the Thanksgiving season.
If you're looking for a more advanced project, we suggest trying your hand at needle felting a woodland animal scene. You can create a mini forest with cute foxes, pumpkins, and other fall elements. This project allows you to showcase your creativity and attention to detail while making a stunning piece of art.
No matter which project you choose, we hope these recommendations inspire you to keep crafting and exploring new techniques. Happy crafting!
Your Recently Viewed Projects
Thanks for your comment. Don't forget to share!
Marilyn B
Nov 14, 2017
What wonderfully detailed instructions this project has, and with great hints for success! I am not sure if I have the chops to recreate this project as shown, but this little guy is so adorable, I sure would want to give it a try! Has anyone made this? I have friends who live in an area with lots of wildlife and the fox is one of them, and they would love this creature!
Report Inappropriate Comment
Are you sure you would like to report this comment? It will be flagged for our moderators to take action.
Thank you for taking the time to improve the content on our site.