Marvelous Clay Caramel Apples
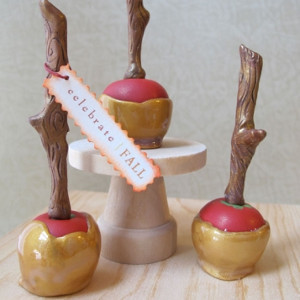
Celebrate autumn with these festive fall craft ideas. These Marvelous Clay Caramel Apples would make an adorable decorative fall display or centerpiece idea. They could also be used as name cards or hostess gifts for Thanksgiving. Everyone will be an awe of these little clay creations. These craft ideas for fall really do look good enough to eat. Although they aren't edible, these Marvelous Clay Caramel Apples are sweet to look at and to share with friends as little homemade surprises.
Primary TechniqueClay

SeasonFall
Materials:
- Clays
- Premo! Sculpey®, 2 oz , Pomegranate - 1 block
- Premo! Sculpey®, 2 oz , Wasabi - 1 block
- Premo! Accents®, 2 oz , Bright Green Pearl - 1 block
- Premo! Accents®, 2 oz , Gold - 1 block
- Premo! Accents®, 2 oz , 18K Gold - 1 block
- Premo! Sculpey®, 2 oz , Burnt Umber - 1 block
- Premo! Accents®, 2 oz , Bronze - 1 block
- Tools
- Sculpey® Clay Conditioning Machine
- Sculpey Clay Tool Starter Set
- Sculpey Clay Tool Starter Set
- Sculpey® Bake & Bond
- Blending Tool
- Lollipop Stick
- Tape
Instructions:
- Do not use unbaked clay on unprotected furniture or finished surfaces. Start with clean hands and work surface area. Good work surfaces include wax paper, metal baking sheet, or disposable foil. Knead clay until soft and smooth. For best results, clean your hands in between colors. Shape clay, pressing pieces together firmly. Bake on oven-proof glass or metal surface at 275°F (130°C) for 30 minutes per ¼" (6 mm) thickness. For best baking results, use an oven thermometer. DO NOT USE MICROWAVE OVEN. DO NOT EXCEED THE ABOVE TEMPERATURE OR RECOMMENDED BAKING TIME. Wash hands after use. Baking should be completed by an adult. Begin by preheating oven to 275°F (130 °C). Test temperature with oven thermometer for perfectly cured clay. For best results, condition all clay by running it through the clay dedicated pasta machine several passes on the widest setting. Fold the clay in half after each pass and insert the fold side into the rollers first.
- Take the lollipop stick and cut approx. ¼ off one end with your wire cutters or scissors. Then use making create branches around your lollipop stick by wrapping and folding your tape so they stick out on the sides of your lollipop stick. Set aside.
- Gather scrap clay from other projects (if you don’t have any you can use any color clay) You’ll need enough to create an approx. 1” ball of clay.
- With the Clay Conditioning Machine on setting #6 create a sheet of Pomegranate. Use your super slicer to cut a piece enough to cover the top half of your 1” ball of clay. Roll ball in your hand to adhere the Red to the scrap clay ball.
- With the clay Conditioning Machine on setting #6 create a sheet of Wasabi. Then with the clay Conditioning Machine on setting #6 create a sheet of Bright Green Pearl. Tear small pieces of each of the clay colors and place on the top of your ball in the center. Using a blending tool, blend into your apple ball away from center. These will give the apple some realistic Green highlights.
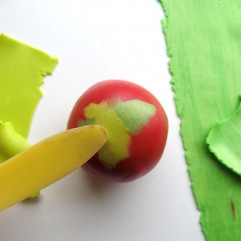
- Take your lollipop branch stick and insert it approx half way threw the top center of your red apple. It should be right where you placed your green clay. While the stick is in your apple ball, rework the ball back into a form of an apple. Set aside.
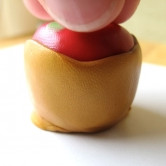
- With the clay Conditioning Machine on setting #4 create a sheet of Gold and 18K Gold mixed together. Using the super slicer blade cut a strip long enough to wrap around apple. Cut one side of the strip wavy to show the effect of the caramel dripping down the apple.
- Wrap the caramel strip around your apple then cut off extra clay with your slicer and blend seams together with blending tool. Lightly press apple down so the extra caramel clay bunches on the bottom to create caramel “puddling” at the bottom. Set aside.
- With the clay Conditioning Machine on setting #4 create a sheet of Burnt Umber, Bronze and the Gold mixed together. Using super slicer blade cut a strip long enough to cover lollipop branch stick.
- Take your lollipop branch armature and put some Sculpey Bake & Bond on stick, then lay it on your clay. Fold over your clay, remover access clay and then sculpt your branch using your fingers and clay tool starter set.
- Remove or keep bare approx ¼ to ½ off the bottom of your lollipop branch stick. Add some Sculpey Bake & Bond into apple hole, then carefully insert your branch.
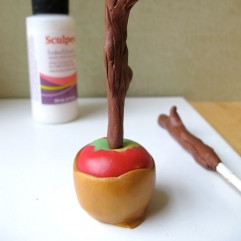
- Place your caramel apple on a smooth ceramic tile and bake as directed above.
- Once cooled you can add details to your caramel apple. We dry brushed some gold paint on the branch to make the details shimmer. Use Sculpey glossy glaze and add a few coats to just the caramel part of your caramel apple to create a high gloss candy effect.
- You can also add a paper greeting by simply printing out a greeting on a piece of cream cardstock then cut out with decorative scissors. Add a little orange color around the tag with an orange stamp pad punch a hole and tie a string to hang on one of the branches.
More Crafty Ideas For You
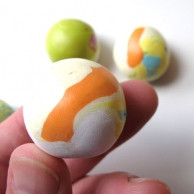
If you're a fan of crafting delicious looking treats like the Marvelous Clay Caramel Apples, then you may enjoy diving into the world of polymer clay creations. One fun project idea is to make a collection of miniature food charms, such as cupcakes, donuts, and ice cream cones. These adorable charms can be turned into keychains, pendants, or even earrings for a unique and personalized accessory.
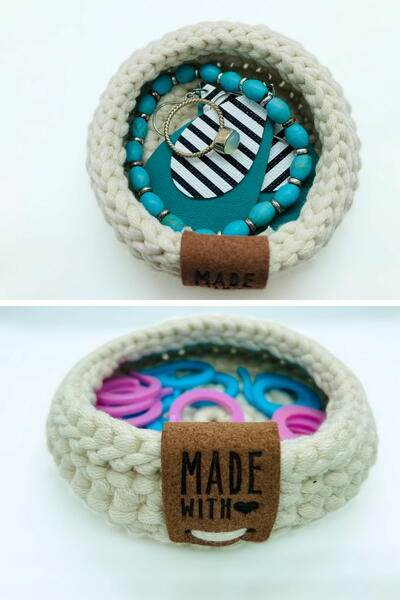
For those looking for a more practical craft project, consider creating clay trinket dishes in the shape of different fruits, like apples, oranges, and strawberries. These dishes can be used to hold small jewelry pieces, coins, or other knick-knacks. They also make great gifts for friends or family members who appreciate handmade items.
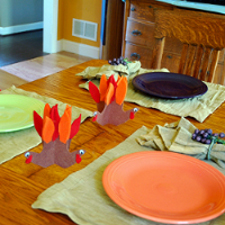
If you enjoy seasonal crafting, try making clay pumpkin decorations for the fall season. These cute pumpkins can be displayed on a mantle, used as table centerpieces, or even given as gifts for Halloween or Thanksgiving. You can customize them with different textures, patterns, and colors to match your home decor.
No matter what project you choose to tackle next, remember to have fun and let your creativity shine. Happy crafting!