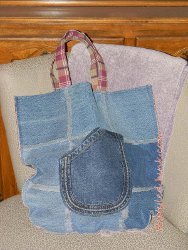
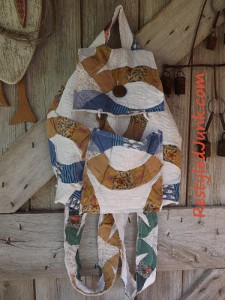
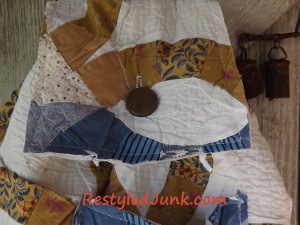
Quilt Scrap Backpack
Fabric scrap crafts don't get much cooler than this. Learn how to make a Quilt Scrap Backpack and use it to carry all of your valuables. Use an old quilt and save yourself a trip to the fabric store. The exposed seams on this rustic backpack will give your bag an unexpected feel and look. The charming and fun design of this bag is unlike anything you've seen before, so be sure to wear your new creation with pride. Just be prepared - everyone will want to know where you picked up your amazing tote.
Materials:
- Old worn quilt
- 1/8 yard muslin
- Measuring tape
- Scissors
- Sewing machine
- Straight pins
- 40" cord of your choice
- Bodkin or large safety pin
- Button, Velcro or snap
Instructions:
- Cut knapsack pieces from an old cutter quilt:
- Body -(2) 15" tall by 17" wide
- Pocket and Flap - (1 each) 7" square
- Handle Loop - 2" wide by 8" long
- Straps-(2) 2" wide by 36" long
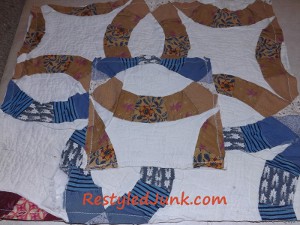
- From muslin, cut one 4-inch-wide by 32" long strip for the drawstring casing.
- Top stitch around all the cutter quilt pieces 1/4 inch from the edges. This will secure the layers of the quilt together.
- Lay one body rectangle on your work surface with the right side facing up and the long edges running horizontal. This rectangle will be the front of the knapsack. The long edges are the top and bottom edges of your knapsack. Place the pocket square on the rectangle with the right side facing up. Position the bottom edge of the pocket 2-1/2" above the bottom edge of the rectangle. Center the sides of the pocket between the sides of the rectangle. Top stitch the sides and bottom of the pocket, 1/4" from the edge, connecting it to the rectangle. Note: The edges will be exposed throughout the project unless otherwise instructed.
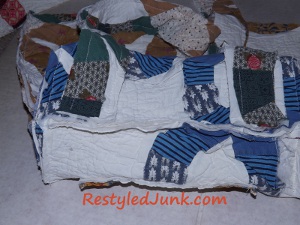
- Place the two body rectangles together with the right sides facing out. Align the edges. Cut a 3-" square from both bottom corners, through all thicknesses. Pin the side and bottom edges. Do not pin the cut out square corners. Sew the pinned edges using a 1/4" seam allowance.

- Open a corner and diagonally squeeze the opening. Match the side seam with the bottom seam, with the right sides facing out. Pin the edges together. Sew the pinned edge using a 1/4" seam allowance. This creates a boxed corner. Repeat on the remaining bottom corner of the knapsack.
- Lay the knapsack body on your work surface with the back facing up. Measure in 3/4" from one bottom corner. Place one end of a strap on the bottom seam at this measurement. Pin to hold. Pin an end of the remaining strap 3/4" in from the other bottom corner. Sew over the pinned ends using a 1/4" seam allowance.
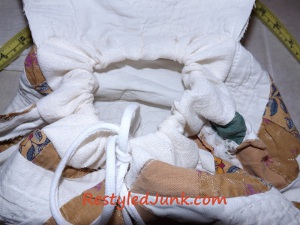
- Lay the knapsack body on your work surface with the back facing up once again. Find the center of the top edge. Stack the unsecured ends of the straps together and pin to the top edge of the body back. Pin an end of the handle loop on each side of the stacked straps. Center one edge of the flap square over the pinned loop and straps with the flap facing wrong side up. Fold the muslin casing strip in half with the long edges matching. Find the center of the casing length and pin the raw edges to the top edge of the knapsack's back through all thicknesses. Continue to pin the raw edges of the casing around the top edge of the knapsack. You will have a gap between the ends of the casing on the front of the knapsack. Sew the pinned edge using a 1/4" seam allowance. Yes, all the layers make the back section quite thick, but it can be sewn through. A heavy-duty (jean) needle is recommended.
- Attach a bodkin or large safety pin to one end of a 40" length of cording. Thread the cording through the casing. Adjust the cording with an equal amount exposed from each opening of the casing. This is the drawstring closure for the knapsack.
- Flip the flap over the top and to the front of the knapsack. Attach a button, Velcro or snap to the front and flap of the knapsack to close.
Read NextNana's Upcycled Wool Bags
Your Recently Viewed Projects


Thanks for your comment. Don't forget to share!
lcarr
Nov 15, 2018
This is a great idea. My cousin would have gone crazy over this when she was a teenager. She probably still would. I know her girls would love it. What a great way to repurpose an old quilt! It would be nice and strong too. Thanks for sharing with us.
dismith73 8345441
Jan 09, 2018
You could make bias binding from contrasting scraps of othe material and bind the pieces before construcing the bag for a whole other look
Linda
Feb 03, 2017
This backpack would be of use for carrying items on my walker when shoping. It's the perfect size for lots of things. Surprizingly simple to make.
JMitchell
Dec 31, 2014
Not being a fan of exposed seams, I would not make this project as directed. However, I do like the idea of up-cycling an old quilt.
Report Inappropriate Comment
Are you sure you would like to report this comment? It will be flagged for our moderators to take action.
Thank you for taking the time to improve the content on our site.