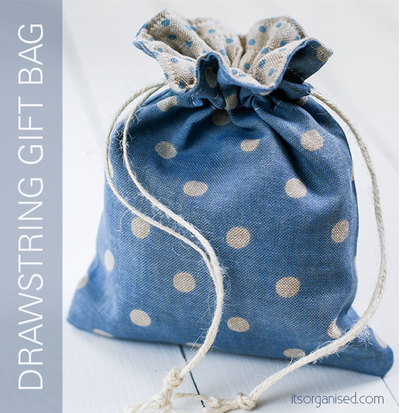
Drawstring Gift Bag Free Sewing Pattern
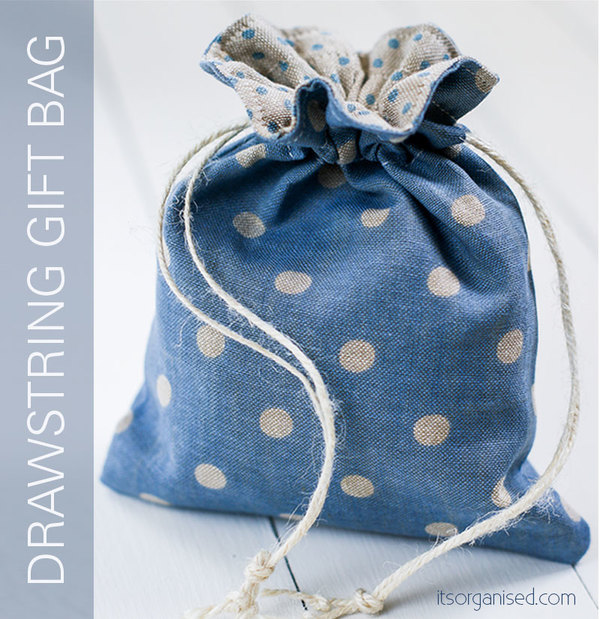
There's no need for wrapping paper when you have a Drawstring Gift Bag Free Sewing Pattern at your disposal. If you're looking for free sewing patterns for beginners, this is the perfect project for you to try. You'll love how quickly you can make this bag and will want to make one for every birthday and holiday. Use a fun fabric that sticks out to make your bag extra special. Free sewing patterns don't have to take all day or cost an arm and a leg. Use what you have and try something new - you never know what kind of amazing crafts you can make in a short period of time.
Primary TechniqueSewing

Sewn byMachine
Materials:
- 2 pieces of main fabric, 18cm x 15cm (7″ x 6″)
- 2 pieces of lining fabric, 18cm x 15cm (7″ x 6″)
- 2 pieces of string, ribbon or lace for the drawstring, each piece 25cm (10″) in length
- Matching thread and sewing accessories
Note: The pattern uses a 1cm (0.25″) seam allowance.
Instructions:
- With right sides facing, sew around the main fabric, leaving the top open and a gap on either side for the drawstring. The gap should be 1.5cm (5/8″) wide, starting 2cm (3/4″) down from the top. It is a good idea to backstitch either side of the gap, as this is the part of the bag that gets the most wear and tear.
- With right sides facing, sew around the lining fabric, leaving the top open. You do not need to leave gaps in the sides on the lining.
- Press all seams.
- Turn the lining fabric right side out. Leave the main fabric wrong side out.
- Insert the lining into the main fabric.
- The right sides of the lining and main fabric should now be facing each other.
- Match up the side seams and pin in place.
- Leave a gap on one side for turning.
- Sew the lining and main fabric together all the way around the top, remembering to leave a gap of a approximately 5cm (2″) for turning.
- Turn the fabric right side out through the gap.
- You should now have the right sides of the lining and main fabric facing out.
- Push the lining back inside the main fabric.
- Turn the raw edges of the opening under and press the whole bag flat, making sure you get a nice clean edge where the main fabric and the lining meet.
- Top stitch around the top edge of the bag, as close to the edge as you can. This will seal the gap.
- Draw two lines, using an erasable sewing pen or tailor’s chalk, around the top of the bag, front and back. The lines should be just above and just below the drawstring gap you left on each side.
- Top stitch along these lines, all the way around the bag, to form the drawstring casing.
- Take your two pieces of string, feeding one in from the left and one from the right.
- Your thread should go in and out of the same hole. String one goes in on the left, all the way around the bag, and out on the left. Repeat with the second string, starting on the right, all the way around the bag, and out on the right.
- Tie the ends of the string together.
- Pull both strings at the same time to close the bag.
Read NextMini Backpack Coin Purse
Your Recently Viewed Projects
Thanks for your comment. Don't forget to share!
Weberme
Nov 25, 2017
I make bags like these Drawstring Gift bags all the time for Christmas in different sizes. I like to make jewerly so I usually put them in the bags. I love using different fabrics that I have leftover too. This is a bag that can be reused so they are nicer than store bought paper ones. They are so easy to make and fast too. Why not make some with this tutorial. You will be surprized how much nicer they are.
Sierra
Dec 20, 2016
I am so glad I found this pattern. I ended up having more gifts than I did wrapping supplies or gift bags. Funds are running low and I do not want to spend them on paper that is going to get ripped or a bag that will get thrown out. This is great because I had fabric I did not know what to do with and now I do. I just tripled the measurement to make my bag big to fit everything inside it is so cute it is like another gift!
quanahs 5032097
Mar 10, 2016
This is an easy and recyclable way to wrap gifts, plus you can make the bags in a variety of sizes by simply changing the dimensions of your fabric. Just make sure all four pieces are cut the same size. If you shop your fabric store for remnants and ribbons on sale they will be less costly than the paper gift bags found at the grocery store. The bags can be used over and over or they can be used to pack small items such as lingerie or stockings when traveling.
Report Inappropriate Comment
Are you sure you would like to report this comment? It will be flagged for our moderators to take action.
Thank you for taking the time to improve the content on our site.