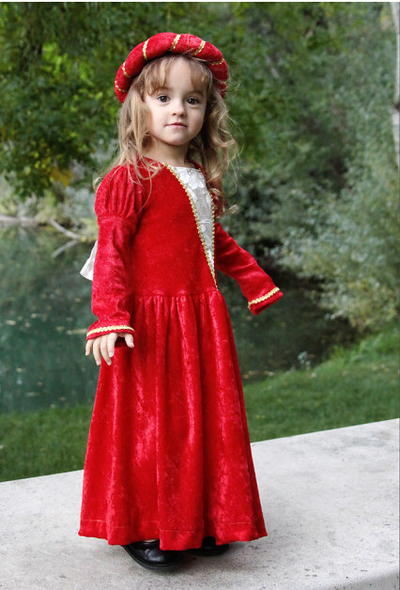
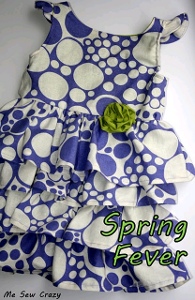
Spring Fling Dress
Get ready for spring with free sewing patterns for kids. The Spring Fling Dress from Jessica Gerblick is a great way to dress for the occasion! Get ready for compliments!
Materials:
- Approximately 1 yard exterior fabric
- Approximately 3/4 yard of lining fabric
- ¼ yard for coordinating fabric optional
- Buttons
- Elastic Cord
- Pattern
Instructions:
Cutting:
Cut (1) 2” x 30” rectangle for ‘Back ruffle trim’ (Optional coordinating fabric)
Cut (1) 2” x 30” rectangle for ‘Front Rosette (Optional coordinating fabric)
Size 2
Cut (6) 4” x 12” of Lining rectangles for ‘2nd Band’ & ‘3rd Band’, & ‘4th Band’ (Note, there is NO 1st band)
Cut (2) 6” x 25” of Exterior fabric rectangles for ‘1st Ruffle’
Cut (6) 5” x 25” of Exterior fabric rectangles for ‘2nd Ruffle’, ‘3rd Ruffle’, & ‘4th Ruffle’
Size 3
Cut (6) 4” x 12.5” of Lining rectangles for ‘2nd Band’ & ‘3rd Band’, & ‘4th Band’ (Note, there is NO 1st band)
Cut (2) 6.5” x 25” of Exterior fabric rectangles for ‘1st Ruffle’
Cut (6) 5.5” x 25” of Exterior fabric rectangles for ‘2nd Ruffle’, ‘3rd Ruffle’, & ‘4th Ruffle’
Size 4
Cut (6) 4” x 13” of Lining rectangles for ‘2nd Band’ & ‘3rd Band’, & ‘4th Band’ (Note, there is NO 1st band)
Cut (2) 7” x 25” of Exterior fabric rectangles for ‘1st Ruffle’
Cut (6) 6” x 25” of Exterior fabric rectangles for ‘2nd Ruffle’, ‘3rd Ruffle’, & ‘4th Ruffle’
Size 5
Cut (6) 4” x 13.5” of Lining rectangles for ‘2nd Band’ & ‘3rd Band’, & ‘4th Band’ (Note, there is NO 1st band)
Cut (2) 8” x 25” of Exterior fabric rectangles for ‘1st Ruffle’
Cut (6) 7” x 25” of Exterior fabric rectangles for ‘2nd Ruffle’, ‘3rd Ruffle’, & ‘4th Ruffle’
Sewing:
Note: Use ¼” seam allowance unless otherwise noted.
- We are going to start by sewing the skirt. Take the ‘1st Ruffle’, with right sides together, sew the width sides together, creating a tube.
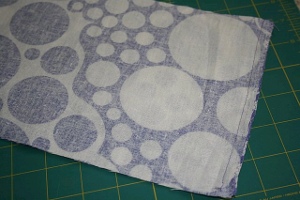
- Take the bottom edge of the ‘1st Ruffle’ tube, and fold under ¼” towards the wrong side of the fabric. Press. Fold again ½”, enclosing the raw edge, and Press. Sew hem closed.
- Along the top edge of the ‘1st Ruffle’ tube, sew a line of gathering stitches. Set Aside.
- As we did with the 1st ruffle, place the right sides together of the ‘2nd Band’ and sew along the width edges. Set Aside. Repeat for the ‘3rd & 4th Band’, the ‘2nd, 3rd & 4th Ruffle’’. Set Aside.
- Take the bottom edge of the ‘2nd Ruffle’ tube, and fold under ¼” towards the wrong side of the fabric. Press. Fold again ½”, enclosing the raw edge, and Press. Sew hem closed. Repeat for the ‘3rd & 4th Ruffle’
- Along the top edge of the ‘2nd, 3rd & 4th Ruffle’, sew a line of gathering stitches.
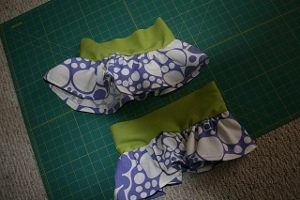
- Turn the ‘4th Ruffle’ so it is right sides out. Taking the ‘4th Ruffle’, gather the top edge stitches, until it matches the length of the ‘4th Band’. With the ‘4th Band’ still wrong side out, Slip the ‘4th Band’ around the ‘4th Ruffle’ so that the top raw edges match - matching side seams. Pin and Sew. Repeat for the ‘2nd & 3rd Ruffle’ and ‘2nd & 3rd Band’.
- You should now have this (PLUS 1 MORE NOT IN PHOTO)
- Fold the ‘2nd Ruffle and band’ down, so that the gathered seam is on top. Place the ‘3rd Ruffle and Band’ inside the ‘2nd Ruffle & Band’, so that the top edge of the ‘3rd Band’ is matching the Gathered seam. (Be sure to match side seams). Pin and Sew.
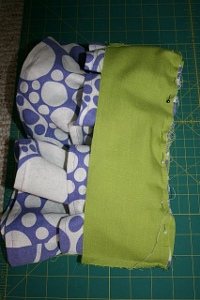
- Repeat for the ‘3rd Ruffle and band’ - folding it down, so that the gathered seam is on top. Placing the ‘4th Ruffle & Band’ inside the ‘3rd Ruffle & Band’, so that the top edge of the ‘4th band’ is matching the Gathered seam. Pin and Sew.
- You will now have this (with an additional ruffle on the bottom - sorry!):
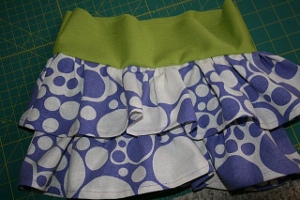
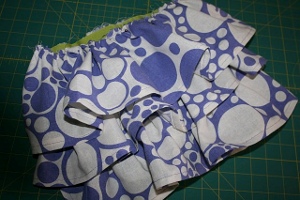
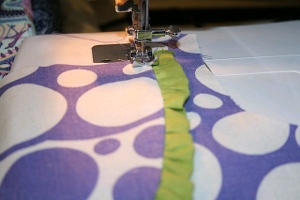
- Turn the ‘1st Ruffle’ right side out. Gather the stitches on the top of the ‘1st Ruffle’ to match the size of the ‘2nd Band’. Slip the ‘1st Ruffle’, right side out, around the Bottom of the skirt, matching the gathered seam to the top of the ‘2nd Band’. Pin in place and Sew. See Photo:
- Set Aside the bottom of the skirt, as we will now start working on the bodice.
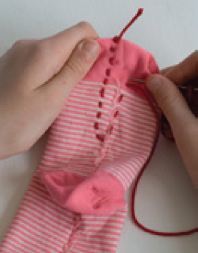
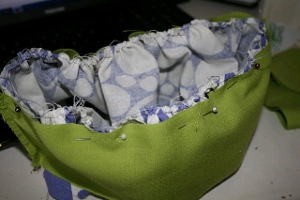
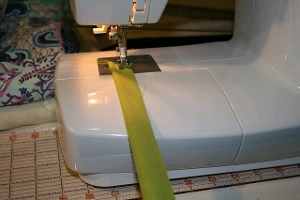
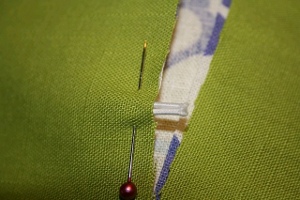
- Taking the ‘Back Ruffle Trim’ piece, fold in half lengthwise, wrong sides together and pin along long edge. Sew a gathering stitch along edge. See Photo:
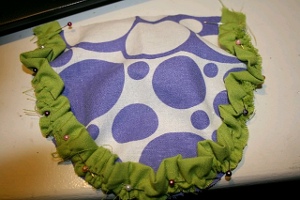
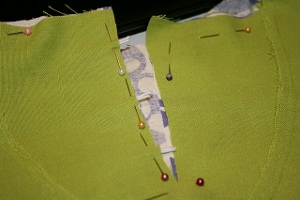
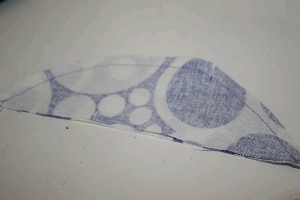
- Gather stitches until ruffle fits around the outer right side of exterior fabric U Shape of the ‘U Shaped pattern’ on the back bodice. Match raw edges, pin in place and Baste stitch around edge. See Photo:
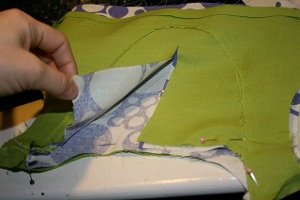
- With right sides together, pin the ‘U Shape Pattern’ piece into the U Shaped opening of the ‘Back Bodice’, matching raw edges. Start from the Center of the ‘U Shape Pattern’ and the center of the ‘Back Bodice’ and work your way up around the sides. *Note, it will not reach the top of the Back Bodice sleeve. Sew in place. See Photo:
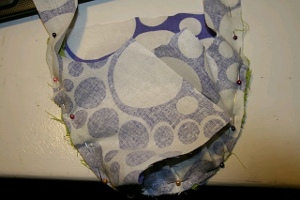
That is the Back Bodice folded in on itself in the picture.
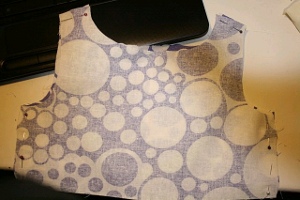
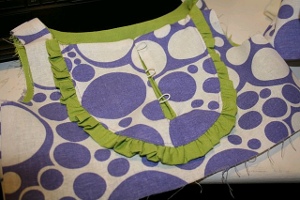
- When it is done, you will have this. See Photo:
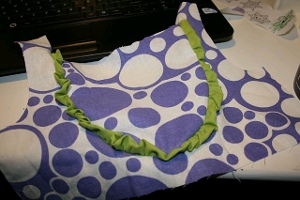
Press the ruffle down.
- I like to sew an edge stitch around the inside of the U Shape to secure down the seam on the inside, which also makes sure the ruffle stays put. See Photo:
- Placing the ‘Front Bodice’ and the ‘Back Bodice’ right sides together, sew the shoulder seams and side seams together. Press open seams. See Photo:
- As you did before...With right sides together, pin the Lining of the ‘U Shape Pattern’ piece into the U Shaped opening of the Lining ‘Back Bodice’, matching raw edges. Start from the Center of the ‘U Shape Pattern’ and the center of the ‘Back Bodice’ and work your way up around the sides. *Note, it will not reach the top of the Back Bodice sleeve. Sew in place. Press seam, and sew an edge stitch around the inside of the U, securing the seam in place.
- Place the ‘Front Bodice’ lining and the ‘Back Bodice’ lining right sides together, sew the shoulder seams and side seams together. Press open seams.
- Fold the bodice lining under ¼” towards the wrong side and Press. See Photo:
- Turn the exterior Bodice right side out, and slip the lining bodice (still wrong side out) around the outside of the exterior bodice, matching shoulder seams. Pin around top neck raw edge. Do Not sew yet!!!
- Very carefully, in the Back U Shape piece, cut a straight line down the center through both the lining and the exterior, stopping 1” from the bottom of the U Piece. See Photo:
Pin around cut line.
- Cut (3) 2” pieces of elastic cord. Making a loop of the cord, see Photo:
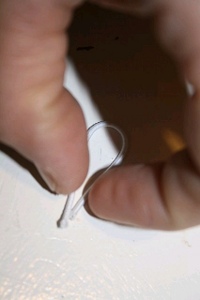
- Slip inside the cut opening on the U Shape, with the loop ends sticking out. See Photo:
- Do the same for the other 2 elastic cord pieces, spacing evenly apart, starting approximately 1” down from the top, and 1” up from the bottom. See Photo:
- Sew around the entire neckline edge, sewing back and forth a few times over the elastic loop ends. Turn Right Side Out. Press.
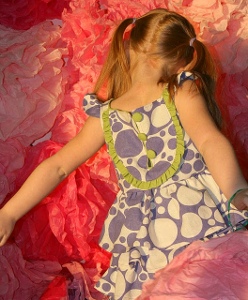
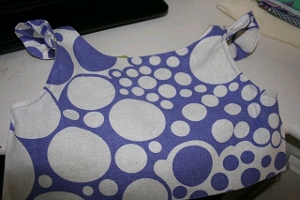
- You should have this when done (Photo of the back of the bodice):
- Edge stitch around neckline.
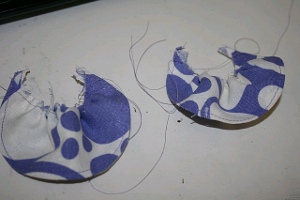
- Taking (2) of the sleeves, place them right sides together edges matching. Sew around the outer curved edge. See Photo:
- Turn Right Side Out and Press. Edge Stitch around outer edge.
- Sew a gathering stitch along straight edge. Gather til sleeve is around 4” long.
- Repeat for other sleeve. See Photo:
- Fold under the Exterior sleeve towards the inside, doing the same with the lining, folding them both in towards each other. This will enclose the raw edges. Press and Pin. See Photo:

- Taking the raw gathered edge of the sleeve, stick inside the bodice sleeve opening centering at the top. Pin in place. Sew arm hole closed.
- You should now have this, See Photo:
- Now is a good time to check the measurements on your child, to be sure the length will be ok. This way you can add another ruffle or 2 if needed, to get to your desired length. To add more ruffles, just follow the above steps with ruffles and bands.
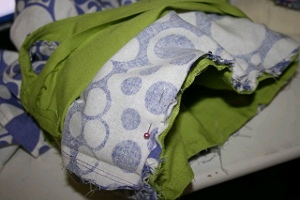
- Turn your bodice Wrong Side Out, and pull up the lining to get it out of the way. Matching the side seams on the bodice and skirt (Skirt is right side out), slip the bodice over the skirt body and match the raw edges. Pin in place, Sew. See Photo:
- Fold bodice up and Press seam upwards. Hand stitch the bodice lining to the seam, enclosing it.
- Add buttons, lining them up with the elastic loops.
- I added a Rosette on the front of the dress for an additional touch. To make the ruffle rosette, ruffle the ‘Front Rosette’ fabric, as we did with the ‘Back Ruffle Trim’. Then wrap the ruffle around itself, starting from the center and working your way outwards, putting in hand stitches to keep in place. Hand stitch onto front of dress to secure.
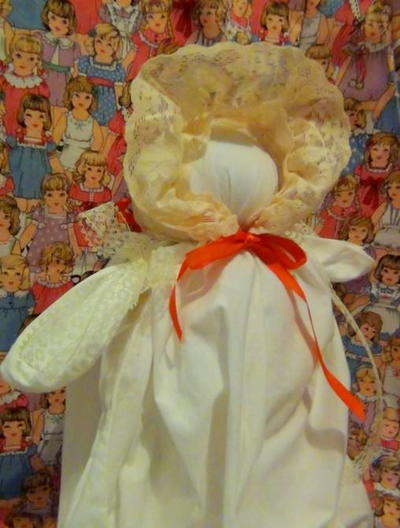
Read NextVintage Handmade Handkerchief Doll
Your Recently Viewed Projects


Thanks for your comment. Don't forget to share!
leannepye 8532956
Apr 14, 2012
thank u for the great instructions i will look forward to making this soon in time for the nice weather
Gillybilly50
Jul 09, 2011
The sizing of patterns is not clear to me- i would like to see the what size chest a dress pettern would make or a waist measurement i.e. would a size 5 dress fit a 26 inch chest? Please help Many thanks
rush88888
Mar 24, 2011
i wish this were made using plainer fabrics. it would be so much easier to follow.
Report Inappropriate Comment
Are you sure you would like to report this comment? It will be flagged for our moderators to take action.
Thank you for taking the time to improve the content on our site.