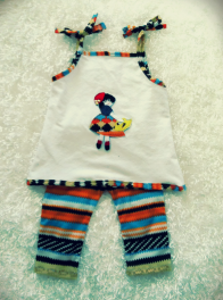
Nautical Sailor Pants
Make your child a pair of breezy, nautical sailor pants for the summer. This free sewing pattern for kids shows you how to make sailor pants or shorts, the perfect addition to your child's wardrobe.
Materials:
- One pair of shorts/pants that fit your kid currently
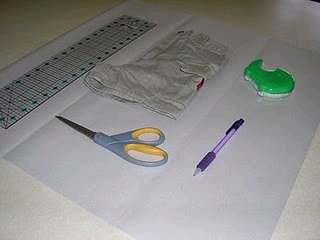
- Paper large enough to trace the pants/shorts or tape printer paper together
- Ruler
- Pencil
- Buttons
- Elastic
This tutorial works best on little kids sizes up to a 3 Toddler maybe even a 4T. Because of the fact that there is little difference between front and back of toddler pants/shorts we are using already existing clothing that fits them WELL for the initial pattern. (The difference between Kids and Toddler sizes is that Toddler sizes accommodate a diaper)
Instructions:
Starting Pattern:
Lay your pants/shorts out on the paper folded in half. Use the ruler to help draw the lines as strait as possible, don't follow the curves of the outside of pants, keep all lines strait except the crotch curve. The shorts I used had elastic in the waist so I used the width of the leg and drew my line strait up to the waist. "This is your starting pattern".
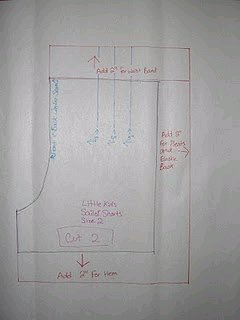
Fine Tuning the Pattern:
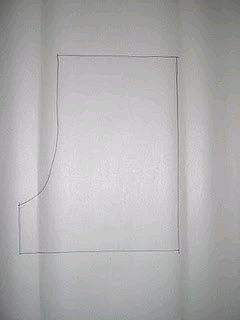
- Use the ruler and add 2" to the top, bottom and side of your Starting Pattern (Red lines in picture above)
- From the center Front/Back edge measure out and mark 3", 4", and 5" (Blue lines in picture above)
- Title your pattern with what size you used and pattern name, so you can use it repeatedly. (Pink lines in picture above). The pattern is finished.
Shorts:
- Pin your pattern to your fabric (Your fabric should be folded over where when you pin the pattern down one side will be right side up and the other wrong side up to get the two opposite sides of the pants)
- Cut out your pieces. While your pattern piece is still on your fabric mark the pleat lines either by giving each line a 1/4" snip on the very edge of the fabric or by using a fabric marker to mark it.
- Pin pleats matching the two outside lines up, middle line should be folded inward towards crotch edge.
- Sew 1/8" " down each pleat edge until the desired pleat length is achieved.
- Pin each leg together and sew down the inseam making sure not to sew in the crotch areas. I used a 1/4" seam allowance.
- When legs are sewn flip one leg right side out and insert into other leg. Pin crotch together matching up all notches and sew.
- Fold the waist down 1" and sew in place. Measure your child's waist and the waist of pants, what ever the difference minus 2" will be your elastic length. (So, if my son has a 19" waist and the pants are 24" the difference between the two is 5" minus the 2" equals 3" of elastic that is needed.)
- Pin the middle of the elastic to the back pant waist seam and stitch in place with a wide stationary zigzag stitch. Stretch the elastic out 1" on either side, pin it then stitch it down with the stationary zigzag. Don't worry about it looking a little bunched, it will be pulled out when the band is sewn.
- Fold down the waist once again, pin in place and sew stretching the back out as you go.
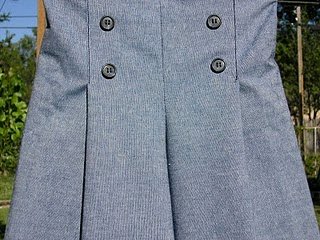
- Add those buttons now if you're using them. There are no specific spacings, I just placed mine where they looked good. Some pant/shorts may have longer pleats and look good with more buttons.
- Hem the legs to desired length and you're done.
Read NextWatermelon Baby Blanket Pattern