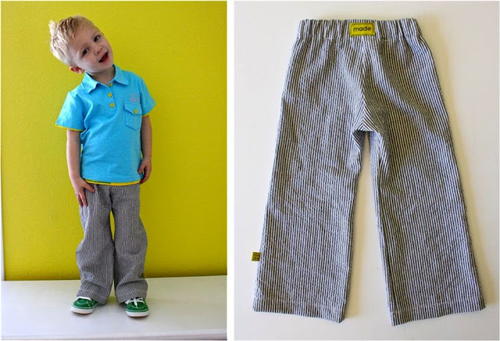
Basic Comfy Kids Pants
Stop paying department store prices for your kids' clothes by learning how to sew pants yourself. This tutorial for basic comfy kids pants from Dana Willard makes it easy to design and make your own clothes. Kids clothes patterns are easy to sew and a smart way to save yourself some money. Buy some fabric on sale and start to sewing dudes for your little dude or dudette today. This free sewing pattern is designed to fit a 2T-3T, but you could easily expand it to fit an older child. Plus, these comfy DIY pants have an elastic waist, making your morning routine just a bit quicker.
Materials:
- this pattern
- approximately 1/2 to 1 yard of fabric, depending on the child's size
- fabric pen or marker
- scissors
- iron
- pins
- safety pins
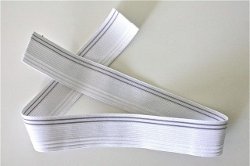
- 1-inch wide elastic (1/2 inch or 3/4 inch elastic also works) approximately the size of your child's waist
- small side tag and/or clothing label (optional)
Final Size: 2-3T (2-3 years old)
Instructions:
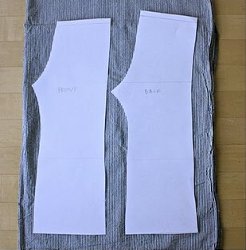
- Print this pattern from your computer. There are 6 pages total--3 pages for the Front of the pants and 3 pages for the Back of the pants. Each page will fill an entire 8 1/2 x 11, standard sheet of paper. If your paper standard is a different size, the images may be slightly off but you should be able to make out the image fairly well.
- Line up the pattern pages together--matching up the arrows and letters with each other. Do NOT overlap pages. Just butt them right up next to each other and tape them together. And you're ready to go!
- Fold your fabric in half and lay out the pattern. You don't need to cut anything "on the fold" but you do need TWO Front pieces and TWO Back pieces. Make sure your fabric is folded with the right or wrong sides of your fabric together so that you end up with two Backs that are opposites...the crotches facing in opposite directions.
- Trace your pattern to the fabric using a fabric pen or marker.
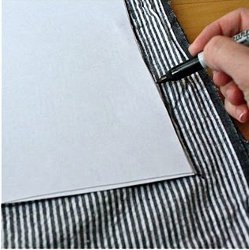
- Cut out the pattern pieces from your fabric.
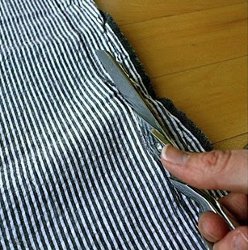
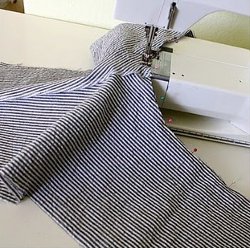
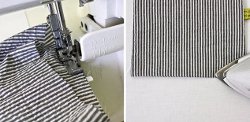
- Sew down both of the crotches. If your fabric has a 'right' side to it, make sure you flip the pieces before sewing so that the 'right' sides of the fabric are facing each other.
- Using a 3/8 inch seam allowance, start at the waist and sew to the end of the crotch (or vice versa; doesn't matter). Do this for both front pieces and both back pieces.
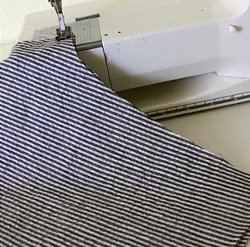
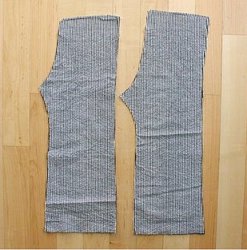
- Serge off the seams (to keep it from fraying over time) and iron out the seams. If you don't have a serger....do a zigzag stitch or leave the seam raw.
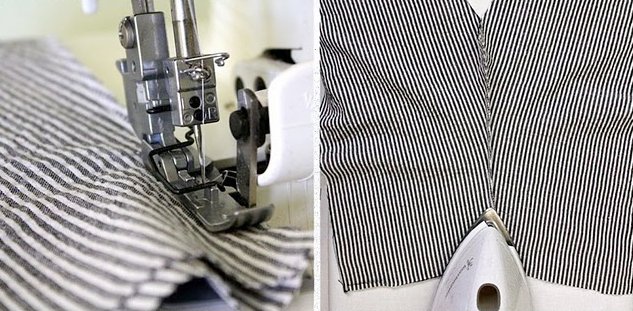
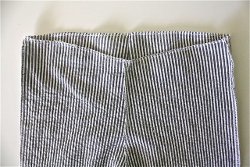
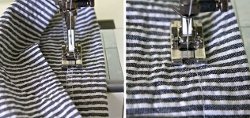
- The front and back of your pants should look like this:
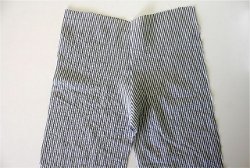
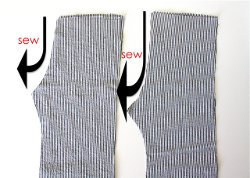
- With Right sides of the fabric together, pin the Front and Back pieces together on the In-seam of the legs and sew them together. Start at the bottom of one leg and sew all the way up to the crotch and back down the other leg, in one continuous seam. Serge off and iron out your seam.
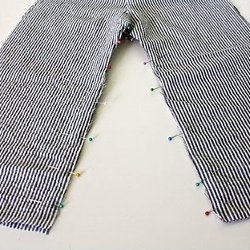
- With right sides of the fabric together, pin together the outside legs of the pants.
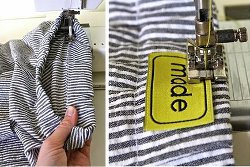
- If you have a small side tag, add it to the outside seam, a few inches from the bottom of the leg. And sew down both sides of the pants. Serge off and iron out your seams.
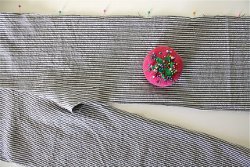
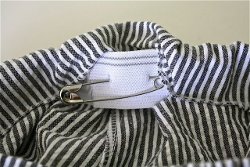
- To make the waistband, serge all the way around the waist to finish off the edge and prevent it from fraying over time. If you don't have a serger, iron the waistband under 1/4 inch, or finish it off with a zigzag stitch.
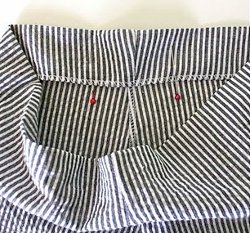
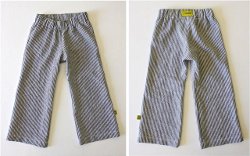
- It should look like this. Notice how the front of the pants is a couple inches shorter. This makes the pants more comfortable and well-fitted.
- Measure around your child's waist to determine the length of elastic you will need. Add 1 inch to the measurement of your child's waste, for overlap and sewing, and cut that length of elastic.
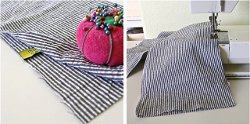
- Iron the waistband down to create a casing for the elastic. Use the elastic to measure how wide the band needs to be--it should be about 1/4 inch wider on the top and bottom than the elastic.
.jpg)
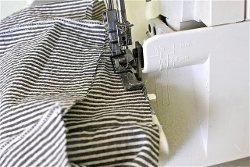
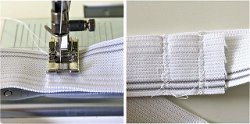
- Mark a start and stop point on your waistband with pins--this is where the elastic will go in and out. Start at one point and sew all the way around to the other point to make a casing.
- Attach a safety pin or Bodkin to one end of the elastic. Insert the elastic into the waistband casing and use another safety pin to attach it to the other end of the pants opening--so the elastic isn't lost inside the pants. Feed the elastic all the way through till it comes out the other end.
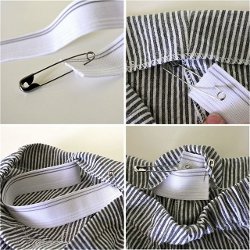
- Before sewing the elastic together, safety pin the two ends together and try the pants on your child to see if adjustments need to be made.
- If all is well, overlap the elastic ends by 1 inch and sew them together. Try using a tight zigzag stitch and sew in a couple of spots.
- Sew the casing closed by pulling the waistband taut and sewing off the opening. If you have a clothing label, add one to the back or inside the waistband (before sewing the waistband closed).
- Try the pants on your child to determine the hem length. Or, use a pair of existing pants to measure the length.
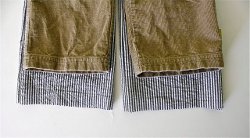
- Serge around the bottom of each pant leg to finish off the edge and keep it from fraying over time. If you don't have a serger, do a zigzag stitch or iron the edge under 1/4 of an inch. Iron the hem under to your desired length.
- Sew the hem in place, sewing on the inside of the hem to make sure you catch the entire hem. For decorative aesthetic, sew a second line on the outside of the hem, about 1/4 over from the first hemline.
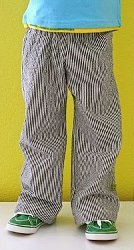
- And.....you're done! Try them on and take lots of pictures!
For more info on this free sewing project, check out the tutorial on Made Everyday.
Read NextTwenty Minute Baby Blanket
Your Recently Viewed Projects
Thanks for your comment. Don't forget to share!
FPU000425
Aug 02, 2016
What size is this pattern based on? Great pattern but not sure f size reference.
Kaylee
Aug 03, 2016
@FPU000425 unfortunately I cannot seem to find the answer to this question either. I have tried reaching out to the original designer and will let you know if I hear back. In the meantime, you could compare it to other patterns you have for a general idea. Thanks! -Kaylee, Editor of FaveCrafts.com
julieaatchison 829 0491
Nov 28, 2012
This is a great pattern! I have been looking for a basic pants pattern for my son, and this one has great instructions and printable pattern pieces that don't need to be enlarged. You can just print them off your computer, you don't need to then enlarge them on a photocopier like some patterns. Looking forward to making these pants this afternoon!
DJs Mimi
Jun 29, 2011
Hi Dana, planning to make jammie pants for my grandson. Approximately what size is the pattern?
Kaylee
Aug 03, 2016
@DJs Mimi I have reached out to the designer and hope to hear back soon. Thanks! -Kaylee, Editor of FaveCrafts.com
Report Inappropriate Comment
Are you sure you would like to report this comment? It will be flagged for our moderators to take action.
Thank you for taking the time to improve the content on our site.