Teacup Recipe Card Holder
An adorable kitchen solution for keeping recipe cards clearly visible while cooking, from AMACO.

Materials:
- FIMO Classic Polymer Clay — Translucent (#00), Golden Yellow (#15), Green (#5), Orange (#4), White (#0), Black (#9), Light Turquoise (#32), Red (#2), Magenta (#21)
- AMACO PolyBlade or Craft Knife
- AMACO Needle Tool
- AMACO Fun Wire™ — Clear Silver 24 Gauge; Three 12" Lengths
- AMACO Pasta Machine
- Index Card
- Toothpicks
- Wire Cutter
- Oven
Instructions:
- Condition clay by warming it in your hands or fold and roll it through pasta machine until it is soft and pliable.
- Teacup: Using 3/4 package of FIMO® Classic Magenta, roll a ball then flatten with palms of your hands until it is 1/2" thick and shaped according to teacup pattern. Place a thin layer of transparent on the top part of the teacup.
- Flower: Roll five 1/4" balls from Orange FIMO® Classic and shape into teardrops. Make an indentation mark in center of each with needle tool for petals. Wrap a very thin log of Red clay around each teardrop outlining it. Place points of teardrops together in a circle and press a 1/4" flattened Red clay ball in center. Press a tiny Yellow ball into center of Red ball. Press flower onto center of teacup front.
- Leaves: Roll Light Turquoise FIMO® Classic into two 1/4" balls. Shape into teardrops. Make indentation for veins. Press a small thin log of Green clay in the center for veins. Outline the leaf with a thin Green log of clay. Press one leaf to each side of flower. Shave off tiny pieces of White clay and roll between fingers and press onto teacup creating polka-dots.
- Base: Roll Orange clay into a 3/4" ball. Shape into a teardrop and press rounded edge onto flat surface. Wrap the bottom with a log of Golden Yellow FIMO® Classic. Place a toothpick through center of base and press teacup over toothpick to secure.
- For the handle, roll Light Turquoise clay into a 1/4" by 2" log. Place tiny Green dots onto log. Bend log into desired shape for handle and press onto right side of teacup.
- Flatten Magenta clay using the #3 setting on pasta machine or approximately 1/8". Cut a 2" circle. This is the saucer.
- To create stripes, flatten Black and White clay to equal thickness, approximately 1/8", and trim. Stack Black on top of White and cut in half. Stack again and repeat this step. Roll a thin log of any color. Slice the striped clay very thin and wrap around log so that stripes are vertical. Wrap striped log around top of teacup and around Magenta saucer. Place teacup in center of saucer.
- Shape wire according to your taste and press ends into top (center) of teacup to create the “steam effect”.
- Place on an index card, propping where necessary with glasses etc., to prevent it from falling over. Bake in a pre-heated oven at 265°F, 130°C for 30 minutes. Remove from oven when cool.

Note:
- This project can also function as a photo or place card holder.
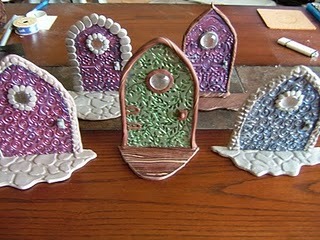
Read NextHow to Make Polymer Clay Fairy Doors
Your Recently Viewed Projects

Thanks for your comment. Don't forget to share!
M Altenberg
Mar 14, 2017
This is a fabulous gift to make for a bridal shower. it is nice to have something pretty to hold your recipe card up nicely while you are cooking. Fun project to try. Nice to give a personal gift.
kerriewolters 2065 232
Jan 06, 2011
This one is making its way to a freinds house as a birthday present . love it too bits.....
kerriewolters 2065 232
Jan 06, 2011
This one is making its way to a freinds house as a birthday present . love it too bits.....
kraftymomma7
Feb 14, 2010
This project is an example of what makes polymer clay so great - its versatility. Polymer clay can be used in any room of the house to add color and function.
Report Inappropriate Comment
Are you sure you would like to report this comment? It will be flagged for our moderators to take action.
Thank you for taking the time to improve the content on our site.